Quick start guide, Quick start guide — mmx 42/62, Installation – Extron electronic MMX 42 User Manual
Page 3
MMX 42/62 Series Matrix Switchers • Quick Start Guide
Quick Start Guide — MMX 42/62
QS-1
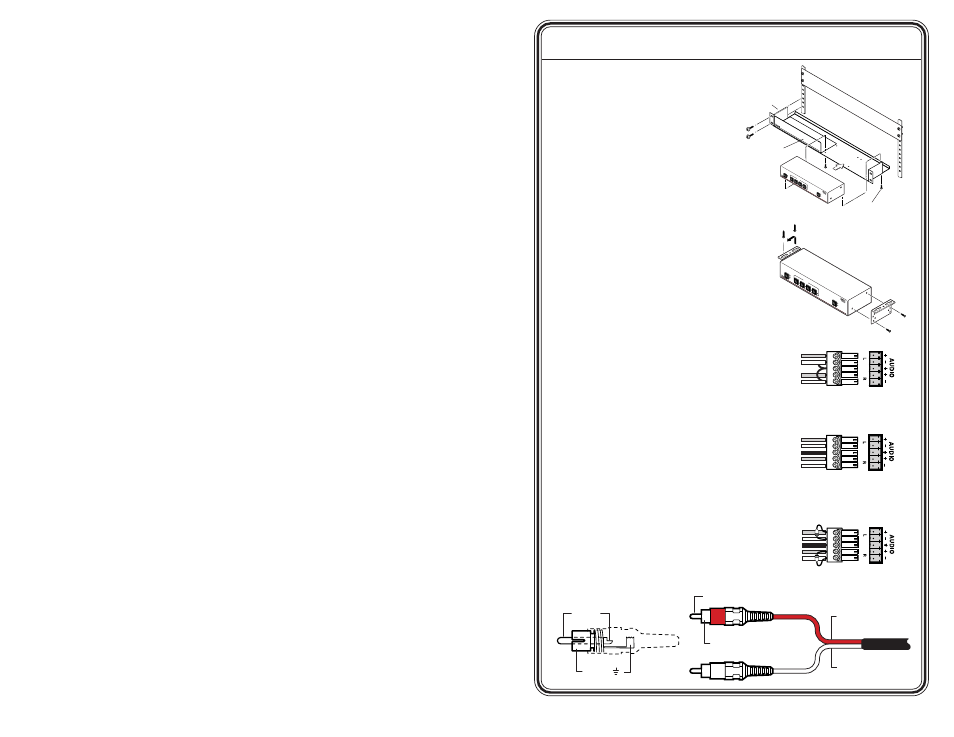
Installation
Step 1
Turn all of the equipment off
and disconnect it from the power
source.
Step 2
Select your mounting option
,
install the appropriate brackets
and mount the switcher.
Otherwise, install the four rubber
feet (included) and place the
switcher on a desktop.
Step 3
Attach the video input cable(s).
Using video inputs 1 through 4
(MMX 42) or 1 through 6 (MMX
62) attach video inputs to the
switcher using connectors
appropriate for your model (BNC
or 4-pin mini DIN). See “Rear
Panel Cabling” in chapter 2,
Installation.
Step 4
Attach the audio input cable(s).
Using audio inputs 1 through 4
(MMX 42) or 1 through 6 (MMX
62), attach audio inputs to the
switcher with connectors
appropriate for your model (5-
pole, captive screw or RCA - see
illustrations below and right).
Step 5
Attach the video output cable(s)
.
Connect up to two video output
devices to the switcher using
Unbalanced Input
Tip
Sleeve
Tip
Sleeve
Balanced Input
Tip
Ring
Sleeve (s)
Tip
Ring
Tip
Ring
Sleeve (s)
Tip
Ring
Balanced Input
(high impedance)
(high impedance)
(600 ohms)
600 ohms
600 ohms
(2) 4-40 x 3/16" screws
Use 2 mounting holes on
opposite corners.
Half Rack Width
False Front Face Plate
VersaTools
Rack Shelf
CO
NF
IG
AUD
IO
VIDEO
OUT
PUTS
1
2
4
2
3
1
INPU
TS
MM
X S
ER
IES
CO
NFIG
AU
DIO
VID
EO
OU
TPU
TS
1
2
4
2
3
1
INP
UTS
MM
X S
ER
IES
Tip (+)
Sleeve ( )
Sleeve (Gnd )
Right Channel
(Red Jacket)
Left Channel
(White Jacket)
Tip (Signal)