Epson PLQ-30 User Manual
Page 2
Proof Sign-off:
A. Tanaka
PLQ-30/PLQ-30M
Rev. C
PLQ-30_30M.fm
A3 size
9/14/15
Continued
4130369
1-B
Rev.0
Black
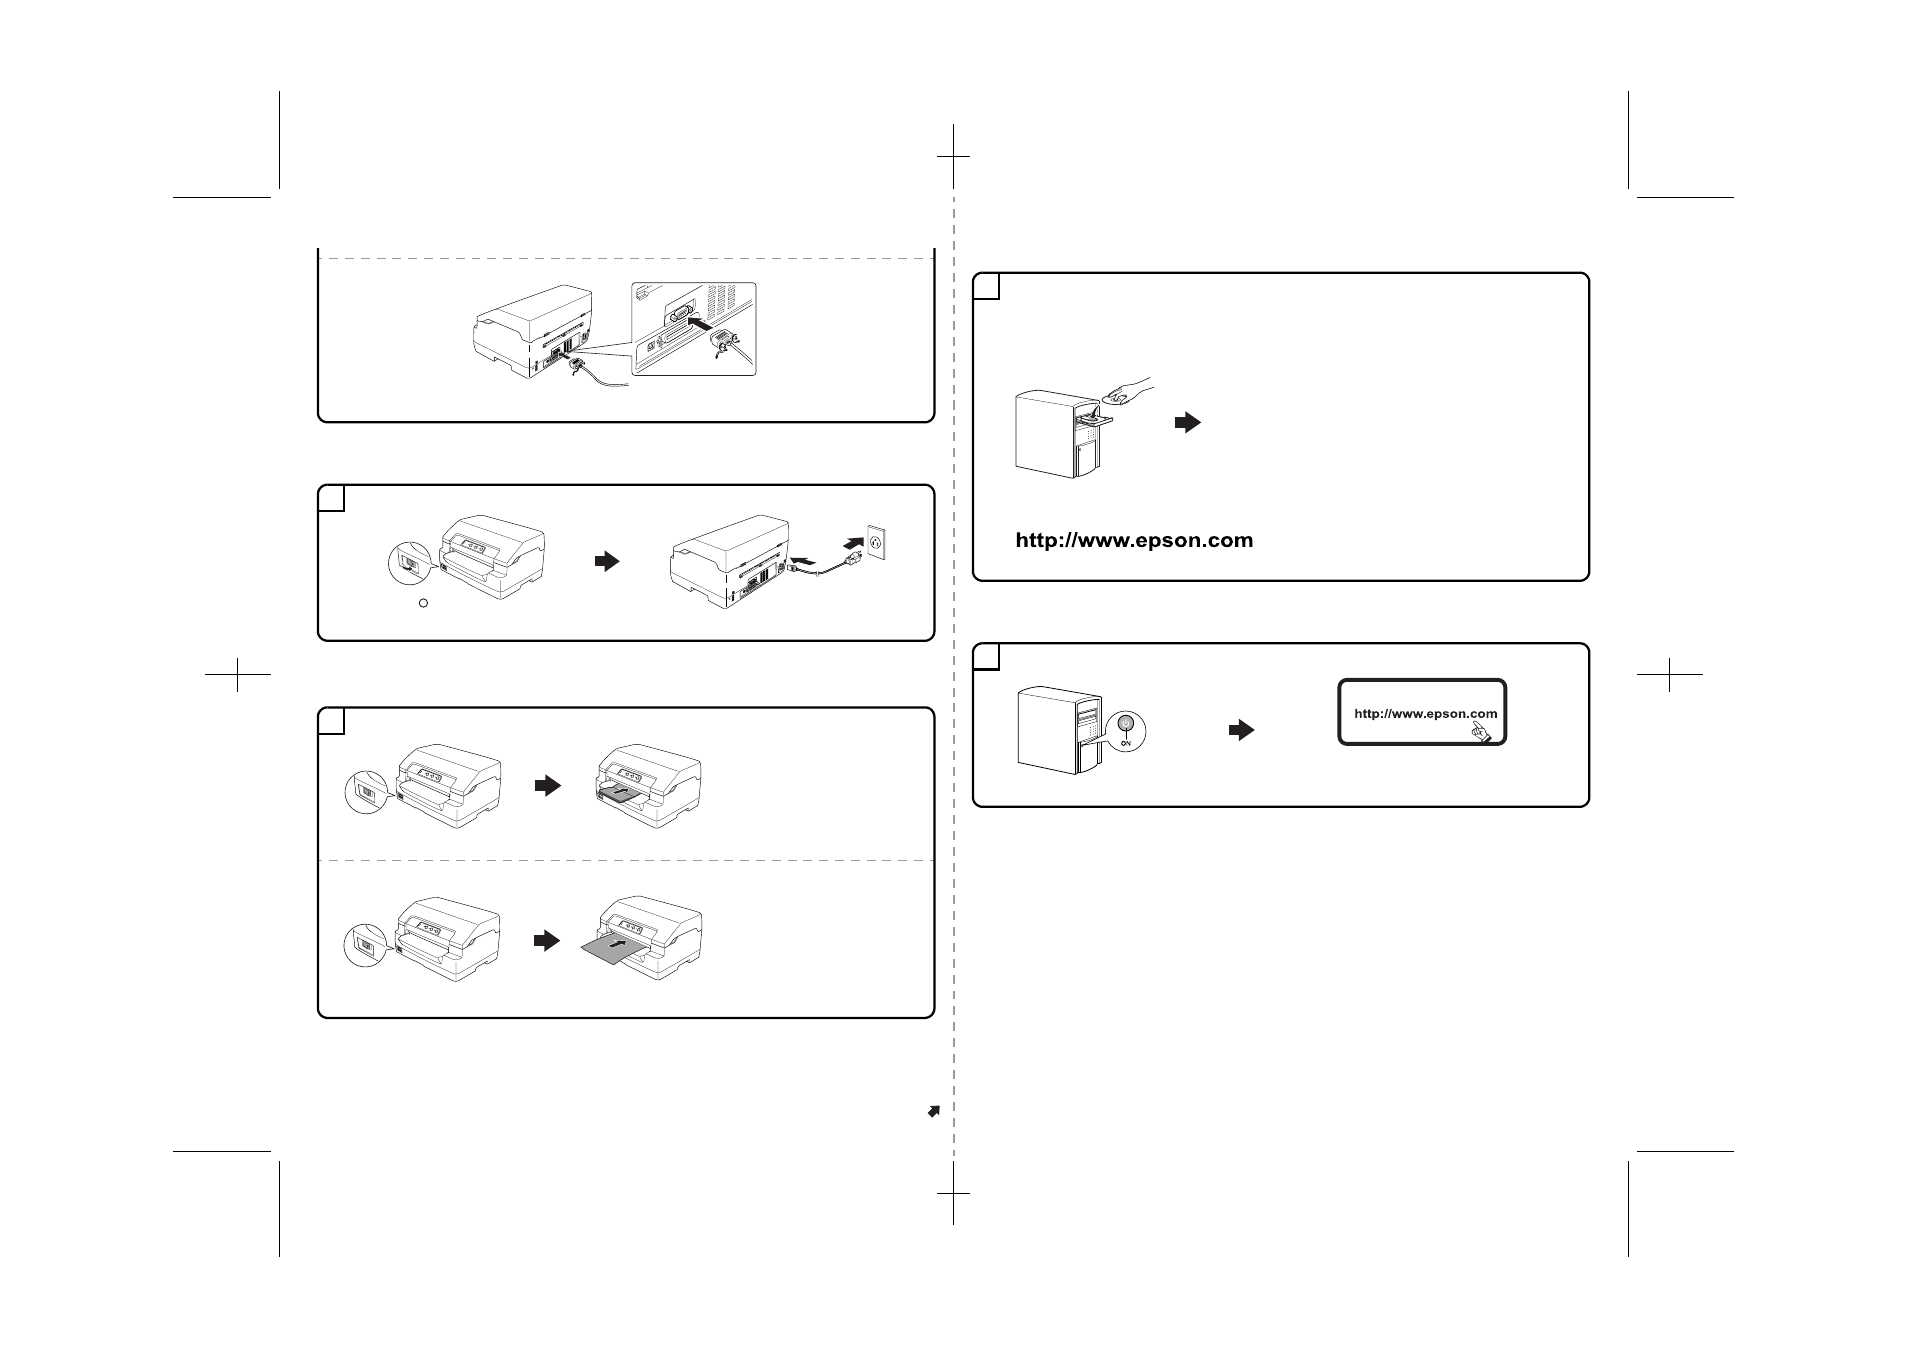
Connecting the Power Cord
Loading Paper
Getting More Information
Downloading the Printer Software
No part of this publication may be reproduced, stored in a retrieval system, or transmitted in any form or by any means, electronic, mechanical, photocopying,
recording, or otherwise, without the prior written permission of Seiko Epson Corporation. No patent liability is assumed with respect to use of the information
contained herein. Neither is any liability assumed for damages resulting from the use of the information contained herein.
Neither Seiko Epson Corporation nor its affiliates shall be liable to the purchaser of this product or third parties for damages, losses, costs, or expenses incurred
by the purchaser or third parties as a result of: accident, misuse, or abuse of this product or unauthorized modifications, repairs, or alterations to this product,
or (excluding the U.S.) failure to strictly comply with Seiko Epson Corporation’s operating and maintenance instructions.
Seiko Epson Corporation and its affiliates shall not be liable against any damages or problems arising from the use of any options or any consumable products
other than those designated as Original Epson Products or Epson Approved Products by Seiko Epson Corporation.
EPSON
®
is a registered trademark, and EPSON EXCEED YOUR VISION or EXCEED YOUR VISION is a trademark of Seiko Epson Corporation.
General Notice: Other product names used herein are for identification purposes only and may be trademarks of their respective owners.
Epson disclaims any and all rights in those marks.
The contents of this manual are subject to change without notice.
Copyright © 2015 Seiko Epson Corporation. All rights reserved.
Printed in XXXXXX
Connect firmly
Serial
Connect firmly
4
Confirm the
(OFF)
5
Passbooks
ON
Open your passbook to the page to be
printed. Then insert the passbook printable
side up and the magnetic tape facing away
from the printer into the front slot until the
top part of it reaches the roller inside. The
printer loads it automatically to the correct
position and the passbook is ready to be
printed.
Single Sheets
ON
Insert a single sheet printable side up into the
front slot until the top part of the paper
reaches the roller inside. The printer loads the
paper automatically to the correct position
and the paper is ready to be printed.
Now setup is finished and the printer is ready.
For detailed information about the printer and troubleshooting, refer to the User's Guide.
If you cannot find the information you require in the User's Guide, visit our Web site:
Select language
Insert
6
Download and install the Epson software
if necessary.
7