Maintenance, Fig.4 – Sealey S01000 User Manual
Page 3
5.1 CHANGING THE SHADE CARTRIDGE.
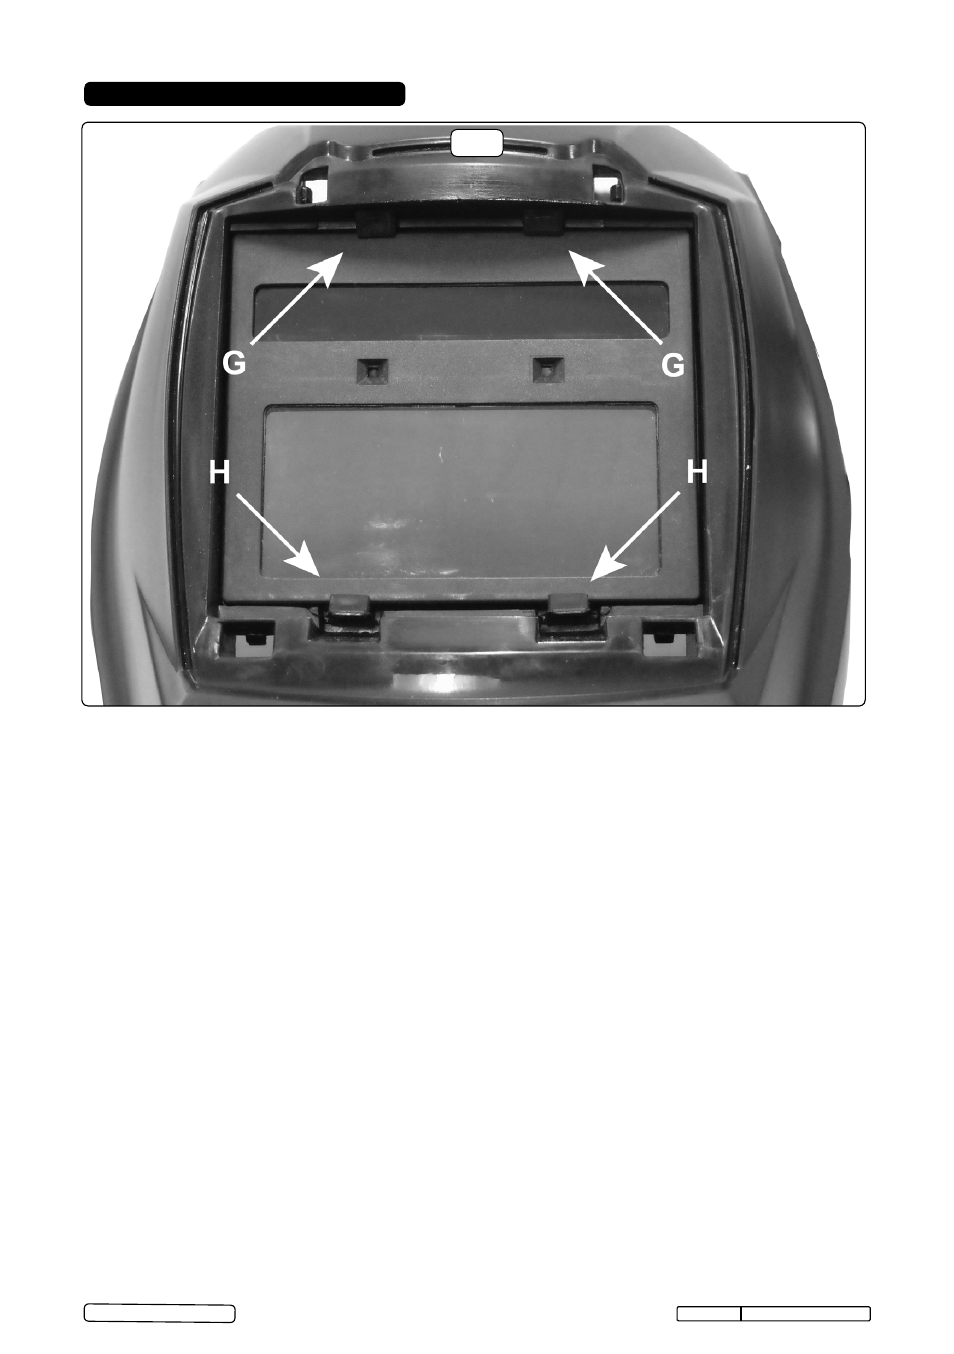
All components clip into the front of the helmet as shown
in fig.4 above, (shown without front cover.)
5.1.1 To access the cartridge firstly remove the front cover by
releasing the four clips accessible on the inside of
the helmet above and below the cartridge.
5.1.2
Release the top clips first (see ‘A’ in fig.3) by pressing
them inwards and forwards. Then release the bottom
clips (see ‘B’ in fig.3) by pressing them downwards and
forwards.
Lift off the front cover.
5.1.3 Referring to fig.4, push downwards on the two clips ‘H’
whilst pushing the bottom edge of the cartridge outwards
from inside the helmet. When it is free from the lower
clips pull the cartridge downwards and forwards to free it
from the upper retainers. (See ‘G’ in fig.4.)
5.2 FITTING NEW CARTRIDGE.
(Part No: S01000.03)
5.2.1
Take the new shade cartridge and hook the top edge
under the upper retainers ‘G’. Push firmly on the bottom
edge of the cartridge so that it snaps into place behind
the two clips ‘H’.
5.2.2 Place the front cover ‘A’ onto the front of the helmet so
that the cover clips pass into the matching holes in the
helmet. Press firmly on the top of the cover to engage
the top clips then press firmly at the base of the cover
to engage the lower clips.
5.3 REPLACING OUTER PROTECTIVE COVER LENS.
(Part No:S01000.01)
Remove the front cover as described in sections
5.1.1 and 5.1.2.
5.3.1 Remove the lens from the back of the front cover
by lifting one vertical edge and sliding the whole lens
sideways until it releases from its retaining points.The
lens will flex sufficiently to allow you to do this.
5.3.2 Flex the new lens and slide it in from one side under
the retaining points until it is in position. Ensure that it
laps over the inside of the lens opening on either
side.
5.4 REPLACING CARTRIDGE PROTECTIVE LENS.
(Part No: S01000.02)
The protective cartridge lens that can be seen on the
inside of the helmet should be replaced if damaged. The
lens is held in place at its four corners.
5.4.1 To remove the lens place your finger tip into the
scoop just below the cartridge controls (see fig.3) and
flex the lens upwards until the upper corners release.
Lift out the lens.
5.4.2 Take the new lens and place one vertical edge under
the corner retainers in the lens recess. Flex the
lens in the middle and tuck the other end into the
corner retainers.
5.5 CLEANING.
Clean helmet by wiping with a soft cloth. Clean cartridge
surfaces regularly. Do not use solvent based cleaners .
Clean sensors and solar cells with methylated spirit using
a clean cloth and wipe dry with a lint-free cloth.
5. MAINTENANCE
Original Language Version
S01000 Issue No.1 10/01/13
fig.4
© Jack Sealey Limited