Kcl78-300136-p5 – Kichler 300136 User Manual
Page 6
5
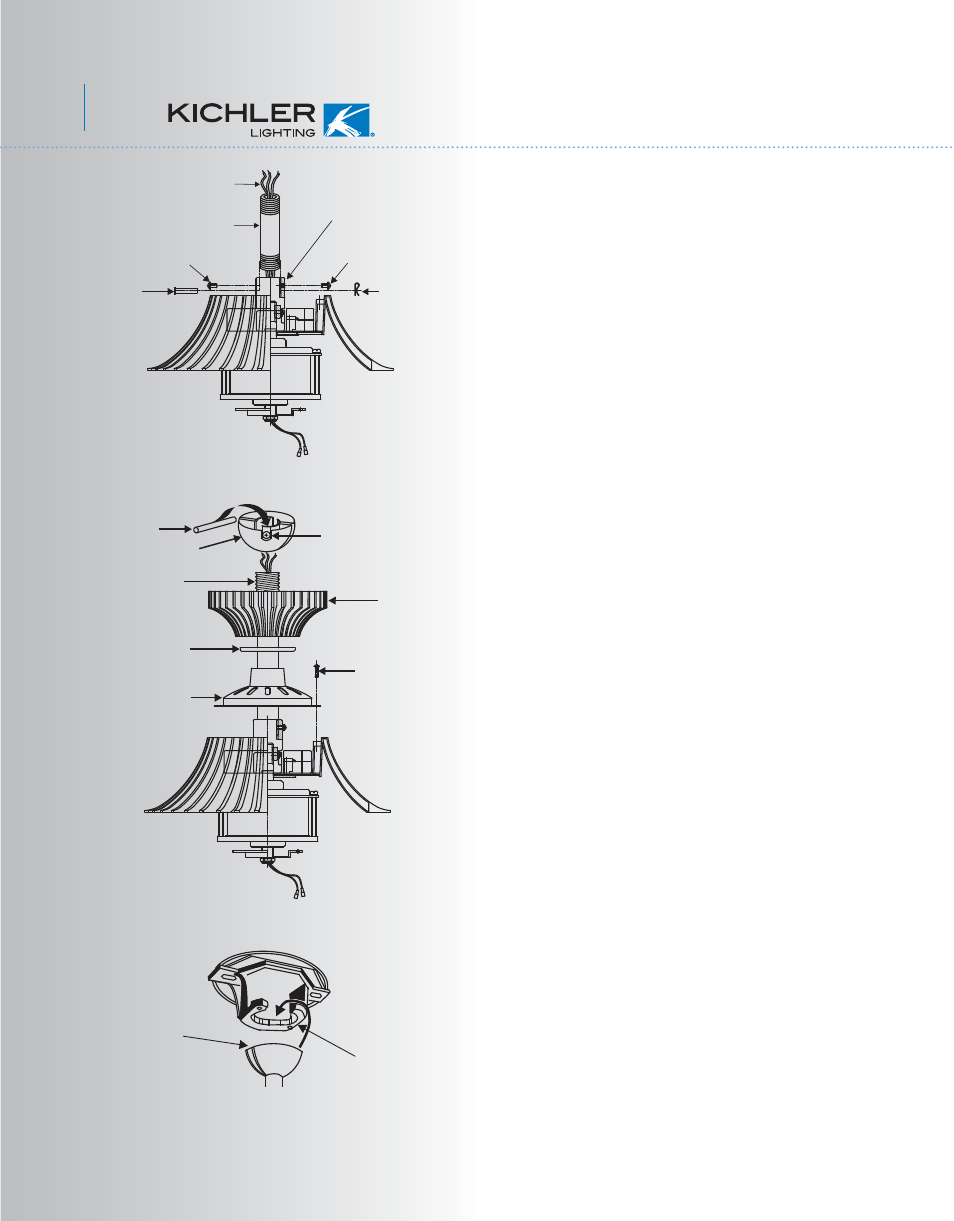
Fig. 9
Fig. 11
Fig. 10
Registration slot
Check tab
Step 7. Loosen the two set screws and
remove the hitch pin and retaining clip from
the coupling on top of the motor assembly.
(Fig. 9)
Step 8. Carefully feed the electrical lead wires
from the fan up through the downrod. Thread
the downrod into the coupling until the Hitch
pin holes are aligned.
Next, replace the hitch pin and retaining clip.
Tighten both set screws. (Fig. 9)
Step 9. Slip the coupling cover, canopy cover
and canopy onto the downrod. Secure the
coupling cover to the motor housing using the
two screws previously removed. (Fig. 10)
Thread the hanger ball onto the downrod,
insert the cross pin through the downrod and
tighten. Now tighten the set screw. (Fig. 10)
Step 10. Lift the motor assembly into position
and place the hanger ball into the ceiling
mounting bracket.
Rotate the entire assembly until the "Check
Tab" has dropped into the "Registration Slot"
and seats firmly. (Fig. 11)
The entire motor assembly should not rotate
(left or right) when seated properly.
WARNING: Failure to reattach the cross pin
and seat the "Check Tab" can cause the fan to
fall from the ceiling during operation. Take
special care to make sure this pin is
reattached.
Downrod
Canopy
Canopy cover
Coupling cover
Screws
Cross pin
Hanger ball
Set screw
Supply wires
Downrod
Hitch pin
Retaining clip
Set screws
Coupling
Set screws