Kcl78-300136-p4, Valkyrie, Hanging the fan – Kichler 300136 User Manual
Page 5
4
Fig. 8
Fig. 7
Mounting screws
(supplied with
electrical box)
Hook
Ceiling
mounting
bracket
ETL Listed
outlet box
120V Wires
Washers
Ceiling mounting
bracket
Canopy
Canopy cover
Fig. 6
Fig. 5
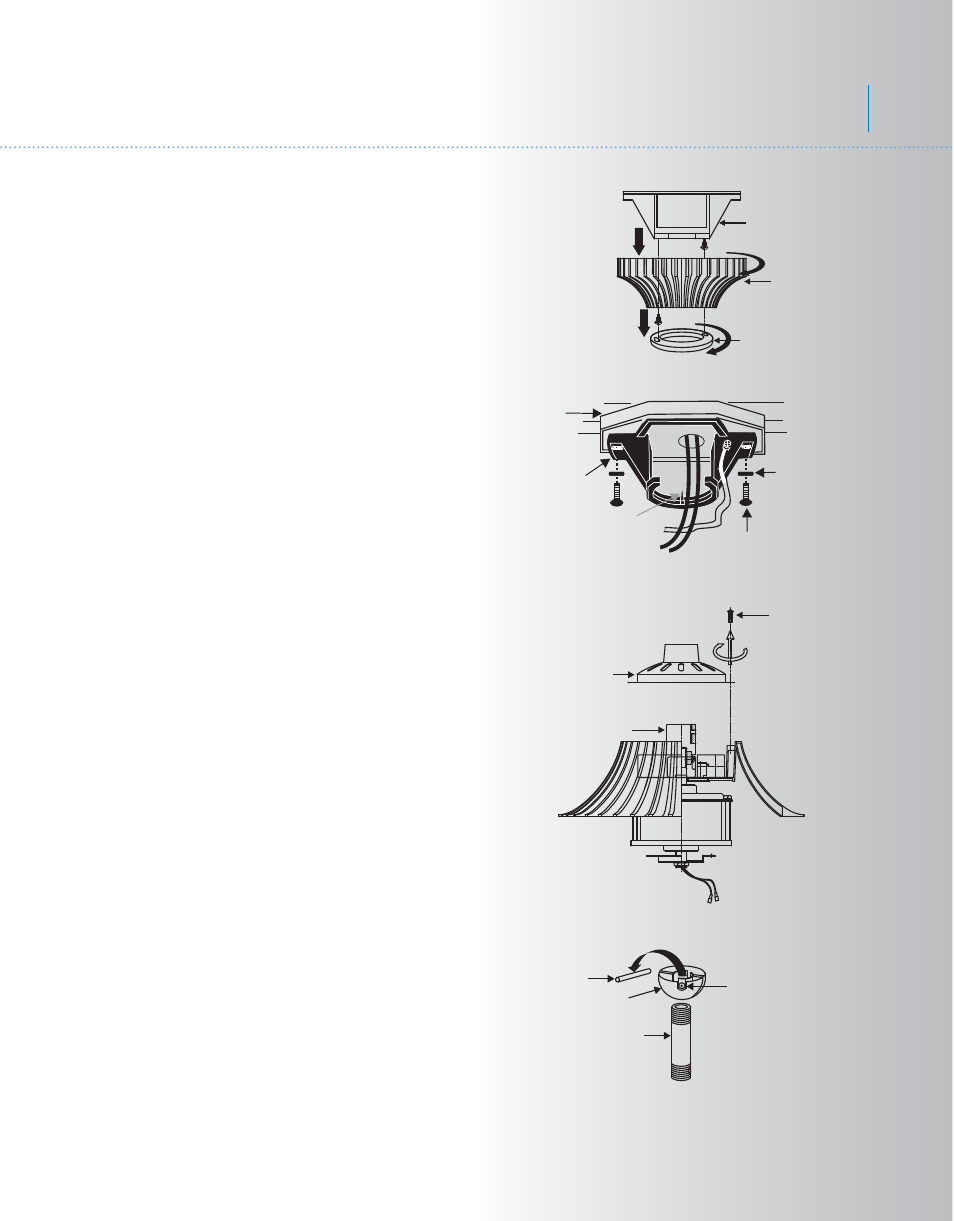
5. HANGING THE FAN
RMEMEBER to turn off the power before you
begin installation. This is necessary for your
safety and also the proper programing of the
control system.
To properly install your ceiling fan, follow the
steps below.
Step 1. Remove the decorative canopy bottom
cover from the canopy by turning the cover
counter clockwise. (Fig. 5)
Step 2. Remove the ceiling mounting bracket
from the canopy by removing (and save) one
of the two screws. Loosen the remaining screw
by a half turn. (Fig. 5)
Step 3. Pass the 120 volt supply wires from
the ceiling outlet box through the center of the
ceiling mounting bracket. (Fig. 6)
Step 4. Attach the ceiling mounting bracket to
the outlet box using the screws and washers
included with the outlet box. (Fig. 6)
Step 5. Remove the coupling cover from the
motor housing by removing the two screws
from the rim of coupling cover. (Fig. 7)
Step 6. Remove the hanger ball from the
downrod assembly by loosening the set screw,
removing the cross pin and sliding the ball off
the rod. (Fig. 8)
SPECIAL NOTE: For proper Control System
Programing, it is essential that power is NOT
connected or turned on to the ceiling fan
during the installation process.
You will be instructed at the proper time to
power up the system.
Collar
Coupling cover
Screws
Cross pin
Hanger ball
Set screw
Downrod
Valkyrie
TM