Ag757kcl-300106-e p9, Control system set-up – Kichler 300106 v.1 User Manual
Page 10
9
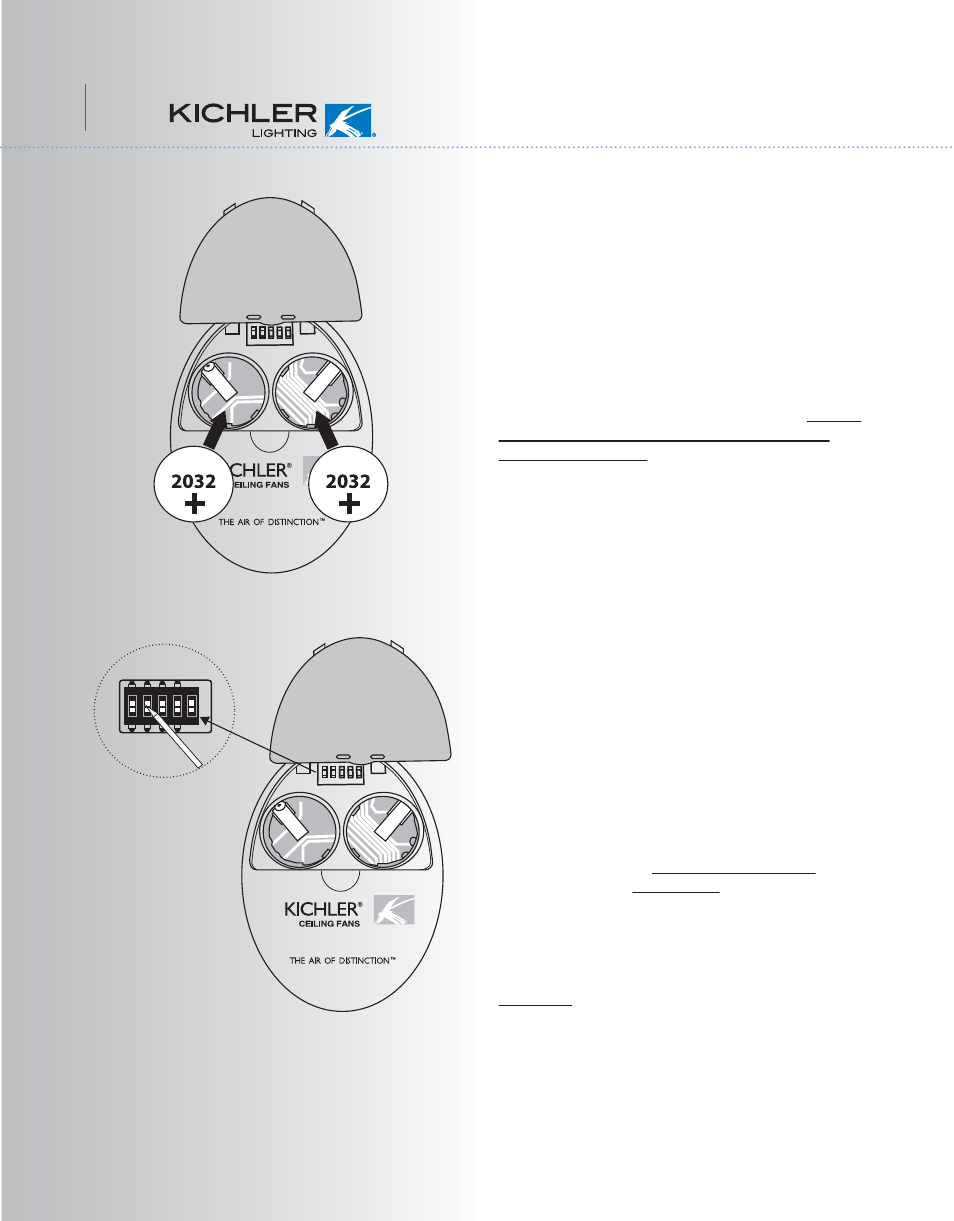
12. CONTROL SYSTEM SET-UP
Fig. 17
Fig. 18
TM
TM
ON
1 2 3 4
D
X
ON
Dip switch
Make sure the power is completely
disconnected before you begin this procedure.
SPECIAL NOTE:
Your new Kichler
®
Ceiling Fan is State of the
Art and employs a High Efficiency DC (direct
current) Motor with an advanced CoolTouch™
Remote Control System. The DC Motor uses
70% less energy than a conventional ceiling
fan AC Induction Motor. The DC motor is
“Digitally” controlled and operates differently
than conventional ceiling fans motors. Please
read this portion of the manual completely
before proceeding.
Our CoolTouch™ Control system includes an
“Automatic Frequency Selection” feature. To
set the control frequency and program the
control system, follow these steps.
Open the back of the Transmitter (figure 17)
The Frequency Selector is a "Dip Switch
Block" inside the Battery compartment of the
Transmitter. (See figure 18) You change
frequencies by arranging the small switches
numbered 1 through 4 in a up or down
position. 16 possible frequencies or
combinations are possible.
The fifth switch, marked D and X sets the
system for operation with Incandescent or
Fluorescent Lamps. It is essential to set this
switch correctly. If your ceiling fan is equipped
with
Incandescent Lamps
set this switch to
the
D Position
, for Fluorescent Lamps, set
the switch to the X Position. If these settings
are reversed, the lighting control system will
operate erratically and could damage your
ceiling fan.
System Programing: Read all of these steps
BEFORE proceeding. Each step must be
followed exactly to properly program the
control system.
1. You can leave the frequency switches at
the factory setting or move them to any
combination of up or down. Use a small flat
bladed screwdriver to move the switches.