Kichler 300106 v.2 User Manual
Page 8
7
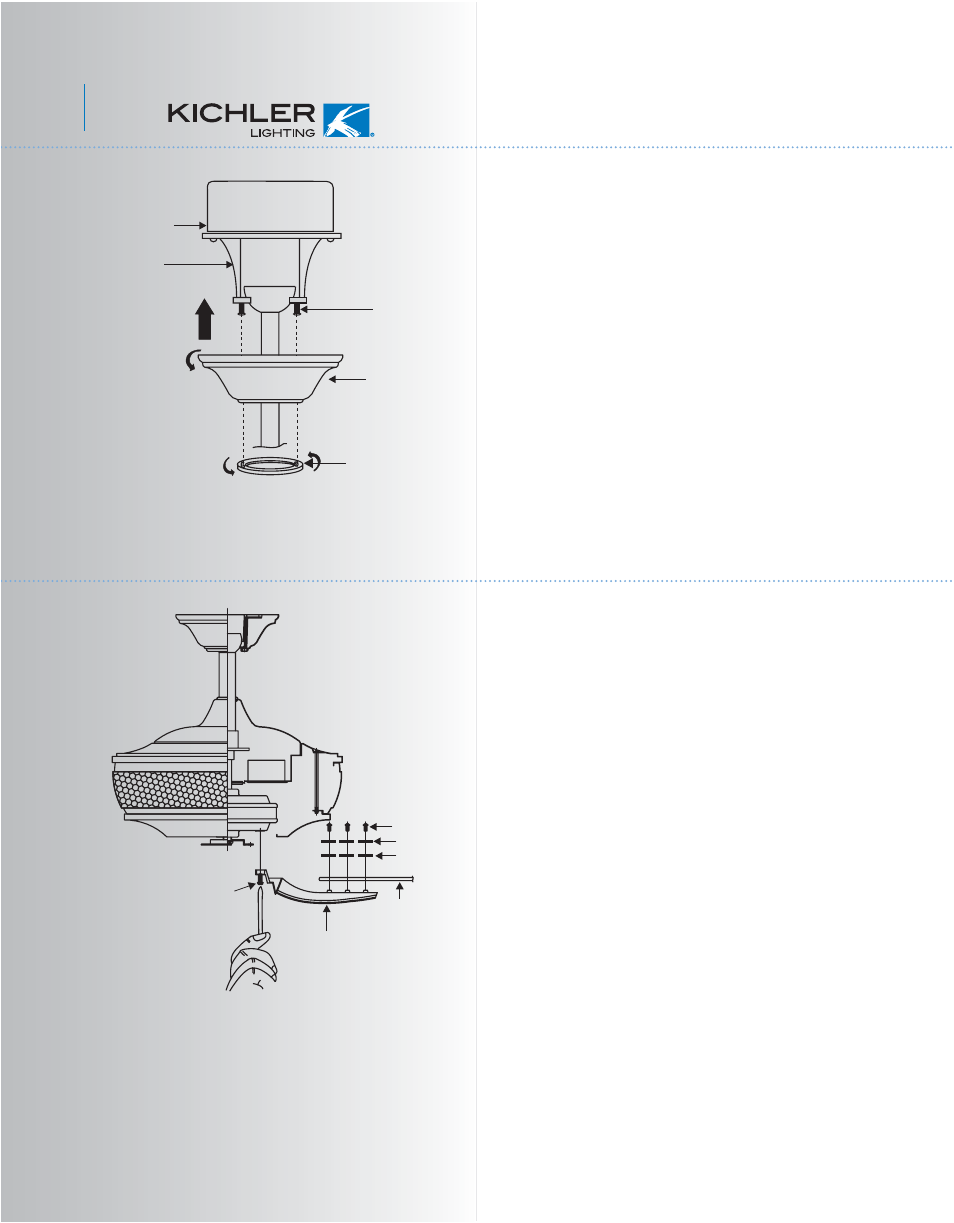
Fig. 14
Fig. 15
Step 1. Tuck connections neatly into ceiling
outlet box.
Step 2. Slide the canopy up to ceiling and
over the two screws on hanger bracket. Rotate
canopy clockwise, next, while holding the
canopy with one hand, slide the canopy cover
over the screws and rotate clockwise until
tight. NOTE: adjust the canopy screws as
necessary until the canopy and canopy cover
are snug. (Fig.14)
Warning: Make sure the "Check Tab" at the
bottom of the hanger bracket is properly
seated in the "Registration Slot" on the side of
the hanger ball before attaching the canopy to
the bracket. Failure to properly seat the
"Check Tab" could damage the electrical wires
when to ceiling fan blade direction is changed
while the fan is running.
Outlet box
Hanger
bracket
Canopy
Canopy cover
Screws
8. FINISHING THE INSTALLATION
9. ATTACHING THE FAN BLADES
Caution: Remove 5 rubber packing mounts
and discard before installation.
Step 1 Attach the blade to the blade bracket
using the screws, washers and fiber washers
as shown in Figure 15. Start screw into
bracket. Repeat for the two remaining screws.
Step 2 Make sure the blade is straight and
tighten each screw.
Step 3 Fasten blade assembly to motor using
"Pre-Installed" mounting screws in the blade
bracket.
Screws
Blade
Blades bracket
Screws
Washers
Fiber
washers