Monarch, Make the electric connections, Installation of safety support – Kichler 300106 v.2 User Manual
Page 7
6
Monarch
TM
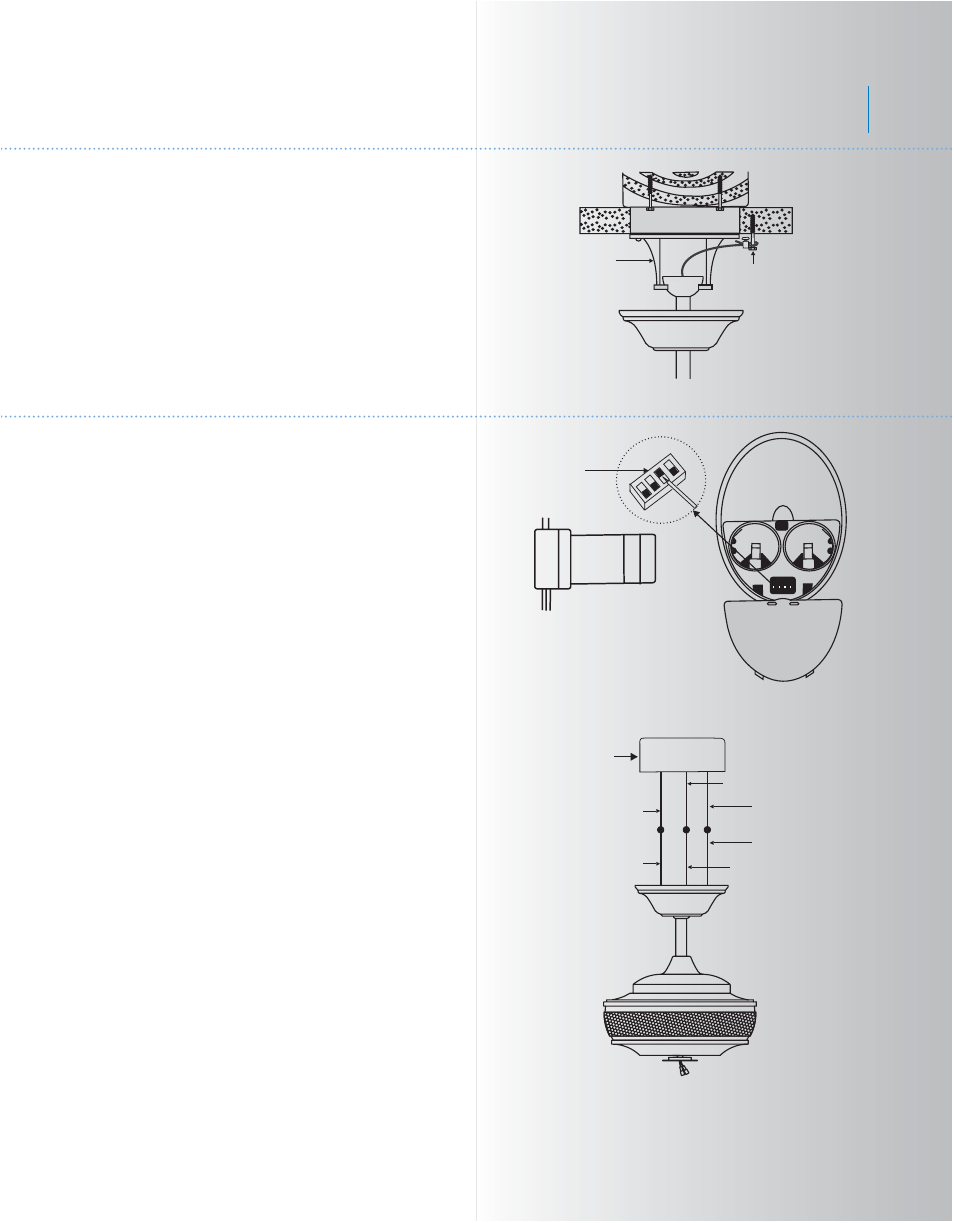
Fig. 11
Fig. 12
Fig. 13
7. MAKE THE ELECTRIC CONNECTIONS
WARNING: To avoid possible electrical shock
be sure electricity is turned off at the main fuse
or breaker box before wiring.
NOTE: Receiver in controller system features
an automatic learning function. Turn the power
on and press the speed button, the receiver
will automatically search for the frequency
from the control, in approximately 30 seconds.
The control and receiver units included with
your ceiling fan are equipped with 4 code
combinations to prevent possible interference
from or to other remote units. The frequency
switches on your control transmitter have been
preset at the factory. There are no frequency
switches on the receiver, the receiver unit will
automatically scan the frequency from the
control if any changes are made. The
frequency settings should be changed only in
case of interference or if a second or more
ceiling fans with the same type of control
system are installed in the same structure.
(Fig. 12)
1. Connect the fan supply (black) wire to the
black household supply wire as shown in
Figure 13.
2. Connect the neutral fan (white) wire to the
white neutral household wire. (Fig. 13)
3. After all splices are made, check to make
sure there are no loose strands. As an
additional precaution we suggest to secure the
plastic wire connectors to the wires with
electrical tape.
Code switch
6. INSTALLATION OF SAFETY SUPPORT
(for Canadian Installation ONLY)
Outlet Box
Receiver on the
Top of Motor Housing
Black ("AC IN L")
White ("AC IN N")
White (Neutral)
Black (Motor)
Green or bare
copper (ground)
Ground (green)
(Connect to ground wire
on hanger bracket if no
house ground wire exists.)
Transmitter
An additional safety support is provided to
prevent the fan from falling fan). Place the end
of cable through the loop of ceiling support
cable. Pull as much cable through loop as
possible. Feed end of cable into clamp hole
and fi rmly tighten screw (Fig. 11). Cut off
excess safety cable. Secure the safety cable
to the ceiling joist with screw and washer.
Hanger bracket
Attach
safety cable
to ceiling joist
with screw and
washer