Evo Fitness EVO 3I User Manual
Page 13
EVO 3i MOTORIZED TREADMILL
Visit us at: www.evofitness.com
13
ASSEMBLY
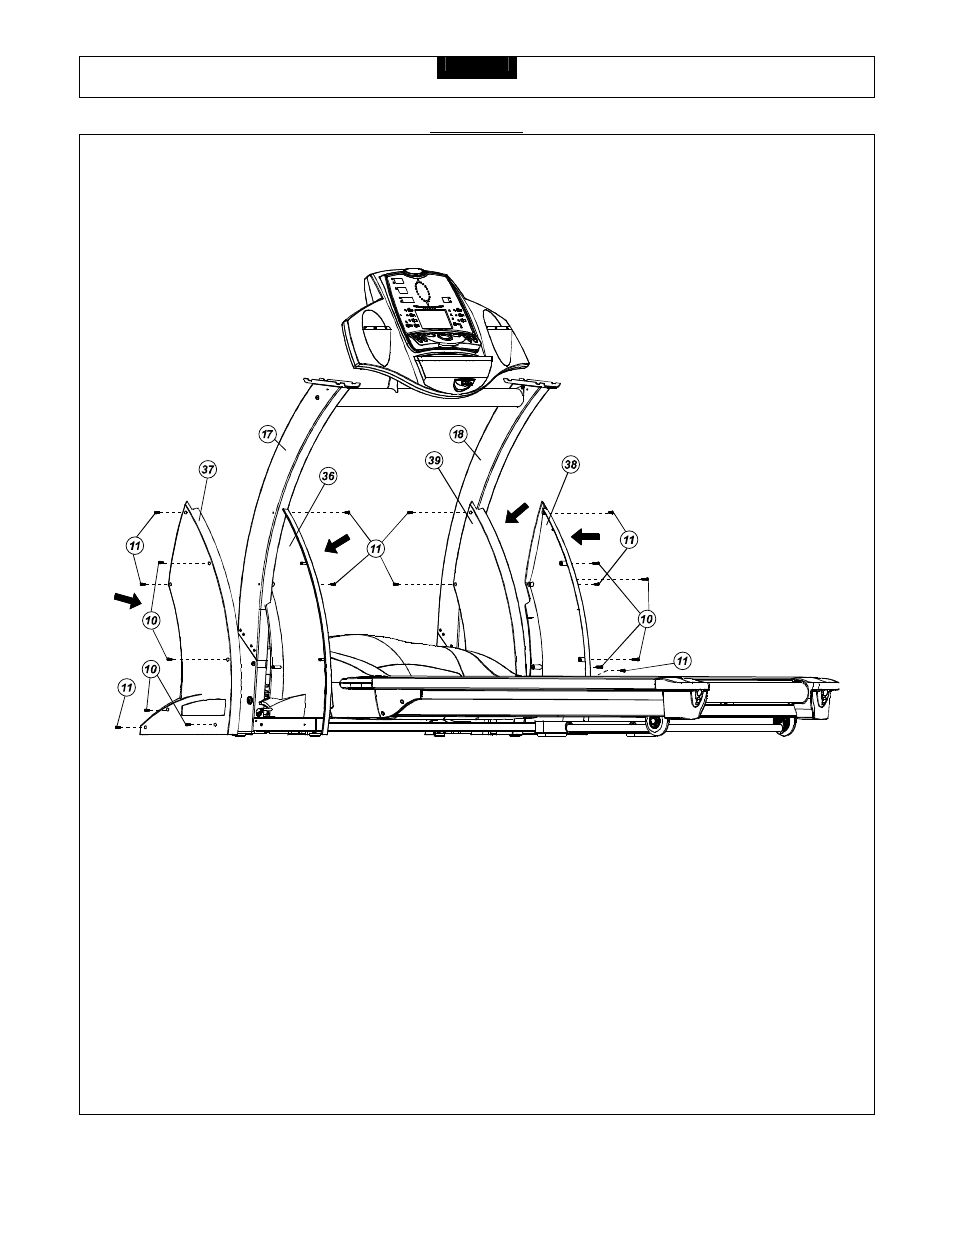
STEP 4:
Attach the Upright Plastic Shroud – Left #1 (36) and Upright Plastic Shroud – Left #2 (37) to the Left Upright (17) and secure
with five #8 x 25mm Screws (11) and four #8 x 19mm Screws (10). Repeat this procedure on Right Upright (18) with Upright
Plastic Shroud – Right #2 (38) and Upright Plastic Shroud – Right #1 (39).