Warning – Echo HC-185 User Manual
Page 24
24
blade
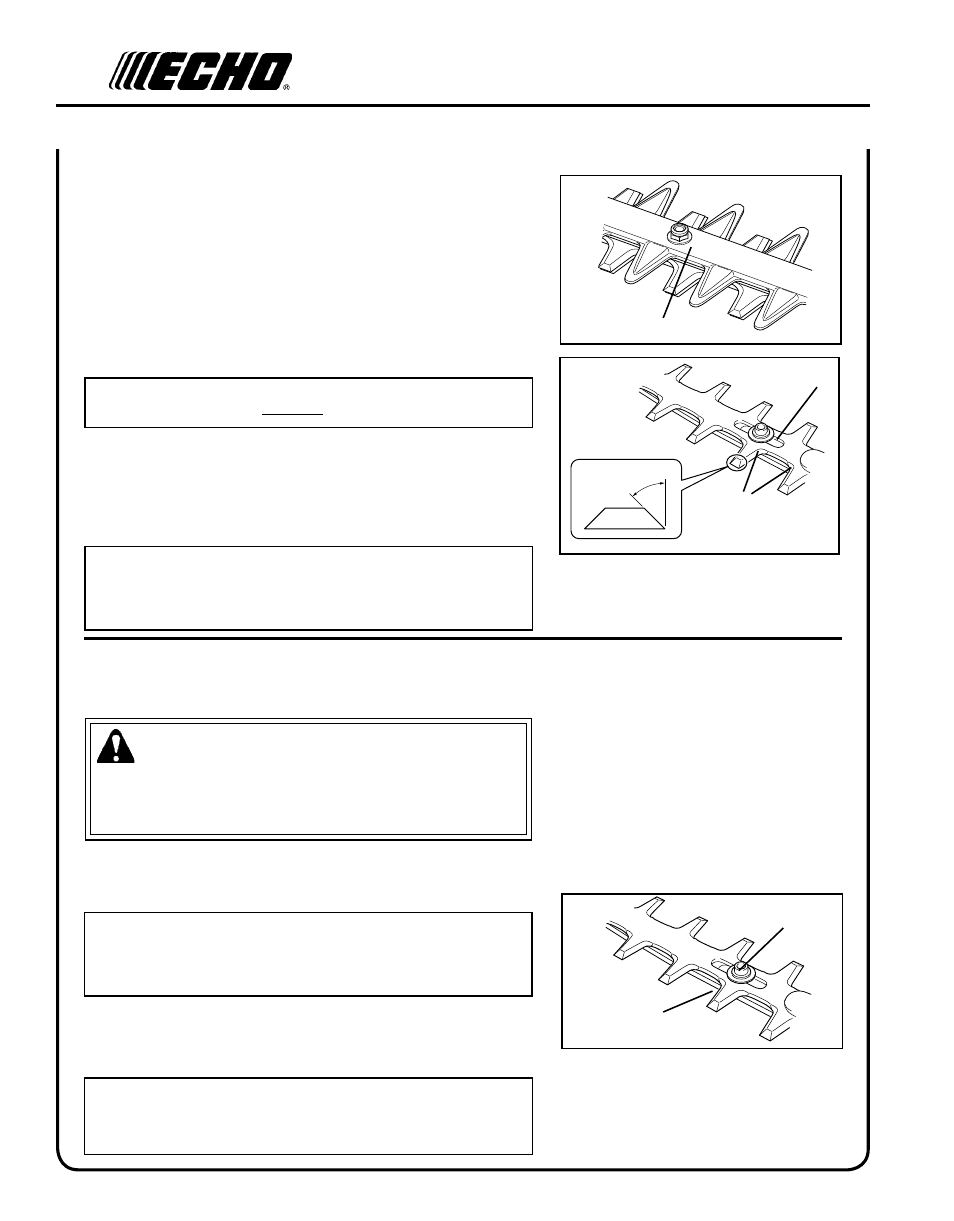
adjusTmenT
Level 2.
WARNING
Hedge clipper blades are very sharp. Touching them may lead to
severe personal injury. Use long hex wrenches and sockets with
extensions when tightening blade screws and blade locknuts to keep
hands at a safe distance from sharp blades.
1. Move stop switch to STOP position.
2. Disconnect spark plug wire.
3. Tighten blade screws (A) securely.
4. Hold blade screws (A) to prevent turning, and tighten locknuts (B).
A
B
1. Move stop switch to stop position.
2. Disconnect spark plug wire.
3. Remove blade guard. (See “Blade Guard Remove/Install instruc-
tions”)
4. Slide blades to allow file clearance using slots (B) on bottom of
blade. Do not pry against cutting edges.
5. File each edge carefully. Follow the original shape of the blade.
IMPORTANT
If a power grinder is used DO NOT allow blade to over heat.
6. Install blade guard. (See “Blade Guard Remove/Install instruc-
tions”)
7. Lubricate blades (see “Lubrication instructions”).
IMPORTANT
Blades should only be removed and reinstalled by an Authorized
ECHO Servicing Dealer, otherwise premature wear or internal
gearcase damage may occur.
A
6mm (.25 in.) Radius
B
45º
IMPORTANT
Blades should only be removed and reinstalled by an Authorized
ECHO Servicing Dealer, otherwise premature wear or internal
damage may occur.
NOTE
Locking ability of Hedge Clipper blade lock nuts will diminish
each time they are removed. Replace if turning resistance is not
felt when installing locknuts.