Recording – Casio QV-770. User Manual
Page 5
17
Battery Handling Precautions
Incorrect use or handling of batteries can cause them to leak
or burst and seriously damage your camera. Be sure to note
the following important precautions to avoid problems with
batteries.
• Remove batteries from the camera if you do not plan to use
it for more than two weeks.
• Never recharge batteries, never allow direct connection
between two ends of a battery, and never try to take batter-
ies apart.
• Do not expose batteries to direct heat or dispose of them
by burning. Doing so can create the danger of explosion.
• Never mix batteries of different types.
• Dead batteries are susceptible to leakage, which can
cause serious damage to your camera. Remove batteries
from the camera as soon as you notice they are dead.
• The batteries that power this camera normally become
warm when they lose power. This does not indicate mal-
function.
POWER SUPPLY
• Use only LR6 (AM-3) type alkaline or FR6 type
lithium dry cell batteries with this camera.
Never mix old batteries with new ones. Failure
to do so can result in bursting or leaking of bat-
teries, creating the danger of fire or personal
injury.
CAUTION
Type of Operation
Auto Play
Continuous Recording
AA-size alkaline batteries LR6
Approximately 100 minutes
Approximately 190 shots
NOTE
Battery life is based on Panasonic’s alkaline batteries
and Fujifilm’s lithium batteries.
They may vary if other manufacturer’s batteries are
used. For your reference, the values when the camera
is operated with Duracell’s batteries are shown below.
• Always make sure that the positive [+] and
negative [–] ends of the batteries are facing
correctly, as noted by the markings on the
camera itself. Improper loading of batteries can
result in bursting or leaking of batteries, creat-
ing the danger of personal injury or soiling of
objects nearby.
CAUTION
18
Auto Power Off
Power automatically turns off whenever you do not perform
any camera operation for a period of time. Power turns off
after about two minutes in the Record Mode or after about
five minutes in the Playback Mode.
• To restore power, simply slide the POWER Switch to the
right as you normally do.
IMPORTANT!
The Auto Power Off function does not operate under the
following conditions.
• During playback of a movie (page 34)
• During playback of a panorama (page 35)
• During Auto Play (page 39)
• During infrared communication (page 65)
• When operations are being performed on a computer
connected to the camera via the camera’s DIGITAL
terminal. (page 59)
• Whenever the AC adaptor is connected to the camera.
Low Battery Indicator
The battery capacity indicator in the lower left of the monitor
screen (shown only when image information display is
turned on) changes to “
” whenever battery power goes
low. If you continue to use the camera, a battery warning
indicator “
” will appear in the center of the monitor
screen, and then camera power will automatically turn off. If
this happens, replace all four batteries with new ones as
soon as possible.
Note that the camera may automatically shut down at a
somewhat higher level of remaining battery capacity when a
computer is connected to its DIGITAL terminal for data com-
munication. This is to protect against problems caused by
sudden power outage during data communications. Be-
cause of this, we strongly recommend that you use the op-
tionally available AC adaptor to power the camera whenever
performing data communication with a personal computer.
POWER SUPPLY
ON/OFF
POWER
19
POWER SUPPLY
• Always be sure to use the AD-C620 AC adap-
tor only. Using any other AC adaptor can cause
damage to the camera not covered by the war-
ranty.
• When unplugging the AC adaptor from the wall
socket, be sure to grasp the adaptor (not the
cord).
• Avoid an undue bending, pulling, and twisting
of the AC adaptor’s cord, and never try to
lengthen the cord by splicing it with other wire.
• Be sure to switch power off before connecting or discon-
necting the adaptor.
• Always turn camera power off before disconnecting the AC
adaptor, even if the camera has batteries installed. If you
don’t, the camera will turn off automatically when you dis-
connect the AC adaptor. Even so, you run the risk of dam-
aging the camera whenever you disconnect the AC adap-
tor without first turning power off.
• The AC adaptor may become warm to the touch after ex-
tended periods of use. This is normal and is not cause for
alarm.
• After use turn off the power switch of the camera and un-
plug adaptor from the AC outlet.
AC power
terminal
Using AC Power
To power the camera from standard AC power, use the op-
tional AC adaptor (AD-C620).
AC Adaptor precautions
• Never use an electrical outlet whose voltage is
outside the rating marked on the AC adaptor.
Doing so can create the danger of fire or elec-
trical shock. Use only the optional AC adaptor
specified for this camera.
• Should the cord of the AC adaptor become
damaged (exposed internal wiring or shorts),
request a replacement from an authorized
CASIO service provider. A damaged AC adap-
tor cord creates the danger of fire or electrical
shock.
AC outlet
AC adaptor
CAUTION
CAUTION
20
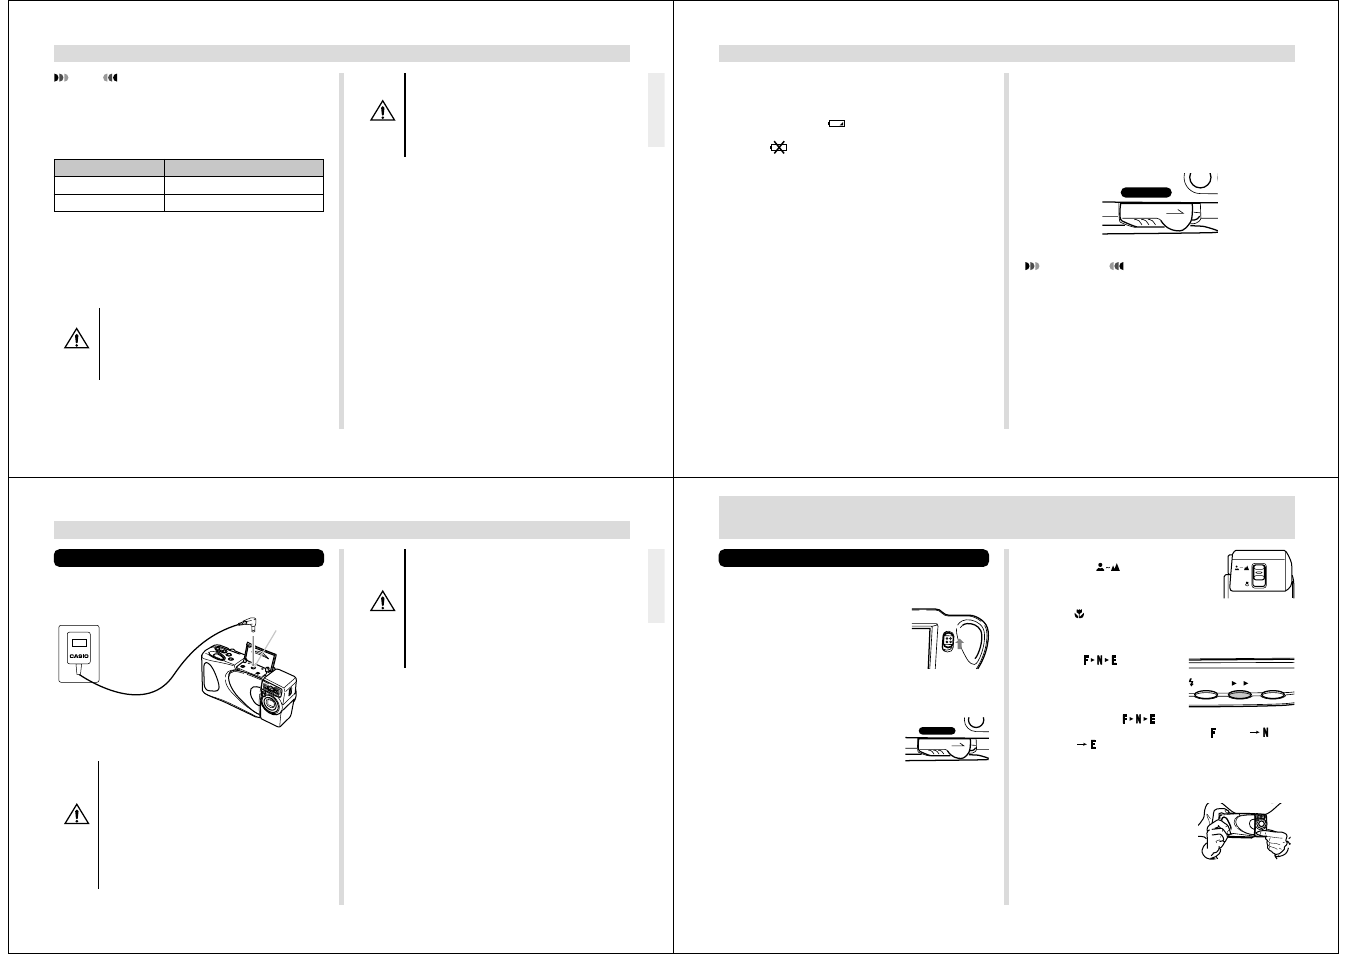
RECORDING
3.
Set the NORMAL/MACRO
switch to
(NORMAL)
position.
• Use
when the subject is located about 15 cm from
the lens (about 6 inches). See page 24 for details on
using this switch.
4.
Press
to select
resolution setting you
want.
• Each press of
cycles through the resolution
setting in the following sequence: (Fine)
(Nor-
mal)
(Economy).
• The resolution setting you select here affects how
many images can be stored in memory. See “Resolu-
tion Settings” on page 24 for details.
5.
Compose the image on
the monitor screen and
then press the shutter
button.
RECORDING
Basic Recording Operation
The following describes the basic operation for recording
images.
1.
Slide the Function
Switch to REC.
• The REC position selects the Record Mode, while
PLAY selects the Playback Mode.
2.
Slide the POWER Switch
in the direction indicated
by the arrow.
• The POWER Switch returns to its original position
when you release it.
• Turning on power enters the normal Recording Mode.
• The monitor screen shows the image picked up by the
lens.
• You can perform step 2 before step 1, if you want.
• If power turns off, slide the POWER Switch again to
turn it back on.
REC
PLAY
ON/OFF
POWER
MODE
F
/Tran-P
N E