T v setup, Setup menu, How to navigate – Curtis LCDVD2440A User Manual
Page 25
T V SETUP
SETUP MENU
Setup
Setup
12
6
Tim e
Picture
Audio
Clock
Phase
Auto
Move
Adjust
Exit
MENU
50
50
50
0
H - pos
V - pos
Setup
12
6
Tim e
Picture
Audio
Clock
Phase
Auto
Move
Adjust
Exit
MENU
50
50
50
0
H - pos
V - pos
Setup
12
6
Tim e
Picture
Audio
Clock
Phase
Auto
Move
Adjust
Exit
MENU
50
50
50
0
H - pos
V - pos
Setup
12
6
Tim e
Picture
Audio
Clock
Phase
Auto
Move Next
Exit
MENU
50
50
50
0
H - pos
V - pos
Lock
12
6
Time
Channel
Menu Language
Transparency
Zoom Mode
Noise Reduction
Advance
Close Caption
XVS
Restore Default
English
Move Select Exit
MENU
Picture
Off
Normal
Off
Setup
Audio
On
12
6
Time
Menu Language
Transparency
Zoom Mode
Noise Reduction
Advance
Close Caption
XVS
Restore Default
English
Move Select Exit
MENU
Picture
Off
Normal
Off
Setup
Audio
On
Setup
12
6
Tim e
Picture
Audio
Clock
Phase
Auto
Move
Adjust
Exit
MENU
50
50
50
0
H - pos
V - pos
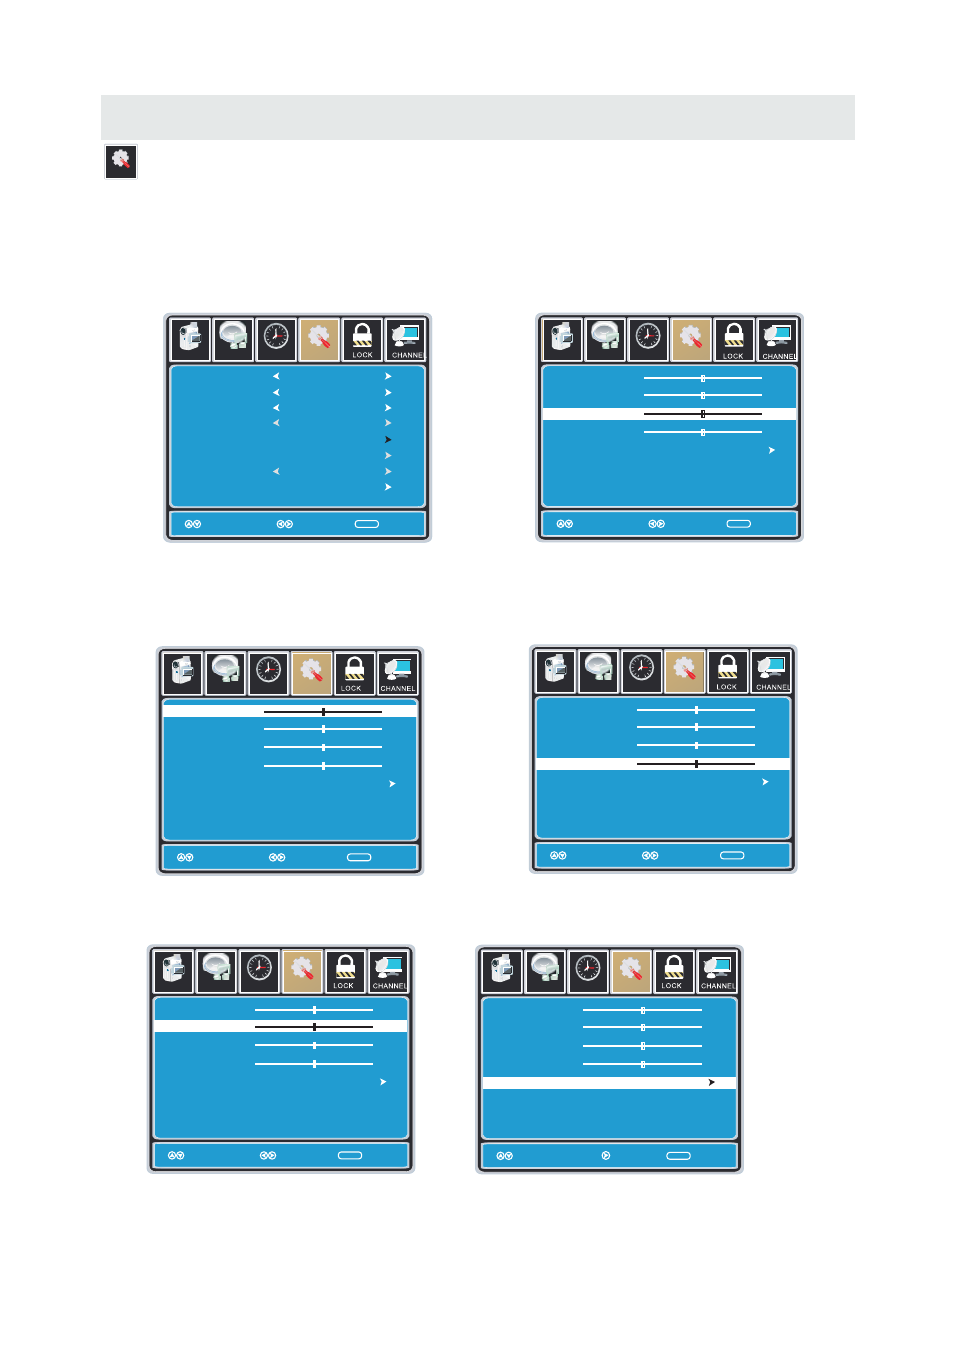
In the SETUP menu you may adjust the position of images displayed on screen once you connect
an input signal from your PC. Recommended resolution is 1920 x1080.
If your PC system uses a standard signal mode, the screen will adjust automatically.
Connect an optional 3.5mm audio cable for stereo sound.
How to Navigate:
After connecting to a PC, press the SOURCE button and highlight VGA, then press the ENTER
button.
Press the MENU button on the remote control
and navigate using the ◄► buttons to select
SETUP. Press the ▼ button to highlight
Advanced, then press the ►button to select
from the following options.
Use the ▼ button to highlight Clock.
Navigate using the ◄► buttons to control the
width of the image.
Use the ▼ button to highlight H-POS.
Navigate using the ◄► but tons to adjust the
position of images displayed from side to side.
Use the ▼ button to highlight Phase.
Navigate using the ◄► buttons to improve focus
and image stability.
Use the ▼ button to highlight V-POS.
Navigate using the ◄► buttons to adjust the
position of images displayed up and down.
Use the ▼ button to highlight AUTO.
Press the ► button to automatically adjust the
display to the best setting.
22
- LCD4062A LCD3708A LCD3227A LCD2425A LCD1908A LCD1933A LCD3235A LED1526A LED1337A LED2415A LEDVD1339A LEDVD2480A LEDVD2479A LEDVD2480B LCDVD199A LCD4077A LCD4620A LCD4686A LCD4686A-W LCDVD322A LCDVD326A PLCDV3213A PLCDV3247A-C PLCD3271A-C PLCD3271A PLCD3273A-B PLCD4692A PLDV321300 PLDED3996A-C2 RLC3209A RLC3255A-B RLCDV3282A-B RLC3273A-B RLC3708A RLC4688A-B RLC4062A RLC4033A RLC4686 RLC4688A RLCD4063A RLCV3223AB