Cleaning under the belt cover, Self-propelled units only), Cleaning the blade brake clutch shield – Exmark Commercial 21 850 User Manual
Page 33: Blade brake clutch units only), Cleaning under the cover plate, Non-blade brake clutch units only), Maintenance
Maintenance
Cleaning Under the Belt
Cover (Self-Propelled Units
Only)
Service Interval: Every 50 hours
1. Stop the engine and wait for all moving parts to
stop.
2. Disconnect the wire from the spark plug (see
3. Pull upward on the back of the cover to unsnap
the front and back cover tabs (see Figure 32).
4. Lift off the cover and brush out all the debris
around the belt area.
5. Install the belt cover by pushing down on the rear
first and then snapping the front onto the mower
housing.
6. Connect the wire to the spark plug.
Cleaning the Blade
Brake Clutch Shield
(Blade Brake Clutch Units
Only)
Service Interval: Every 50 hours
1. Stop the engine and wait for all moving parts to
stop.
2. Disconnect the wire from the spark plug (see
3. Drain the gasoline from the fuel tank. Refer to
Emptying the Fuel Tank and Cleaning the
Fuel Filter section.
4. Tip the lawn mower onto its right side (air filter
up).
5. Remove the blade nuts and the blade (see
Figure 36
1.
Screws
2.
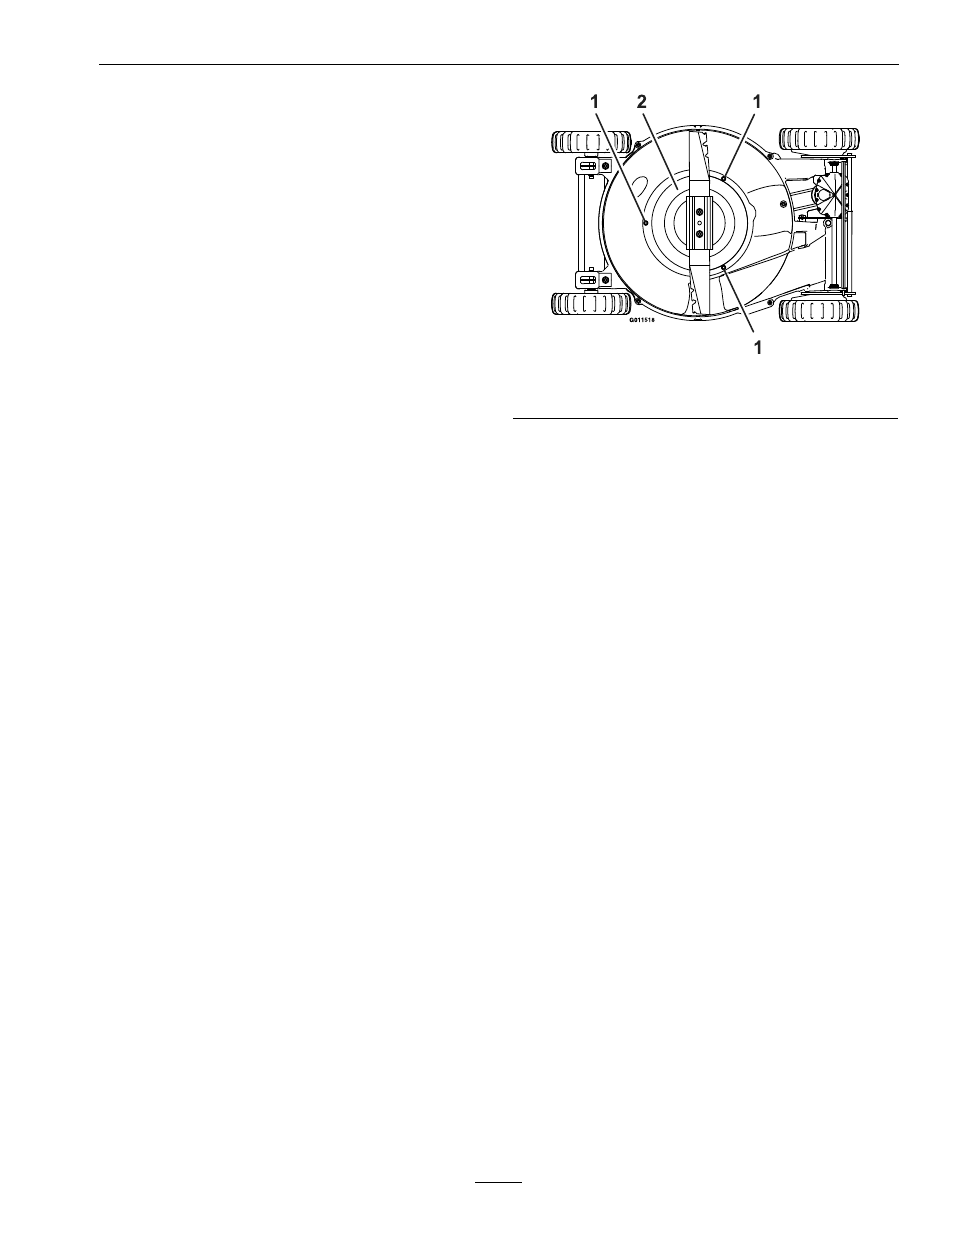
BBC Shield
6. Remove the three screws holding the BBC shield
onto the unit (see Figure 36).
7. Remove the BBC shield and brush or blow all
the debris from under the shield and around the
BBC system.
8. Install the BBC shield. Tighten the screws to
secure the BBC shield to the deck.
9. Install the blade and the two blade nuts.
10. Turn the lawn mower upright.
11. Connect the wire to the spark plug.
Cleaning Under the Cover
Plate (Non-Blade Brake
Clutch Units Only)
Service Interval: Every 50 hours
1. Stop the engine and wait for all moving parts to
stop.
2. Disconnect the wire from the spark plug (see
Figure 10 and Figure 11).
3. Drain the gasoline from the fuel tank. Refer to
Emptying the Fuel Tank and Cleaning the
Fuel Filter section.
4. Tip the lawn mower onto its right side (air filter
up).
5. Remove the blade bolt, blade support, and the
blade (see Figure 25).
33