Exmark NAV20KC User Manual
Page 33
28
4.2
ADJUSTMENTS
IMPORTANT: Disengage PTO, shut off engine, wait for all moving parts to stop,
engage parking brake and remove key before servicing, cleaning, or making any
adjustments to the unit.
4.2.1
Pump Drive Belt Tension.
Spring Tensioned - No adjustment necessary.
4.2.2
PTO Belt Replacement.
a)
Stop engine, wait for all moving parts to stop, and remove key. Engage
parking brake.
b)
With engine “off”, engage PTO lever, then remove the hairpin and clevis
pin at the bottom of the PTO brake band.
c)
Rotate the brake band upwards out of the way of the belts keeping clear of
the belt drive.
d)
Disengage PTO lever.
e)
Loosen belt guides A and B (See Figure 5).
f)
Remove current belts.
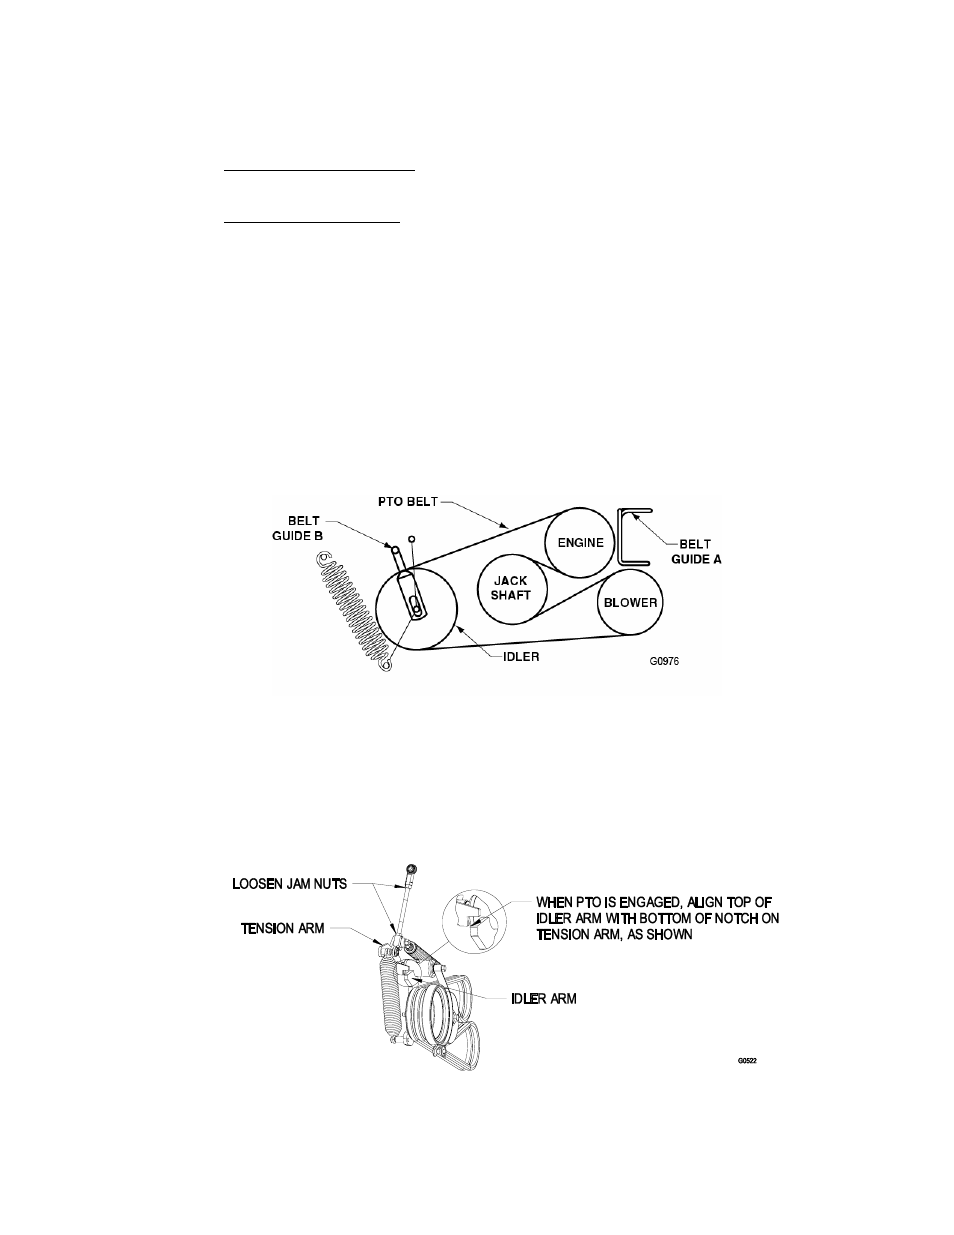
g)
Route new belts onto sheaves as shown in the decal located on the back of
the left drive shield. See Figure 5.
FIGURE 5
h)
Engage the PTO lever.
i)
Rotate brake band back down into original position.
j)
Re-install clevis pin and hairpin to secure brake band.
k)
Engage the PTO lever.
l)
Loosen the jam nuts and adjust linkage until the top of the idler arm is
aligned with the bottom of notch on tension arm as shown in Figure 6.
FIGURE 6
m)
Tighten jam nuts and disengage PTO lever. Re-engage PTO lever and
check alignment.
n)
Check and adjust belt guides per 4.2.4.