Control panel operation, Front panel drawing, Panel enable button – Grass Valley TTN-BES-0808CP/110 User Manual
Page 23: V/a toggle button, Operating crosspoints, Take function, 4 operating, Crosspoints, 5 take, Function
BES-0808CP/110
Rev. 2
15
8 Control panel operation
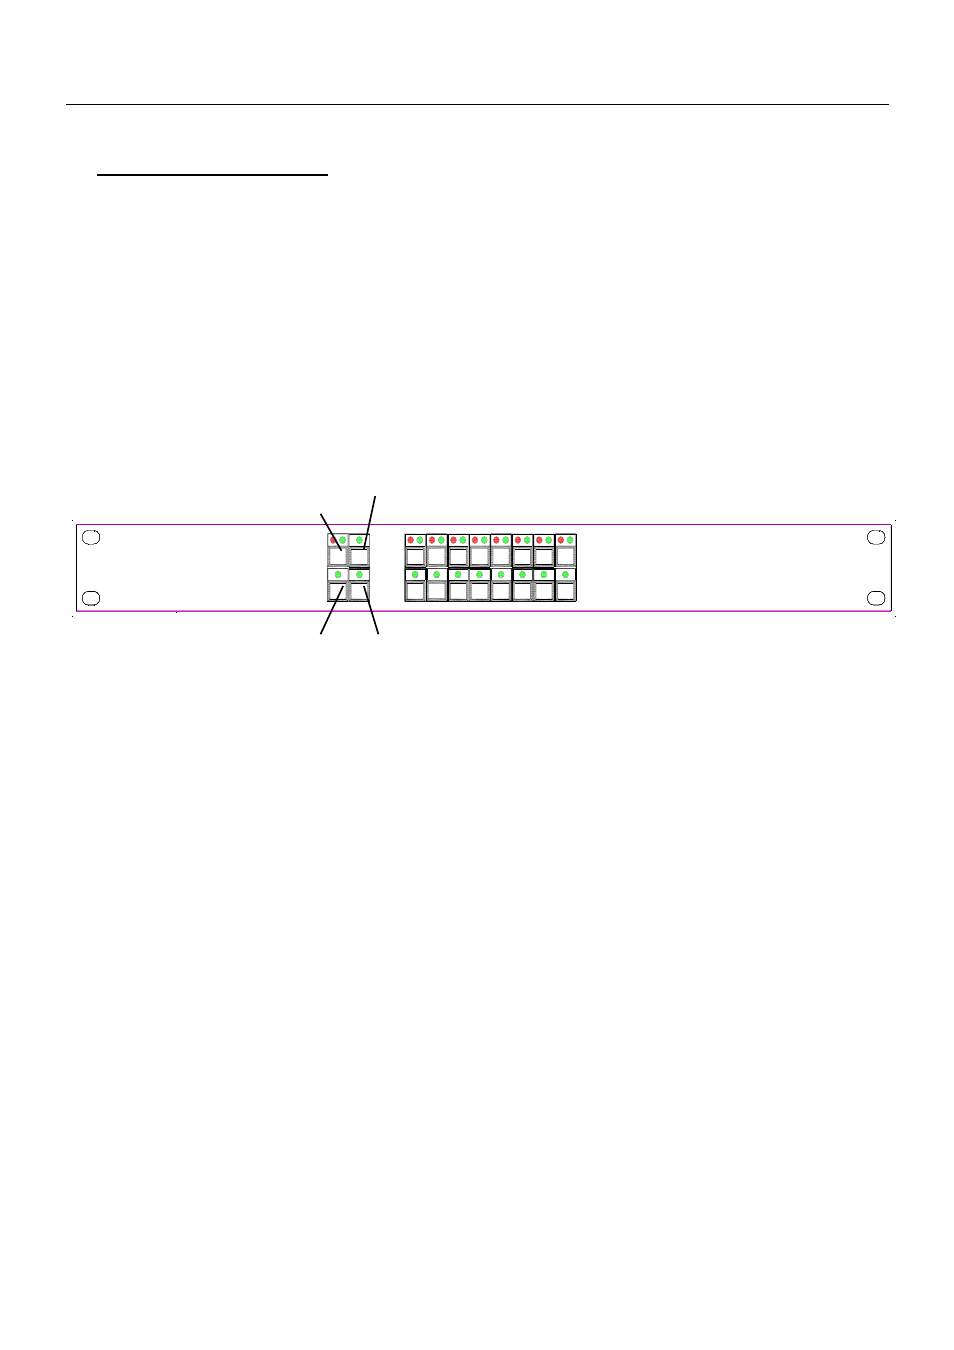
The built-in panel in the BES-0808CP/110 offers 8 input select buttons on the top row. The input buttons
are equipped with two LED indicators for displaying both video and audio status during breakaway
operations. The bottom row selects the 8 router outputs. The last selected output will be indicated with
the LED. On the left hand side the panel provides 4 function keys with following functions:
• TAKE
Executes the last operation
• TAKE ON/OFF
Enables / disables Take function
• AUDIO / VIDEO
Enables Audio, Video or AFV
• ENABLE Enables
panel
8.1 Front panel drawing
V/A Take Input button row
Toggle
Panel Take Output button row
Enable ON/OFF
8.2 PANEL ENABLE button
After powering-up the control panel will be disabled. The LED`s in the buttons are only half illuminated.
Press the PANEL ENABLE button to start operating. If you want to lock the control panel after use you
simply disable by operating the PANEL ENABLE button once again.
8.3 V/A TOGGLE button
After powering-up the control panel will operate audio follow video. The red and green LED on the V/A
TOGGLE button are illuminated. By operating the V/A toggle button you can select the layer you want to
switch. Red LED illuminated means only audio. Green LED illuminated means only video.
8.4 Operating
crosspoints
Operating crosspoints is an easy task with BES-0808CP/110. You select the output you want to operate
on the OUTPUT BUTTON row. With the next operation you select one of the inputs on the INPUT
BUTTON row. The crosspoint operation will be executed while pressing the input button.
8.5 TAKE
function
The BES-0808CP/110 provides a TAKE function which can be activated by pressing the TAKE ON/OFF
button. The TAKE ON/OFF button will show green light if the TAKE function is activated. After
selecting output and input like described under 4.3 the INPUT button and the TAKE button will start to
blink. The crosspoint operation will be executed by pressing the TAKE button. If you work with
video/audio breakaway you can first select the video layer, afterwards the audio layer and finally execute
both operations at the same time with the TAKE button.