Using advc110, Setting dip switches – Grass Valley ADVC-110 User Manual
Page 16
Using ADVC110
Using ADVC110
1
Using ADVC110
Using ADVC110
Using ADVC110
Using ADVC110
Using ADVC110
16
16
16
16
16
U
s
in
g
A
D
V
C
1
1
0
U
s
in
g
A
D
V
C
1
1
0
U
s
in
g
A
D
V
C
1
1
0
U
s
in
g
A
D
V
C
1
1
0
U
s
in
g
A
D
V
C
1
1
0
Setting DIP switches
Setting DIP switches
Setting DIP switches
Setting DIP switches
Setting DIP switches
Use the DIP switches on the bottom of the unit to modify the ADVC110's
functionality. Make sure the power is turned off before you make any
changes.
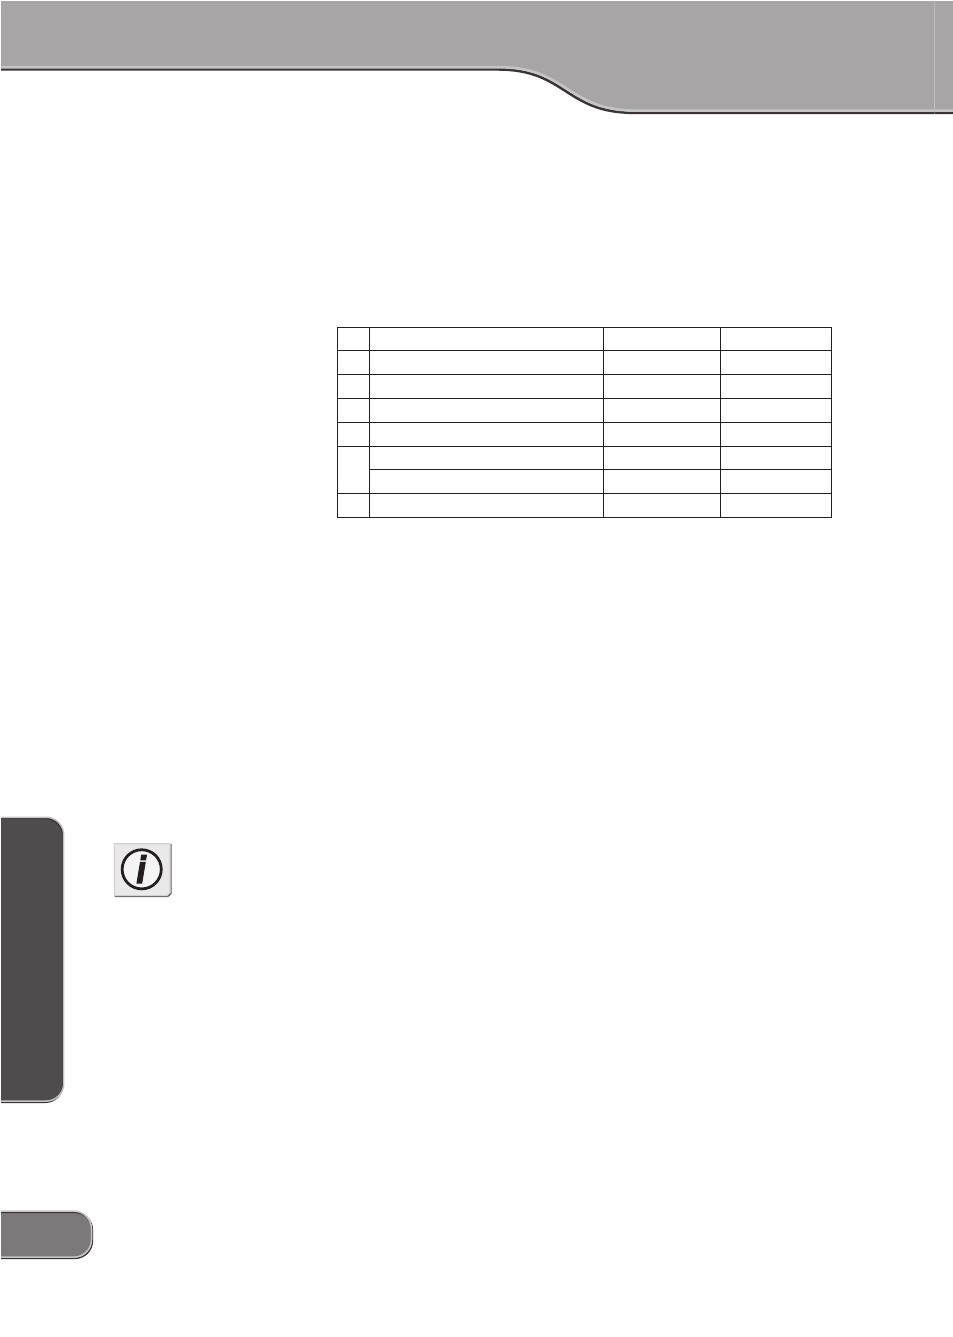
Table 1: DIP Switch Settings
No. Mode
OFF
ON
1 Digital-in Reference Sync
Stream Sync
Fixed
2 Power-on Input Mode
Analog
Digital
3 Audio Mode
48kHz/16-bit
32kHz/12-bit
4 Locked Audio Mode
Locked
Unlocked
5
NTSC Setup Level(SW6=OFF)
0 IRE
7.5 IRE
PAL/SECAM(SW6=ON)
PAL
SECAM
6 Video Format
NTSC
PAL
By default, DIP switches 1, 3, 4, 5 and 6 are in the OFF position,while
DIP switch 2 is in the ON position.
* The DIP switch settings may differ depending on the region of shipment.
y
Digital-in Reference Sync Mode - toggles between Stream Sync
and Fixed modes. To make the Video Sync synchronized with the
DV Stream Sync, set this Switch in the OFF position. If you set this
switch in the OFF position and the color of the output video be-
comes black and white, set this switch in the ON position, making
the Video Sync happen in the fixed timing.
y
Power-on Input Mode - toggles between Analog In and Digital In
modes when you first turn on the unit. If you primarily capture
analog video, you should set this to the OFF position so the unit is
in Analog In mode when you turn it on.
y
Audio Mode - toggles between 48kHz/16-bit 2-channel audio and
32kHz/12-bit 4-channel audio. See Setting 4-channel mixing mode
in the next section for more information.
y
Locked Audio Mode - toggles between capturing locked audio or
unlocked audio. If you are capturing a lot of long clips, you should
leave this switch in the OFF position to make sure the audio stays
locked to the video.
y
NTSC Setup Level - toggles between 0 IRE (Japan NTSC) and 7.5
IRE (USA NTSC).
y
PAL/SECAM - specifies PAL or SECAM, when the DIP switch 6 is in
the ON position (set to PAL).
y
Video Format - toggles between capturing NTSC and PAL video.
The ADVC110 is set to capture NTSC video by default.
Info
Input Analog SECAM signal will
be captured in DV PAL signal. In
this occasion, the color of the
Analog output signal cannot be
guaranteed. When you re-
convert the captured DV signal to
Analog signal, Analog PAL signal
will be output, instead of Analog
SECAM signal.