Installation instructions – Eneo VKC-13140F2810IR User Manual
Page 10
ULTRA CLEAR RESOLUTION CAMERA
Installation Instructions
10
• Extreme care should be taken NOT to scratch the window in front of lens.
• Care should be taken the cable is NOT to be damaged, kinked or exposed in the
hazardous area.
• Do not expose the camera directly to a strong light source such as the sun or spot
light.
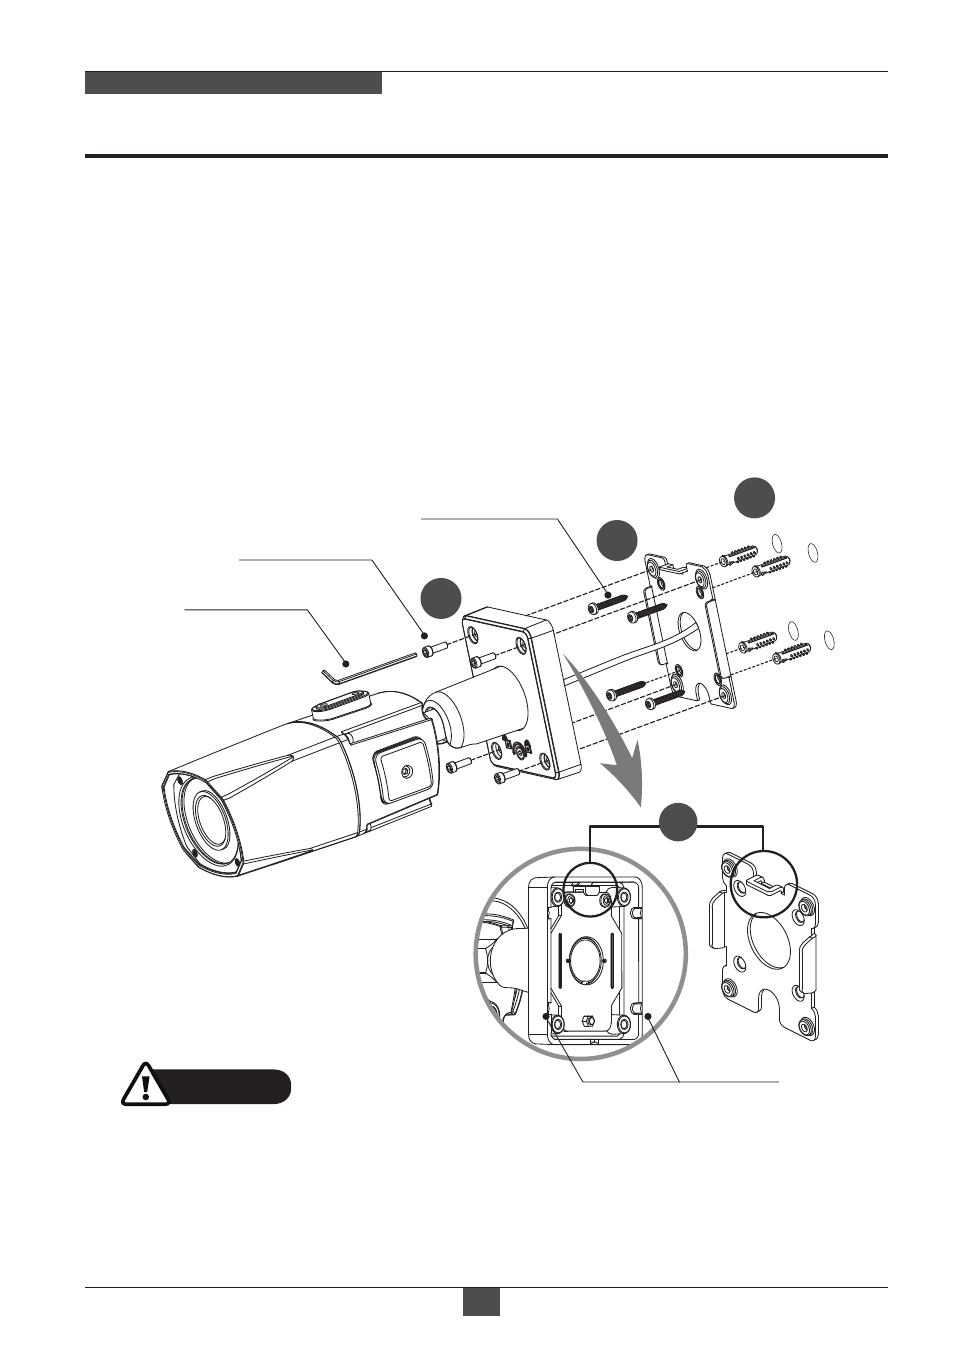
Torque Wrench
Assembly Screw
: 4x14mm
Mounting Screw
: 4x30mm
1. Locate the mounting template at the installation position and drill the ceiling or wall if
needed. ( *The easy bracket can not be installed on the ceiling)
2. Place the easy bracket on pre-drilled position and fix it through using mounting screws
(4x30mm). Skip this step when an easy bracket is not installed.
3. Route the Power cable to the connecting place.
Hook up the camera bracket with the easy bracket as illustrated below.
4. Fix the camera bracket through using assembly screws (4x14mm).
5. Set the camera’s viewing angle and adjust zoom/focus of lens by using the torque wrench.
6. Put the sunshield to the camera unit and tighten the sunshield-bolts.
CAUTION
REAR VIEW
1
2
3
4
Cable exit