Steel-set man-06.pdf, Pool set-up – Aqua Leisure Steel-Set Pool User Manual
Page 6
P.6
3. POOL SET-UP
A.
If time permits, completely unroll your pool and expose it to direct sunlight for an hour
or more. This will make the pool material more flexible during set-up.
B.
If your pool system contains a ground cloth, carefully unfold it and spread out as evenly
as possible over set-up area.
WARNING:
Use of a ground cloth is REQUIRED when the pool is set up on concrete.
(If a ground cloth is not a standard feature in your pool system, you may purchase one as an
accessory. Please check with your local retailer for availability.)
C.
Place the pool over the ground cloth (if applicable) so that the hose fixtures on the pool
point towards the GFCI outlet you will use to power your filter pump. CAUTION:
NEVER DRAG THE POOL AS THIS WILL DAMAGE IT.
D.
Carefully unfold the pool, if you have not already done so, spread out the sides and the
floor of the pool to make them as smooth as possible.
E.
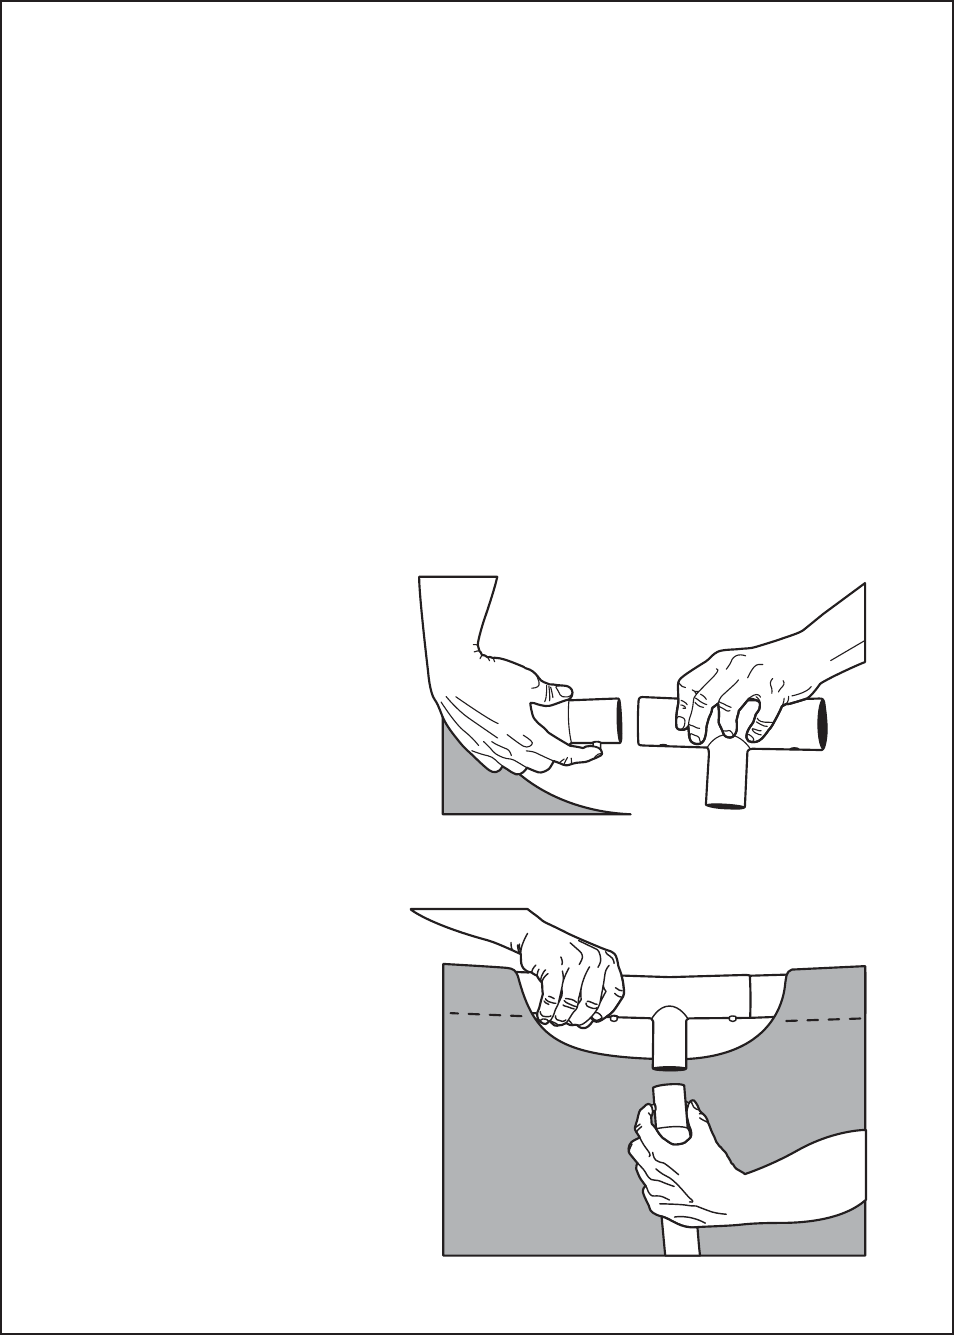
Identify the Horizontal Beam [A] (the longer, larger diameter pole with one pin on each
end). Start by sliding the beam through the sleeve opening along the top of the pool liner.
Center the beam within the sleeve,
then attach a T-Joint [C] by press-
ing in pin and inserting the beam
into the larger of the openings.
Align the pin with the hole on the
T-Joint until it clicks (locks) into
place.
F.
Repeat this proceedure around the
pool in the same direction until all
beams have been connected.
Note: The last connection may be difficult to complete, however by lifting the assembly
up several inches to align and then lowering into position should make this effort easier.
G.
Once the top ring is completed, it
is time the attach the Vertical Legs
[B]. Slide one leg through the
retaining belt located along the
outside of the pool liner. Connect
the leg to the bottom of the T-Joint
in the same fashion, press in the
two pins and align with holes until
it clicks (locks) into place. Also,
make sure the legs are inside the
restraining rope that runs along
the bottom of the pool. Continue
attaching the legs around the pool
in one direction until all legs have
been
completed.