Warranty agreements, Laser – AML M7225 Handheld Computer User Manual
Page 2
Using the Integrated Barcode Scanners
Installing a microSD Card
Accessories
1.
3.
2.
4.
Remove the battery
cover and main battery.
Locate the microSD card slot.
To open the socket, slide the
metal tab to the right and
hinge upward.
Turn the access
latch clockwise
Insert the microSD card fully
into the slot. Hinge the tab
downward and slide into
the locked position.
THE UNIT MUST BE COLD BOOTED
AFTER INSERTING A SD CARD!
Scan Engine
Window
Scan Trigger
Scan Button
Laser -
The laser scan
engines require proper
alignment of the bar
code under the scanner
window.
2D Imager -
Capable of
scanning bar codes at any
orientation as long as the
entire symbol is visible to
the scanner and illuminat-
ed.
© 2015 American Microsystems, Ltd. All rights reserved.
American Microsystems, Ltd. reserves the right to make
changes in specifications and other information contained
in this document without prior notice, and the reader
should in all cases consult American Microsystems, Ltd. to
determine whether any such changes have been made.
The information in this publication does not represent a
commitment on the part of American Microsystems, Ltd.
American Microsystems, Ltd. shall not be liable for technical
or editorial errors or omissions contained herein; nor for
incidental or consequential damages resulting from the
furnishing, performance, or use of this material. This
document contains proprietary information which is
protected by copyright. All rights are reserved. No
part of this document may be photocopied,
reproduced, or translated into another language without the
prior written consent of American Microsystems, Ltd.
2190 Regal Parkway
Euless, TX 76040
800.648.4452
www.amltd.com
www.barcodepower.com
Warranty Agreements
SVC-EW7225
SVC-EWP7225
Extended Warranty, 3 year, M7225
Extended Warranty PLUS, 3 year, M7225
Safety NOM/NYCE-NOM-019-SCFI-1998
Safety of data processing equipment
4-Position Computer
or Terminal Charger
ACC-7225
Communications
Cradle
4-Position Battery
Charging Cradle
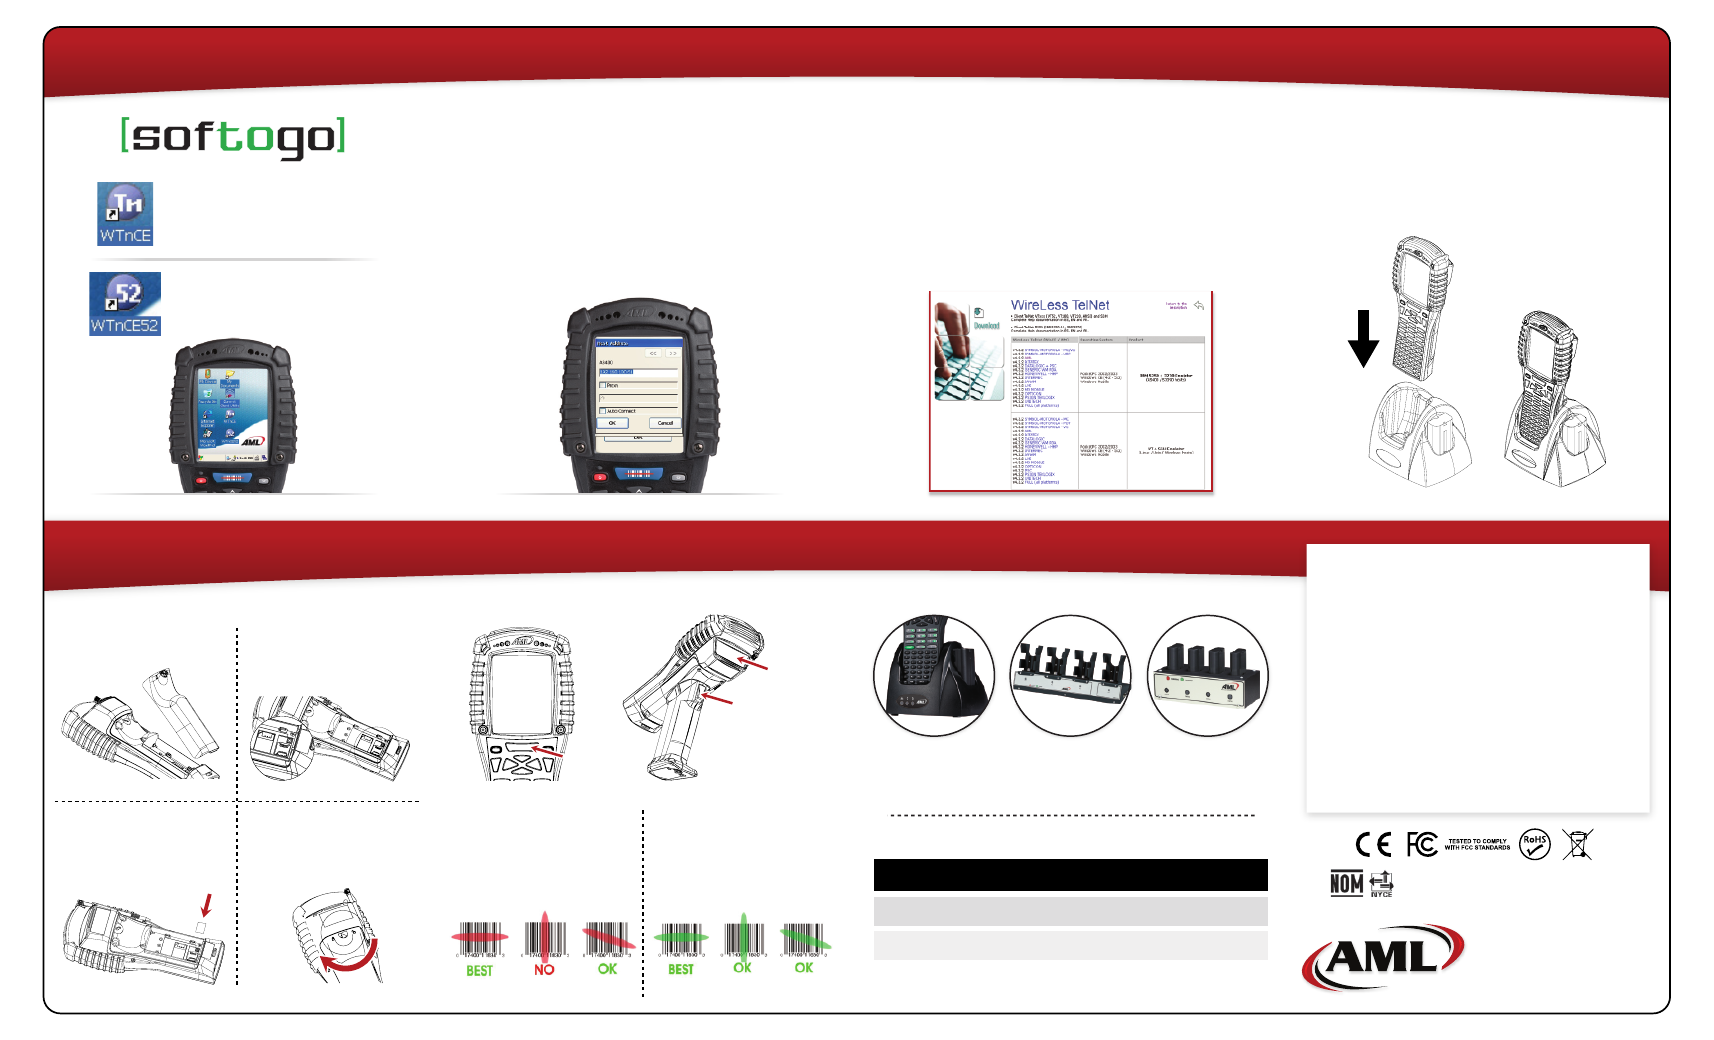
Connect to your Host Server
Running the Pre-Installed TE Client
Download the Telnet Client Manager
Upload Settings to the M7225
From the main menu, select ‘Configure’,
then ‘Hosts’.
Enter your host server(s) IP address.
After you have configured TE Options,
connect the USB cradle, insert the M7225,
and click ‘Install Configuration Only’ to
upload via ActiveSync.
This icon opens the
SofToGo VT100/VT220
Client.
This icon opens the
SofToGo TN5250 Client.
To make any additional setting changes
to the TE client you must download the
SofToGo Telnet Client Manager.
Visit this link:
http://www.softogo.com/com/en/
download/TelNet.html