Servicing valve assemblies, Reassembly of the outlet valve, Disassembly of the inlet valve – AIRLESSCO HSS9000 User Manual
Page 15: Reassembly of the inlet valve
Maintenance
3A1188C
15
Servicing Valve Assemblies
Disassembly of the Outlet Valve
1. Remove Fluid Pump from machine. See Fluid Pump
2. Remove Outlet Valve Assembly. See Disassembly
of the Fluid Pump, page 13.
3. Unscrew piston valve (14) from piston rod (8). Clean
and inspect parts. The piston has a special thread
locking/sealing patch. The patch allows for disas-
sembly/assembly procedures before it is necessary
to apply Loctite
®
to the threads.
4. Remove packing glands from piston rod. Note orien-
tation for installation.
5. Clean and inspect parts for wear or damage,
replace parts as necessary. PTFE O-ring will always
be replaced in this procedure.
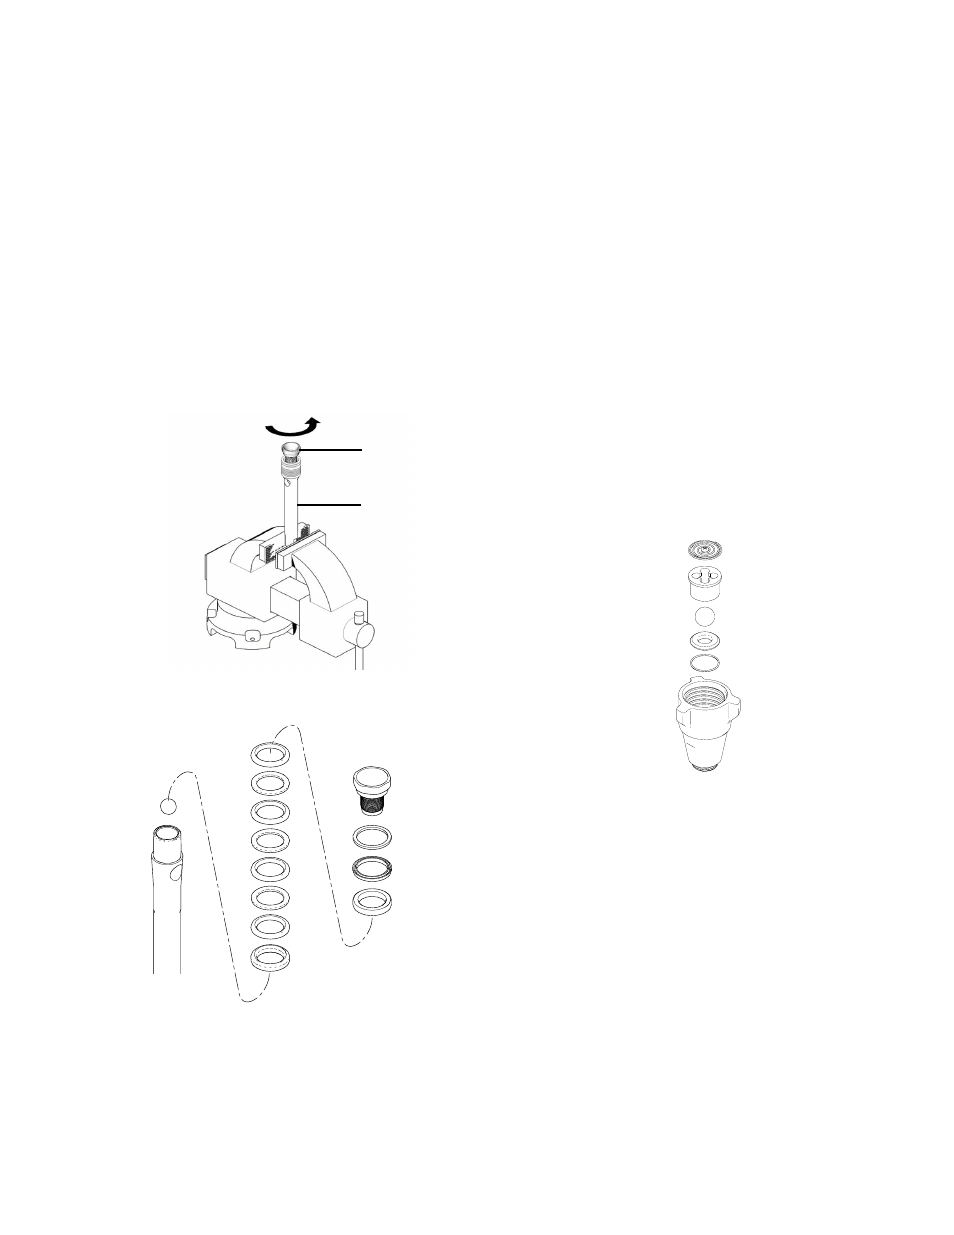
Reassembly of the Outlet Valve
1. Mount piston in vise.
2. Place ball into piston.
3. Install packings, wiper and glands. See Packing
Replacement Procedures, page 16.
4. Apply Loctite to valve seat threads, if special thread
locking/sealing patch is insufficient. (Normally good
for 4 repacks.)
5. Torque valve seat into piston to 55 ft-lbs.
Disassembly of the Inlet Valve
1. Relieve pressure, see page 6.
2. Disassemble intake valve. Clean and inspect
O-ring. You may need to use a pick to remove
O-ring.
Reassembly of the Inlet Valve
1. Reinstall inlet parts in correct order. Reverse inlet
seat if necessary.
2. Run the machine at pressure for several minutes,
inspect for leaks and proper orientation.
14
8
ti8850a
ti8851b
ti16102b