Fluid pump reinstall – AIRLESSCO MP400 User Manual
Page 15
Maintenance
332882A
15
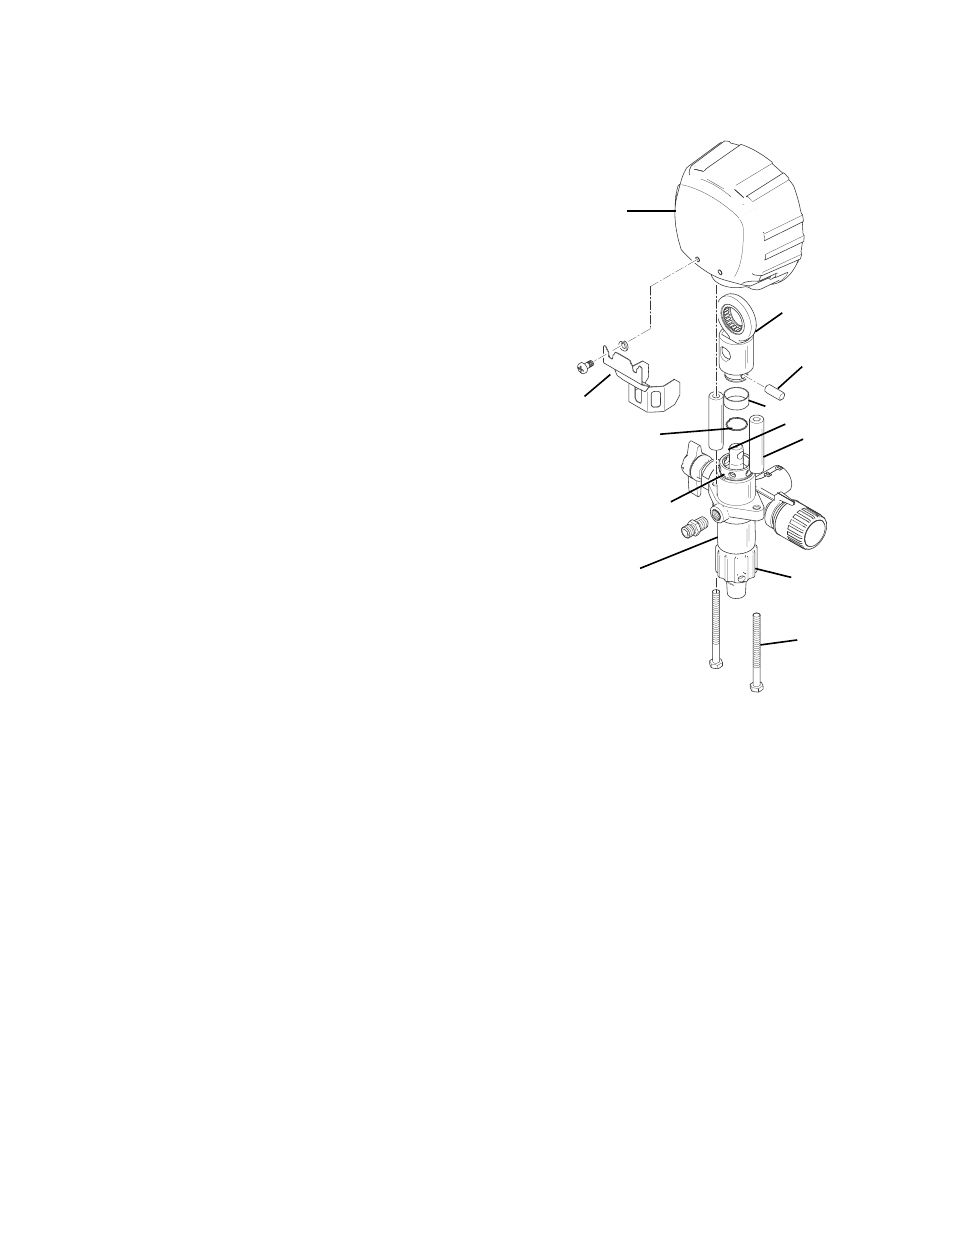
Fluid Pump Reinstall
1. Loosen the packing nut and ensure that the piston
rod (10) is in its upper position in the fluid pump
body, snap cap onto packing nut and slip the sleeve
(3) and the retaining ring (4) over the piston rod
(10).
2. Push the piston rod (10) up into the connecting rod
(2) and align the holes. Insert the connecting rod pin
(1) through the connecting rod (2) and piston. Slip
the sleeve (3) up over the connecting rod pin (1) and
insert the retaining ring (4) into the groove on the
connecting rod (2).
3. Push the two bolts (8) through the tube spacers (11)
and screw them into the cover assembly. Using a
1/2” wrench, tighten the two bolts (8) evenly (alter-
nating between them) to 20 ft-lbs (27.1 N•m).
4. For Hi-Boy: Reassemble lower suction valve
assembly by placing the suction seat, O-ring, suc-
tion ball and suction ball guide in the suction nut (7)
and screw onto fluid pump body.
For Stand: Reassemble lower suction valve assem-
bly by placing the o-ring, PTFE-ring on stop of ball
cage, o-ring on bottom of ball cage in the suction nut
(7) and screw onto fluid pump body.
5. Reconnect the pressure control knob and fitting to
the fluid pump body.
6. Start the machine and operate slowly to check the
piston rod (10) for binding. Adjust the two bolts (8),
holding the fluid pump body to the cover assembly,
if necessary. This will eliminate any binding.
7. Tighten packing nut clockwise until resistance is felt
against the Belleville Springs, go 3/4 of a turn more.
Put five drops of Throat Seal Oil or Packing Seal
Fluid in the packing nut.
8. Run the machine at full pressure for several min-
utes. Release the pressure by following the Pres-
sure Relief Procedure, page 10, and readjust the
packing nut per step 7 above.
9. Install the connection rod shield (12).
5
4
8
7
3
1
10
9
12
11
14
2
ti22323a