Step 3: prepare for waterproof installation, Step 4: connect the cable(s), Step 5: install the camera to the surface – ACTi KCM-7911 User Manual
Page 13
Hardware Manual
Step 3: Prepare for Waterproof Installation
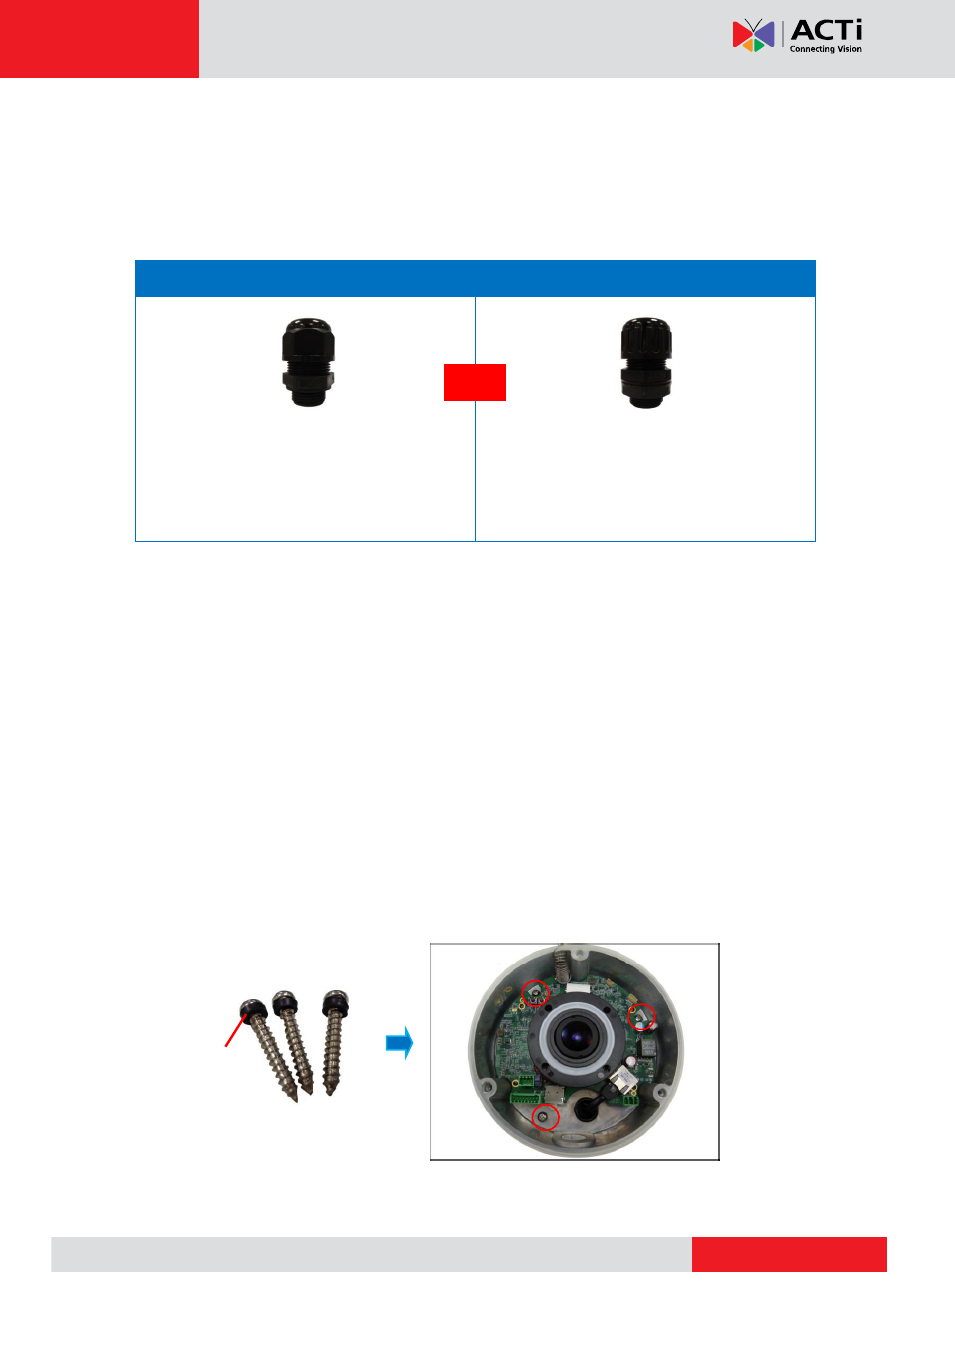
The camera comes with two (2) glands used for waterproof installation: Cable gland and
Conduit Gland. Determine the type of waterproof solution that is applicable to your installation
requirements and prepare the necessary accessories or purchase extra materials.
Cable Gland
Conduit Gland
For use with an
EXTERIOR-GRADE
Ethernet cable. Exterior-grade Ethernet
cables are already waterproof.
For use with
3/8
”
flexible conduit.
Recommended when an exterior-grade
Ethernet cable is not available or when other
input/output devices or an external power
adaptor will be connected to the camera.
Step 4: Connect the Cable(s)
To connect the cable using the cable gland solution, see
on page 15.
To connect the cable(s) using the conduit gland solution, see
on page 18.
Step 5: Install the Camera to the Surface
1.
If necessary, insert a micro SDHC card into the card slot of the camera.
2.
Attach the camera to the surface using the three (3) supplied screws. It is recommended to
install the camera to the surface with the cable hole facing down to avoid water leak
concerns.
NOTE:
Make sure the camera screws have rubber rings. If the screws you received do not
and
Rubber Ring
- Outdoor Hemispheric / Fisheye Dome on Straight Wall Outdoor Hemispheric / Fisheye Dome on Hard Ceiling Outdoor Hemispheric / Fisheye Dome on Vertical Pole with Tilted Mount (PMAX-0310) Outdoor Hemispheric / Fisheye Dome on Corner with Tilted Mount (PMAX-0310) Outdoor Hemispheric / Fisheye Dome on Dropped Ceiling Outdoor Hemispheric / Fisheye Dome on Tilted Wall