Installing the camera on a flat surface, Step 1: drill the holes – ACTi KCM-7911 User Manual
Page 11
Hardware Manual
Installing the Camera on a Flat Surface
This section covers the step-by-step procedures in directly mounting the camera on a flat and
smooth surface, like ceilings or walls.
The installation procedures of other mounting solutions are covered in the Installation Guide
downloadable from the website
Step 1: Drill the Holes
1.
Mark the screw holes location on the ceiling/wall, then drill the holes and insert the plastic
plugs.
IMPORTANT!
For wall installations, note that the camera must be installed with the cable
hole facing up to install the camera with a correct orientation.
2.
Determine how the cables will be routed: pass through the surface or along the surface.
If the cables will pass through the surface
:
a.
Drill the cable hole location on the surface.
b.
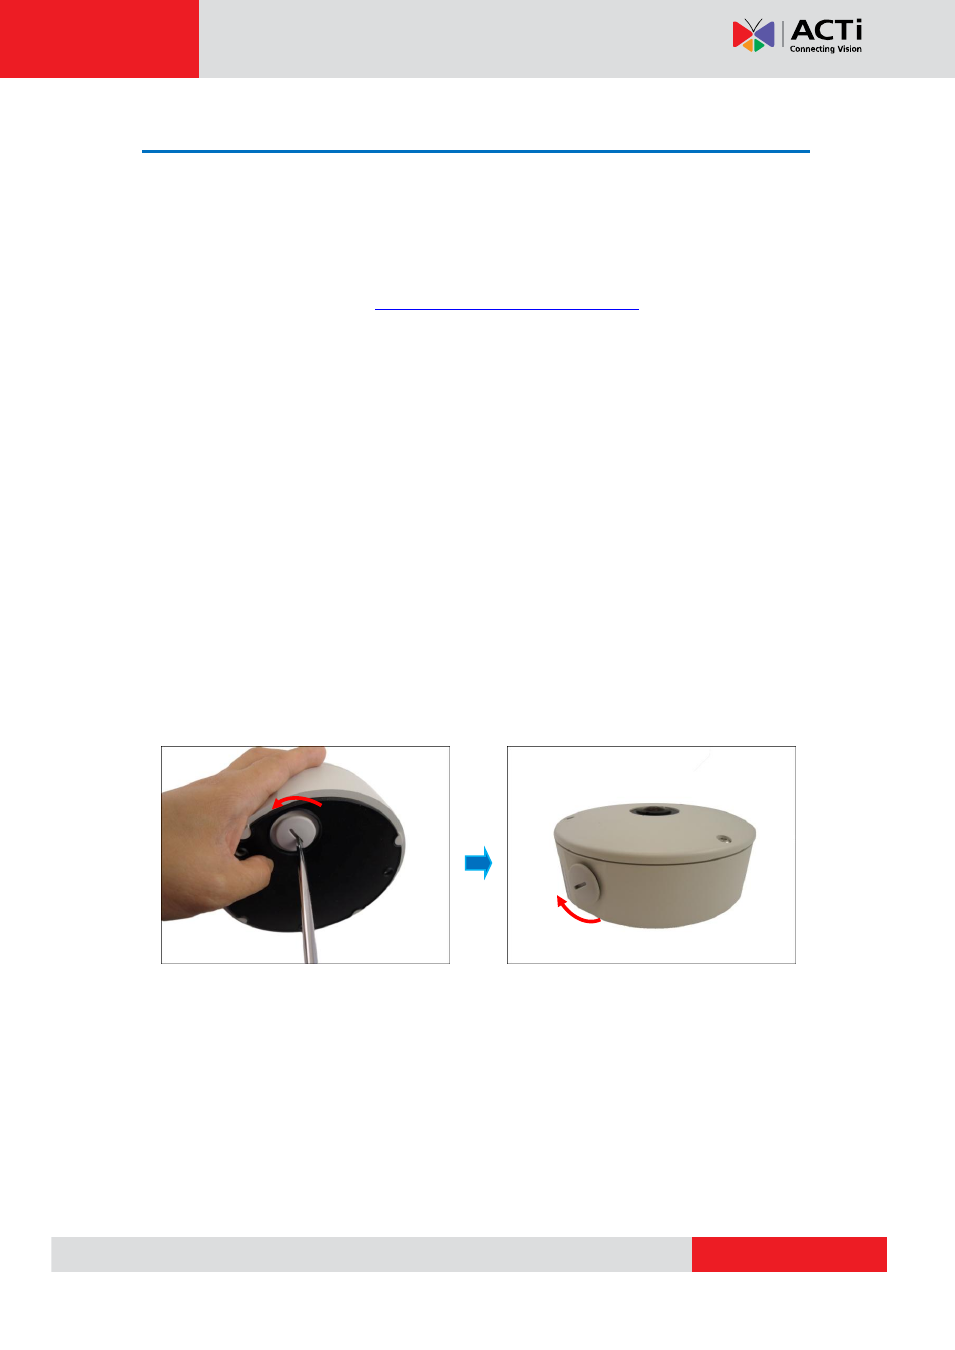
Remove the cap covering the bottom hole of the camera, and attach the cap to
the side hole to close it. The network cable will pass through the surface and the
bottom hole to the camera.
If the cables will be routed along the surface
, skip to the next step.
- Outdoor Hemispheric / Fisheye Dome on Straight Wall Outdoor Hemispheric / Fisheye Dome on Hard Ceiling Outdoor Hemispheric / Fisheye Dome on Vertical Pole with Tilted Mount (PMAX-0310) Outdoor Hemispheric / Fisheye Dome on Corner with Tilted Mount (PMAX-0310) Outdoor Hemispheric / Fisheye Dome on Dropped Ceiling Outdoor Hemispheric / Fisheye Dome on Tilted Wall