Installation, cont’d – Extron electronic SI 26 User Manual
Page 4
4
SI 26 and SI 28 Speakers • Installation
Installation, cont’d
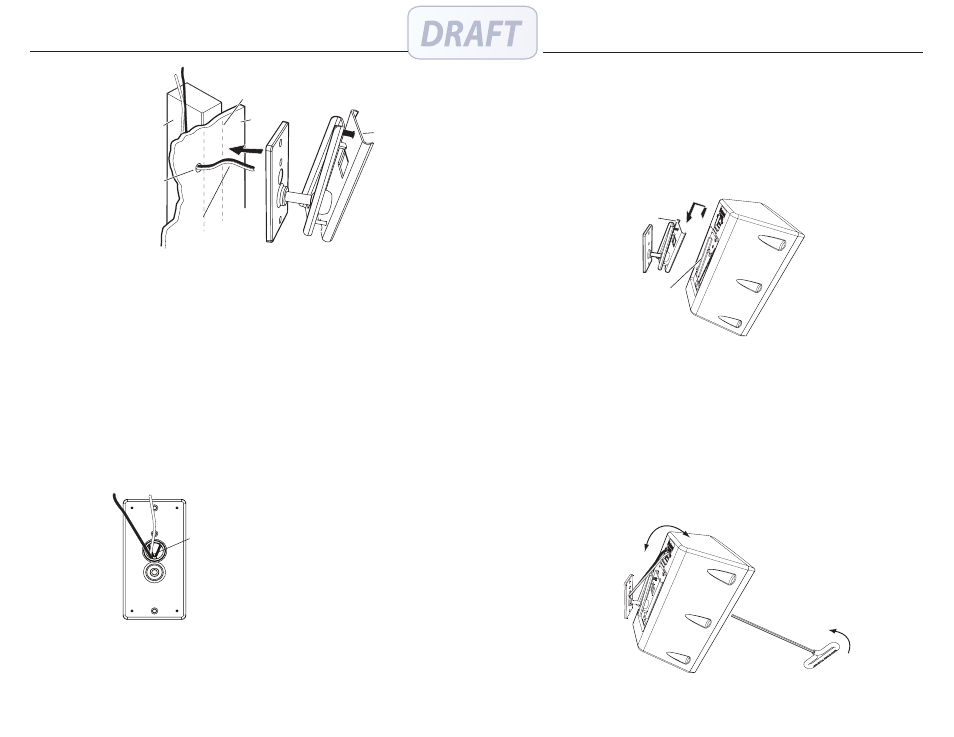
Cut access
hole alongside
stud and feed
wires though
hole.
Wall Stud
Wall Mount Assembly
Wall
Approximate Stud
line behind wall
Bend wire to line
up with access
hole in plate.
Screw
Figure 5 — Install wall mount assembly
N
Extron recommends that the wiring installation is
performed by a professional audio equipment installer.
5
.
Using compatible speaker wire (Extron recommends using
12-18 AWG), route the wire from the audio source to the SI
speaker location by the most convenient and safe route. If
the wiring is to remain hidden behind the wall, follow the
stud to where the small access hole has been cut, and feed
about two feet of wire out through the hole into the room.
If necessary, bend the wire to align with the plate (see
figure 5). Secure the wire at various places to the stud, but
allow enough freedom of movement near to the hole for
connection to the speaker
6
.
Pull sufficient wire up through the holes in the rear plate
(see figure 6) to allow ease of connection to the speaker
after installation.
Pass the wires
through the plate
access hole.
Figure 6 — Pass the wire through the plate
7.
Place the wall mount assembly against the wall, aligning
the plate holes with those drilled, and secure with
appropriate hardware.
5
SI 26 and SI 28 Speakers • Installation
8
.
When the assembly is securely in place, loosen the hex
cap screw (turn counter-clockwise) and rotate the front
section back into a vertical position with the hex cap screw
at the top. Using the allen hex tool, turn the hex cap screw
clockwise to tighten.
9.
Remove the cover from the back of a speaker and carefully
slide the speaker box bracket down into the V lock groove
until it locks into place (see figure 7).
Slide the speaker onto the
wall mount assembly.
Stage
Box
bracket
Figure 7 — Install speaker onto the wall mount
assembly
10.
To adjust the angle of the speaker, carefully remove the
Extron logo on the front of the speaker to expose the front
locking access (see Figure 1, Item 3, for location). Insert the
allen hex tool into the locking access, and slightly loosen
the hex cap screw. Adjust the speaker to the desired angle
(see figure 8), and torque the cap screw down clockwise
until snug. The speaker will sit securely in the desired
position. Install the Extron logo.
N
The Extron logo can be fitted either horizontally or
vertically.
Turn clockwise
to tighten.
Figure 8 — Adjust speaker and lock in place