Vuzix STAR 1200XLD AR System Quick Start Guide User Manual
Star, 1200xld, Ar eyewear system quick start guide
STAR
™
1200XLD
AR Eyewear System
Quick Start Guide
This Quick Start Guide describes a basic STAR 1200XLD installation on a W indows based personal
computer. These Quick Start instructions are intended for users experienced in software and hardware
installation. Full installation details are provided in the STAR 1200XLD User Guide.
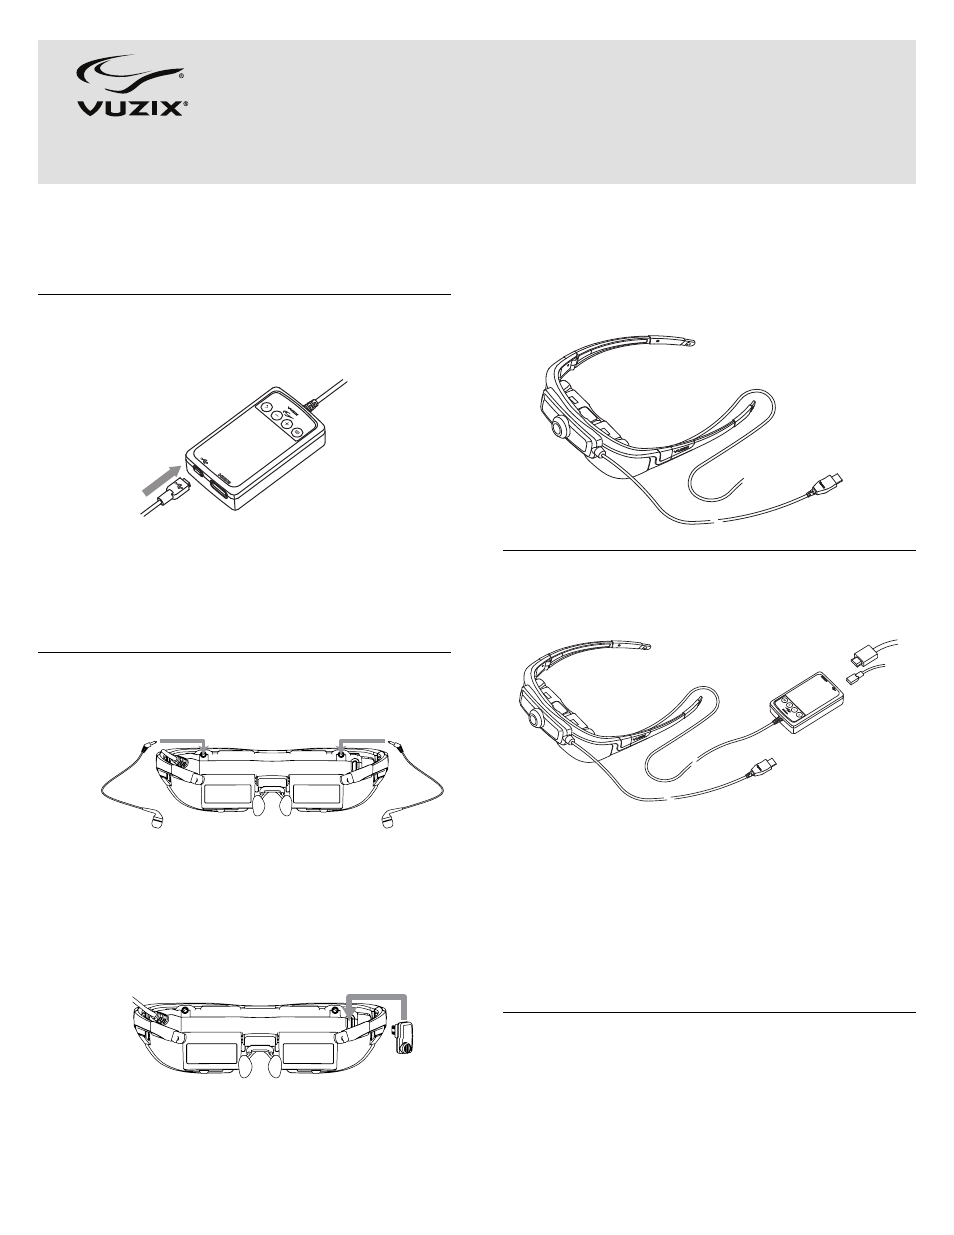
Step 1: Charging the Controller
§
Connect the Controller to the USB charger using the
“mini-B” USB cable and charger provided.
§
Allow the Controller to charge for a minimum of 4 hours
(preferably overnight) for its first charge.
Note: The Controller should be the only device connected to
the charger to enable the shortest charge time.
Step 2: Connecting Accessories
§
Plug the stereo earphones into the jacks above each of
the eyewear displays.
Note: Be sure to adjust the volume to a safe and comfortable
level before inserting the earphones into your ears. The
volume is controlled through the “+” (plus) and “–”
(minus) buttons on the Controller.
§
Plug the Tracker into its port, above and to the right of
the right-eye display.
§
Connect the Camera’s USB connector to a USB 2.0 port
on your computer.
Step 3: Connection the Eyewear & Controller
§
Connect the Controller’s USB connector to a USB 2.0
port on your computer.
§
Connect the Controller to your host device using the
provided HDMI cable.
Tip:
Additional adapters or cables may be required for your
installation. Be aware that some HDMI cables are not
1.4a compliant and may not provide the same level of
performance or support for DRM enabled video content.
See the User Guide for information on MHL Adapters.
Step 4: Fit & Adjustment
At this point your eyewear, camera and other components
will be operational but require adjustment or calibration for
optimal performance.
§
Press the “Power & Menu” button to turn the eyewear on.
Camera USB
to computer
HDMI
USB
USB