Installation instructions – Thermon RGS-SFK User Manual
Page 3
INSTALLATION INSTRUCTIONS
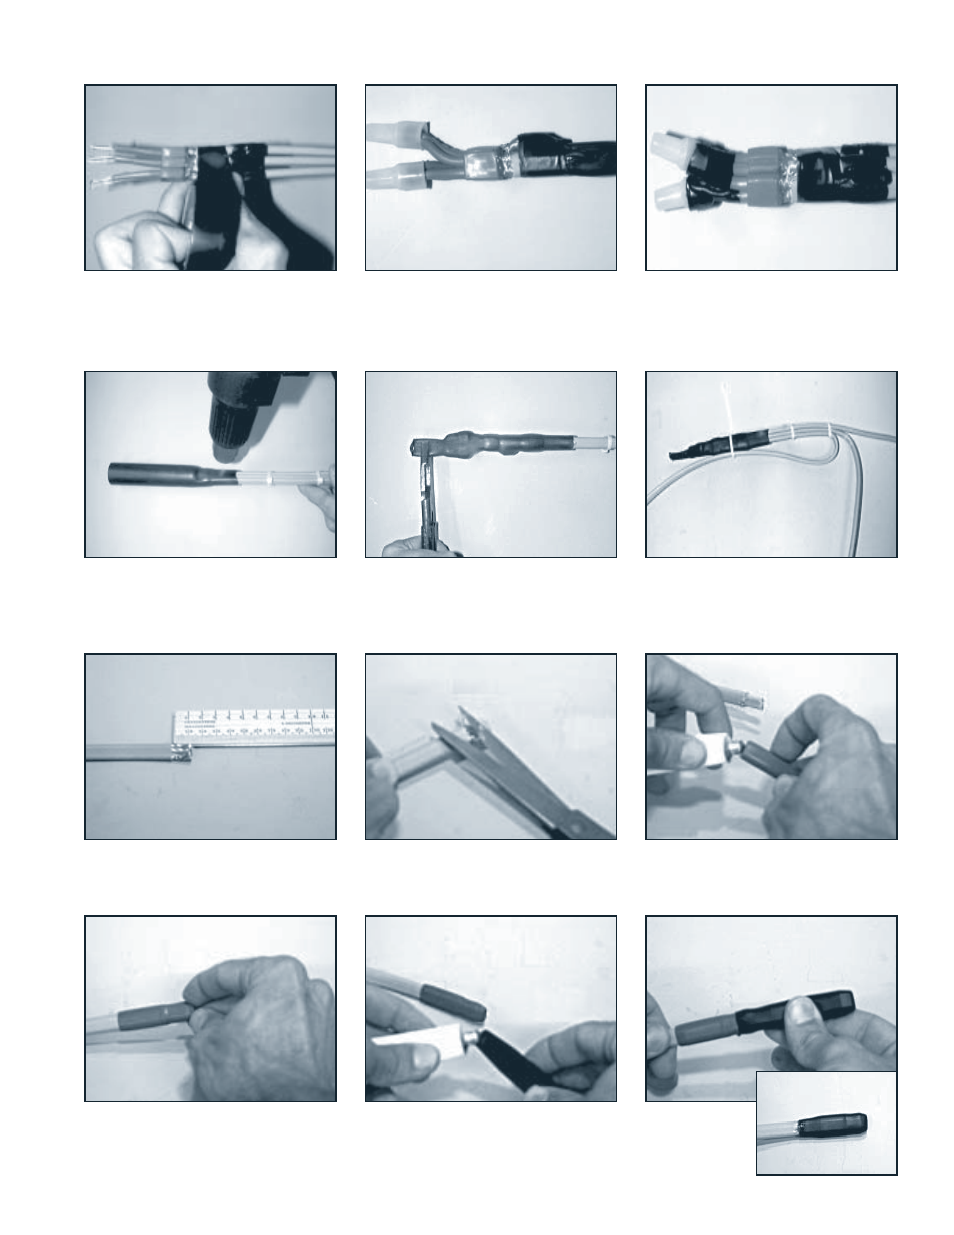
Step 10:
Wrap black electrical tape around
the cables and over the crimped lug.
Step 11:
Twist the bus wires of one side
of the cables together and repeat with the
other side, making sure that both wires
from any one cable do not get twisted to-
gether. Crimp insulating caps on each leg.
Step 15:
Fold the splice back on itself to
one of the outside cables and secure with
a tie wrap. For roof and gutter applications
secure the splice up and away from the
bottom of the gutter.
Step 12:
Wrap mastic tape around each
terminated leg and insulation cap.
Step 13:
Slide the 8" (20 cm) heat shrink
tube over the connection past the mastic
approximately 1" (25 mm) and shrink
from mastic end back toward the termi-
nated splice end.
Step 14:
Pinch heated shrink end with a
pair of pliers until the encapsulant cools
and seals.
End Termination . . .
Step 16:
Cut back overjacket 0.5"
(12 mm).
Step 17:
Trim ALL of the braid strands
back to the overjacket with scissors.
Step 18:
Fill the smaller end cap with RTV.
Step 19:
Slide the end cap on the end of
the cable until fully seated.
Step 20:
Put a small amount of RTV into
the opening of the larger over-cap.
Step 21:
Slide
the over-cap
over the end cap
until fully seated.