Microphone preamplifier gain – Studio Technologies 200 User Manual
Page 13
Issue 3, August 2004
Model 200 User Guide
Page 14
Studio Technologies, Inc.
To prevent unauthorized personnel from
changing configuration settings, a security
plate is attached to the bottom of the Model
200’s enclosure. For convenience, attached
to the security plate is a configuration set-
tings label. It provides a summary of the
configurable parameters and related infor-
mation. Refer to Appendix A for a represen-
tative view of the label. The security plate
is held in place by means of four rubber
bumpers (“feet”) that have built-in screws.
Using your fingers, remove the four bum-
pers so that the plate becomes loose.
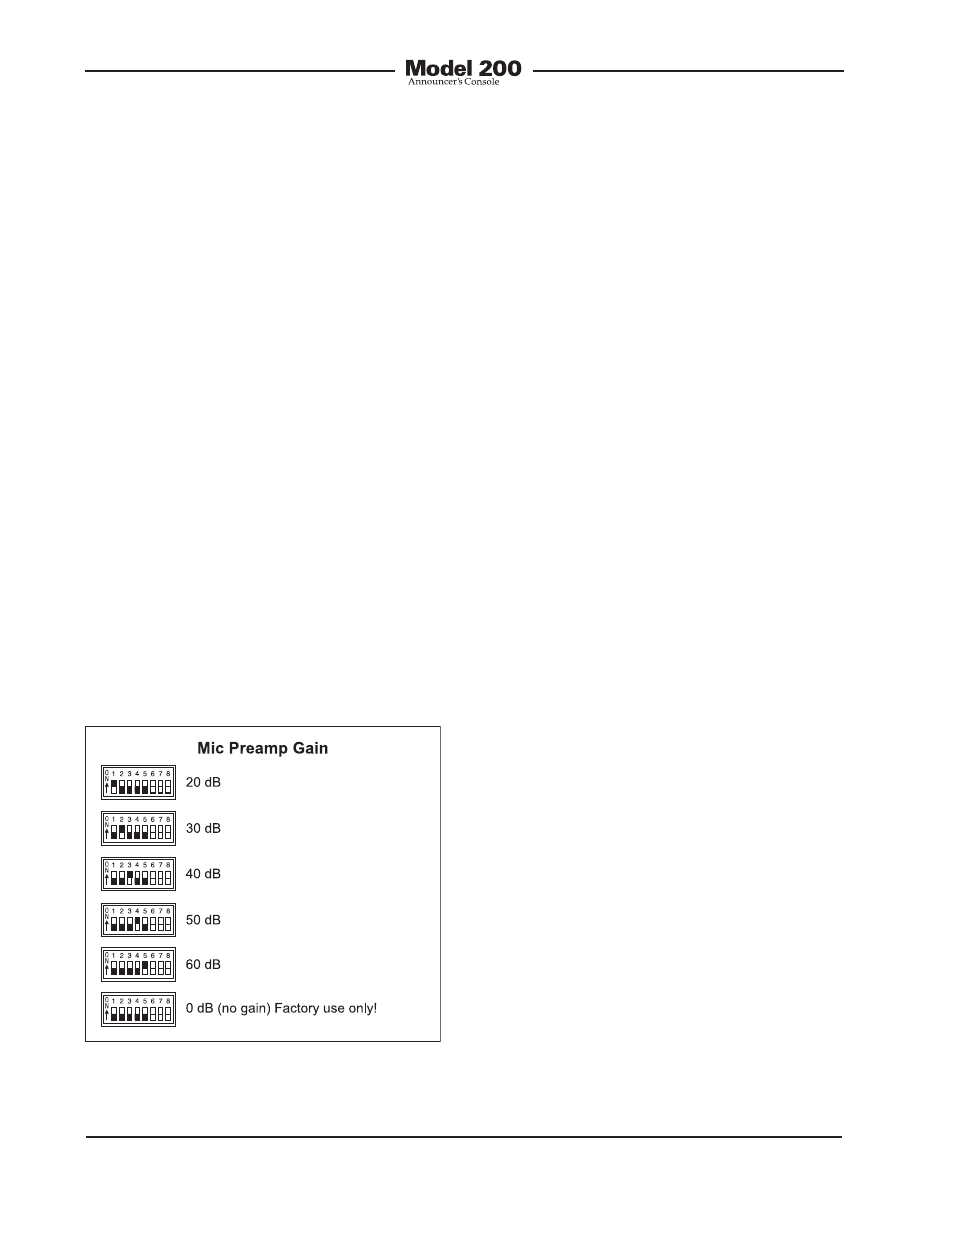
Microphone Preamplifier Gain
Switch positions 1-5 are used to select the
gain of the microphone preamplifier. The
choices are 20, 30, 40, 50, and 60 dB. Only
one switch should be enabled at a time.
There’s no problem changing the gain set-
ting while the unit is operating. Audio clicks
or pops might occur during gain transitions,
but this shouldn’t be a major issue as long
as associated monitor loudspeakers are
temporarily attenuated or muted.
Selecting the correct amount of gain for an
application might take a little experimenta-
tion. The goal is to bring the mic’s signal up
to line level, nominally –2 dBu for the Model
200’s main output. Operating at this sig-
nal level will help to ensure the delivery of
“clean” audio to the connected device.
The output of the Model 200’s microphone
preamplifier is used by both the main and
talkback outputs. So creating a nice “hot”
signal will help maintain audio quality,
specifically the signal-to-noise ratio, when
driving the often-lengthy cable runs.
Unfortunately, there’s no “perfect” gain
setting that this guide can recommend.
The two issues that impact the setting are
output sensitivity of the connected micro-
phone and the acoustical output level of
the microphone’s user. With some head-
set microphones, such as the Sennheiser
HMD25, selecting an initial setting of 40 dB
is be appropriate. Users who speak loudly
might need to have the gain reduced to 30
dB. Quiet users might need 50 dB of gain.
It’s expected that the 20 and 60 dB gain
settings will not often be used. But there are
always exceptions and that’s why they were
included. It’s possible that with a very “hot”
microphone, such as a phantom-powered
condenser-type, 20 dB of gain could be
correct. It’s also possible that a microphone
with a very low-level output, such as a
ribbon-type, would need 60 dB of gain.
But in general, the 30, 40, and 50 dB gain
settings will serve most applications.
Note that if no gain switch is set to its active
(on) position the preamplifier will operate at
unity (0 dB) gain. In this mode the preampli-
fier remains stable, but is intended for use
only during factory testing. The only excep-
tion would be a special application where
a line-level signal was connected to the
Figure 4. Microphone preamplifier gain switch
settings