Hardware installation available configurations – Smart Avi StretcherPro-HD User Manual
Page 6
6
www.smartavi.com
1. Turn off the StretcherPro-HD.
2. Connect the HDMI source (i.e. PC, Blu-Ray Player, Digital Signage, etc.) to the HDMI
INPUT port of the StretcherPro-HD using HDMI cables.
3. Connect the (4) monitors to the (4) HDMI OUTPUT ports of the StretcherPro-HD using
HDMI cables for HDMI monitors and TVs, or HDMI-to-DVI adapters for DVI displays.
4. Connect the IR receiver to the IR input jack at the back of the StretcherPro-HD.
5. Optionally connect an RS-232 cable from PC to the RS-232 port of the unit for additional
control.
6. Turn on the StretcherPro-HD.
7. Wait for a few seconds for the unit to initialize.
Hardware Installation
Available Configurations
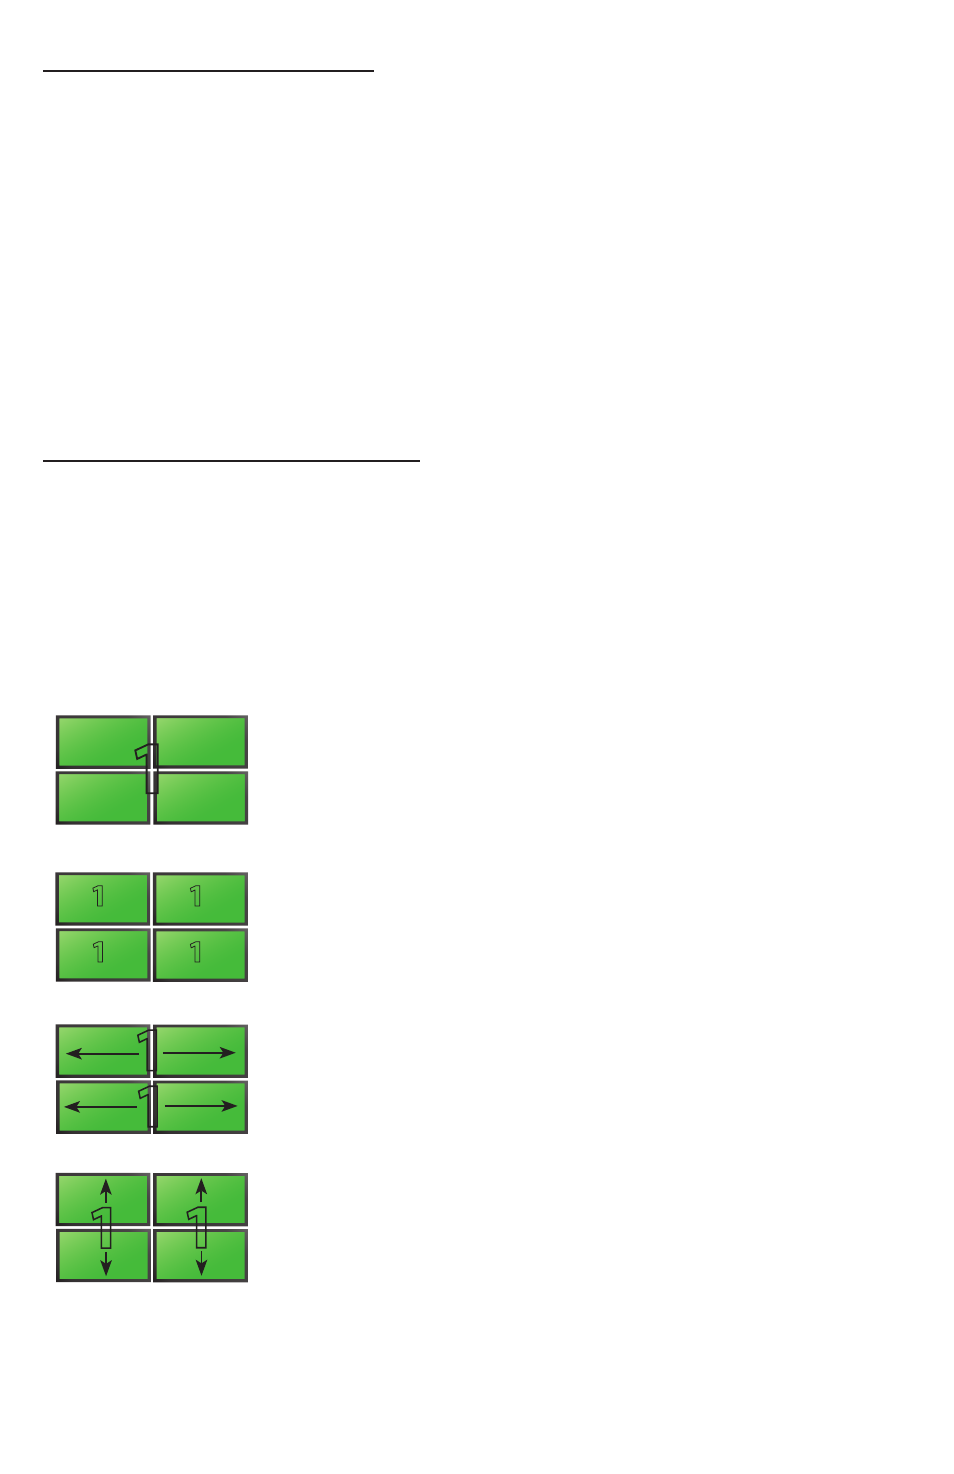
There are four different configurations or modes that are easy to navigate through with the
StretcherPro-HD. Switching between the display modes is simple. The front panel buttons, IR
remote control, OSD, RS-232 console command, and TCP/IP can be used to switch between
modes.
VIDEO WALL MODE: Users can project the input image across
four HD screens (2x2 configuration). With screen resolution of
1920x1080, users can create a stunning 4K resolution video wall
display.
DUAL VERTICAL: Users can route the input image over two
vertically arranged screens two times over, creating a unique
and flexible vertical display option.
CLONE MODE: Users can route the input image to each
display individually, creating a simple and effective digital
signage display.
DUAL HORIZONTAL: Users can route the input image over
two horizontally arranged screens two times over, creating a
unique and flexible horizontal display option.
1
1
1
1
1
1
1
1 1