Custom installation, Installation diagram – Smart Avi SignWall User Manual
Page 9
9
www.smartavi.com
Custom Installation
1
2
3
4
FRONT of 2X2 Video Wall
1
1
2
IN
OUT
2
3
3
4
4
1
2
3
4
EDID-Mirror-4P
SignWall
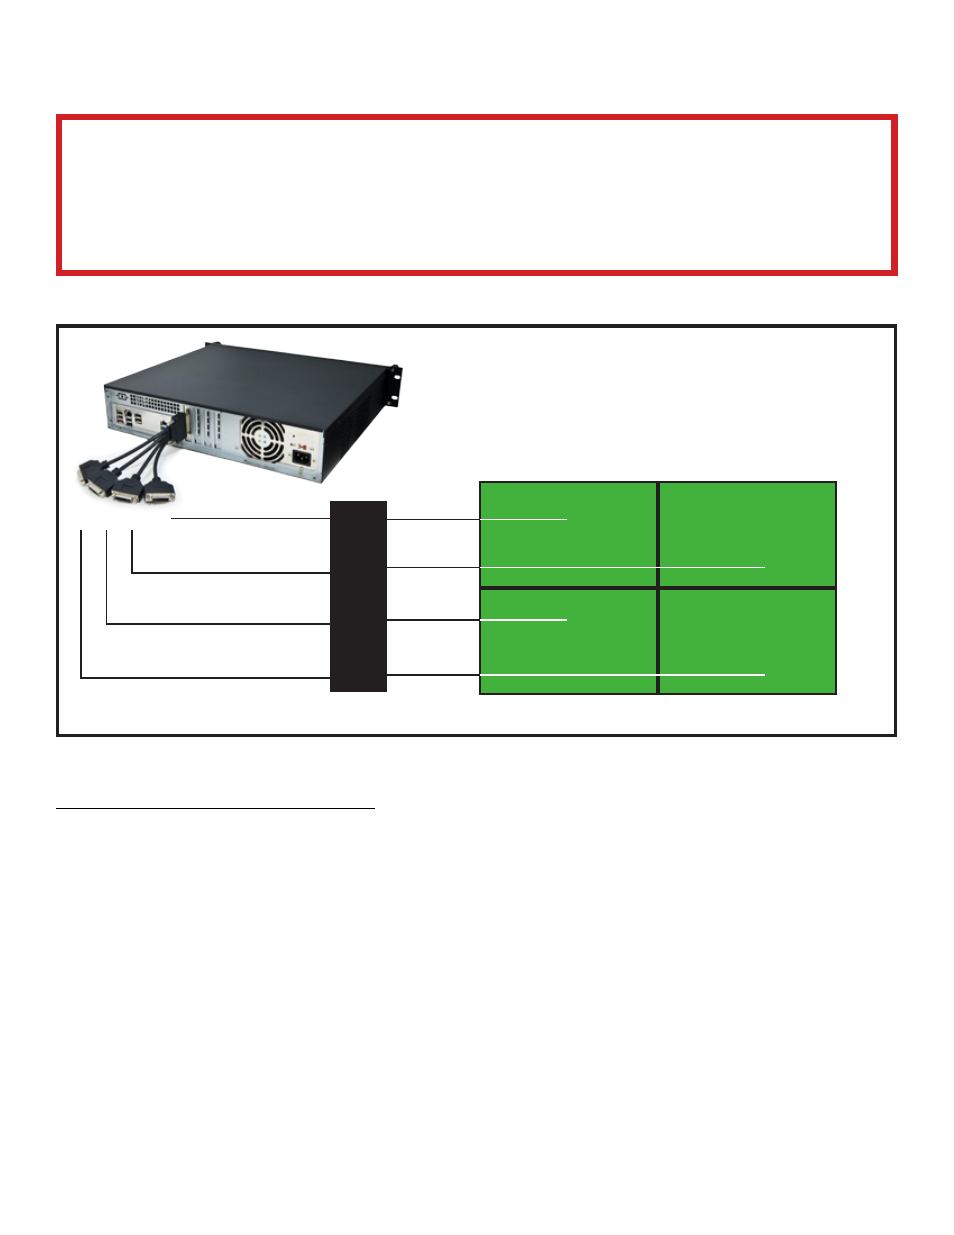
Installation Diagram
Connecting the Hardware
1. Connect all the DVI-D cables from the SignWall processor to the EDID-Mirror-4P and to the
Video Wall as shown in the above diagram.
2. Plug in the green ASUSBKEY to any available USB port.
3. Power on the EDID-Mirror-4P by plugging it in.
4. Power on the Displays.
5. Power on the SignWall processor.
IMPORTANT: The SignWall is already pre-configured for use.
Please refer to the Quick Installation on the previous page.
If you are sure you want to completely re-configure the SignWall
settings, follow the instructions below: