Installing as a serial ascii printer (windows) – Dymo SE450 User Manual
Page 5
3
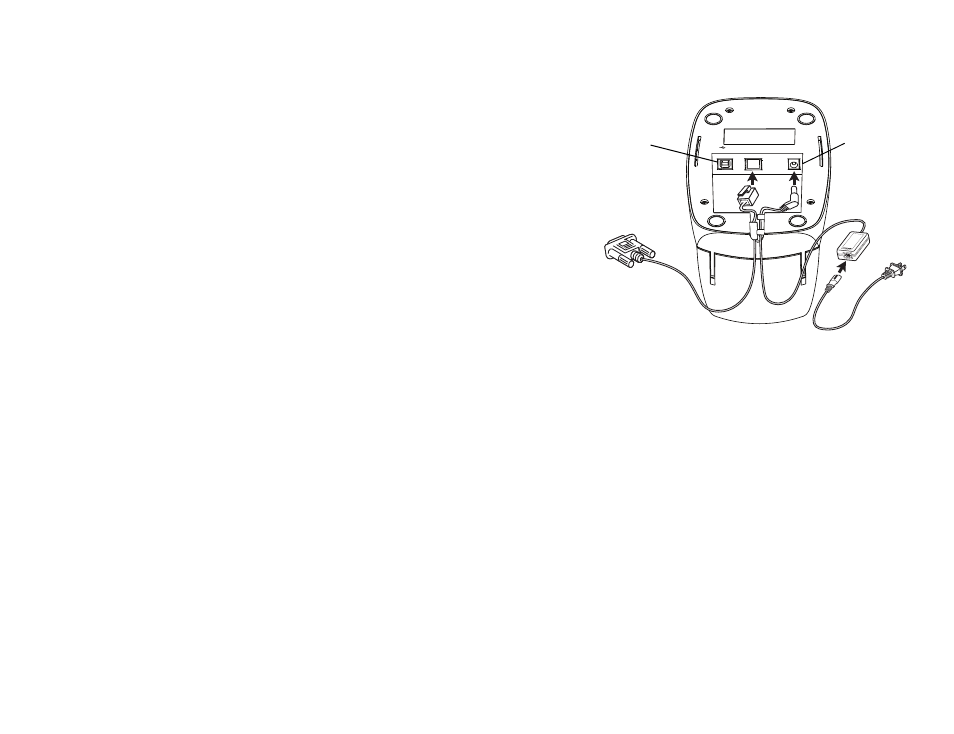
Installing as a Serial ASCII Printer (Windows)
1
Plug the end of the serial cable with the RJ11 connector
into the serial port on the bottom of the printer. See
Figure 3.
2
Connect the 9-pin serial connector to an available serial
port on your computer or device, as appropriate.
3
Plug the power cord into the power adapter.
4
Plug the power adapter into the power connector on the
bottom of the printer.
5
Insert the cables through the cable channel.
6
When all the cables are connected, plug the power cord
into an electrical outlet.
7
Configure the printer port with the appropriate settings.
The printer default settings are:
Baud Rate: 9600
Data Bits: 8
Stop Bits: 1
Parity: None
Follow the instructions in "Loading Labels" on page 6 to correctly load labels onto the spool and
insert the spool into the printer.
USB
10101
24VDC
Figure 3
10101
24VDC