Rena XPS-ProFeed Shuttle User Manual
Page 13
SETUP AND OPERATIONS
-
7
-
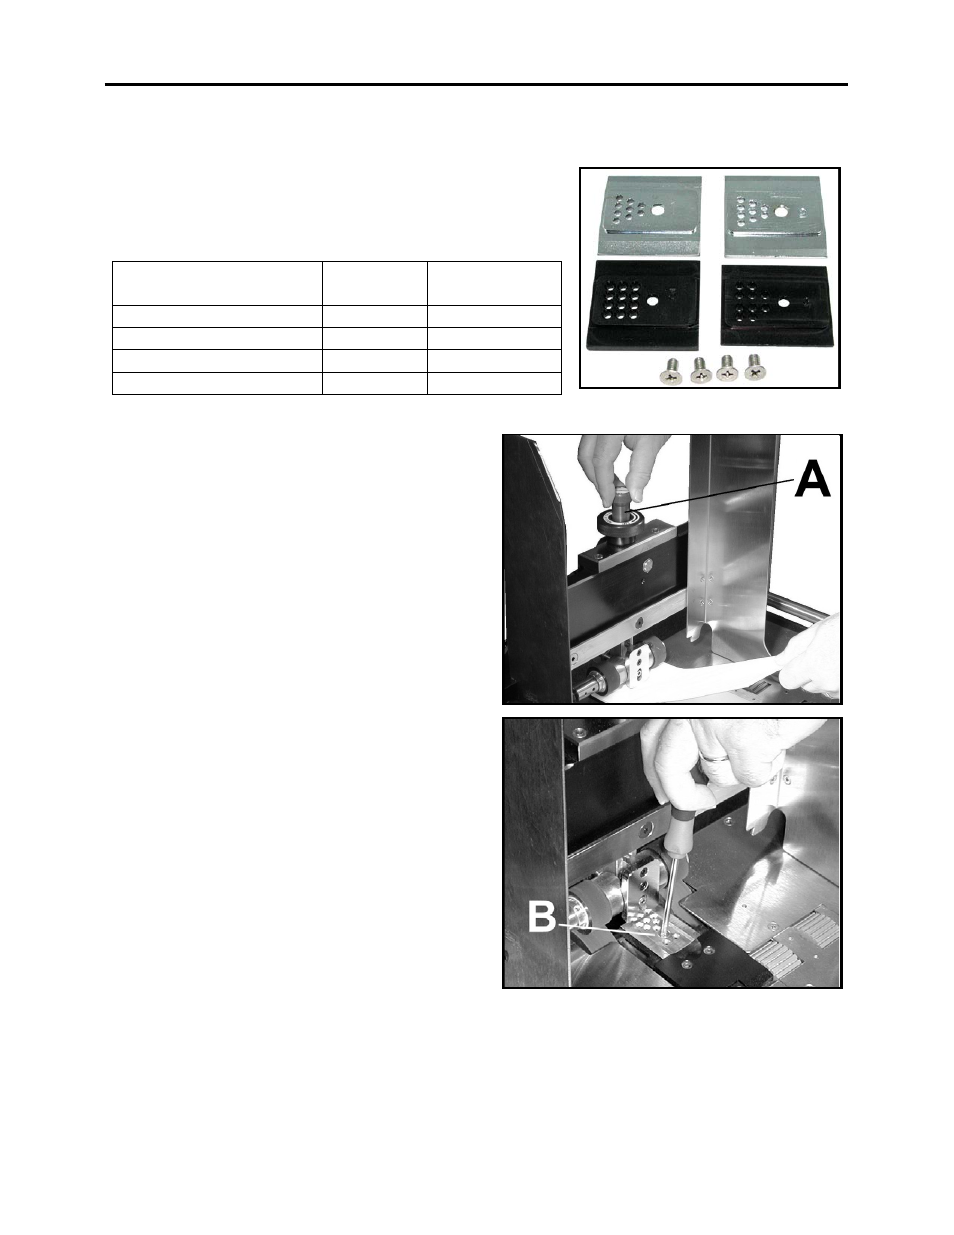
Step 2 - Choose and Install the Proper Vacuum Plate
Included with the Shuttle Feeder are four Vacuum Plates.
Each one works best with a specific type of media. Refer to
the chart below and select the plate for the media you will
be feeding:
MEDIA
VACUUM
PLATE
PART NO.
Single sheets of paper.
1
28-105-35
Thin postcard stock
2
28-105-36
Thick media up to ½ inch
3*
28-105-37
Folded Media
4
28-105-38
*Use the P/N 28-105-45 Rear Pusher on media 1/4-inch or thicker to improve feeding.
1. NOTE: If you are simply changing a
Vacuum Plate (rather than doing a full
Feeder setup), first check that the
Separator is in the fully raised position [A]
(See Step 1, “Verify that the Vacuum
Shuttle is in the “Home” Position”).
2. Remove the Phillips screw holding the
Vacuum Plate to the Vacuum Arm [B].
3. Remove the Vacuum Plate
4. Install the desired Vacuum Plate and
secure it using the small countersunk
Philips screw (123-0002).
CAUTION!
Contact between the Sheet Separator
and Vacuum Plate will cause damage. Please be aware
that changing to the Vacuum Plate will change the
distance between the Vacuum Plate and Sheet
Separator. Before running the feeder, please be sure
there is no contact between the bottom of the Sheet
Separator and the Vacuum Plate.