Danby DFF1044W/BLS User Manual
Page 4
17
Con frecuencia, los problemas no son muy importantes, y es posible que no se requiera unallamada de servicio, use la guía
para la resolución de problemas para tratar de encontrar unaposible solución. Si la unidad continua funcionando en forma
incorrecta, llame a una estaciónde servicio autorizada o al Número de Teléfono de Llamada Gratis de Danby, para
recibirasistencia.
Dificultad
Causa posible
Solución sugerida
No funciono.
No hay voltaje en el contacto.
Verifique que la clavija esté conectada.
Clavija desconectada.
Conecte la clavija.
Voltaje fuera de especificaciones.
Verifique que haya corriente adecuada.
Trabajo muy frecuentemente.
Control en frio maximo o cerca.
Verifique la posición y ajuste a su gusto.
Puerta mal cerrada.
Cierre bien la puerta.
Aumentos muy calientes en interior.
Asegurese de meter los alimentos no muy calientes.
Demasiadas o muy prolongadas
NO mantenga la puerta abierta por grandes
aperturas de puerta.
periodos de tiempo. MÍNIMO aperturas de puerta.
Recibo luz solar directa o estoy
NO coloque su refrigerador cerca de fuentes de
cerca de fuentes de calor.
calor o de los rayos de sol.
Temperatura interior es
Control en frio maximo o cerca.
Verifique la posición y ajuste a su gusto.
muy fria.
Temperatura interior es
No hay voltaje en el contacto.
Verifique que la clavija esté conectada.
poco fria.
Clavija desconectada.
Conecte la clavija.
Control en 1 o cerca.
Verifique la posición y ajuste a su gusto.
Puerta mal cerrada.
Cierre bien la puerta.
Aumentos muy calientes en interior.
Asegurese de meter los alimentos no muy calientes.
Demasiadas o muy prolongadas
NO mantenga la puerta abierta por grandes
aperturas de puerta.
periodos de tiempo. MÍNIMO aperturas de puerta.
Charolas muy grandes bloquean
Permita los espacios sugeridos para que el
la circulacion del aire en interior.
aire circule.
Voltaje fuera de especificaciones.
Verifique que haya corriente adecuada.
Recibo luz solar directa o estoy
NO coloque su refrigerador cerca de fuentes de
cerca de fuentes de calor.
calor o de los rayos de sol.
Congelador es poco frio.
Control en 1 o cerca.
Verifique la posición y ajuste a su gusto.
Puerta mal cerrada.
Cierre bien la puerta.
Aumentos muy calientes en interior.
Asegurese de meter los alimentos no muy calientes.
Demasiadas o muy prolongadas
NO mantenga la puerta abierta por grandes
aperturas de puerta.
periodos de tiempo.
Voltaje fuera de especificaciones.
Verifique que haya corriente adecuada.
Foco no enciende.
No hay voltaje en el contacto.
Verifique que la clavija esté conectada.
Clavija desconectada.
Conecte la clavija.
Foco flojo o fundido; el interruptor
Ajuste el foco, o reemplácelo. Verifique que el
de puerta pegado.
interruptor no esté pegado.
Solución sugerida
2
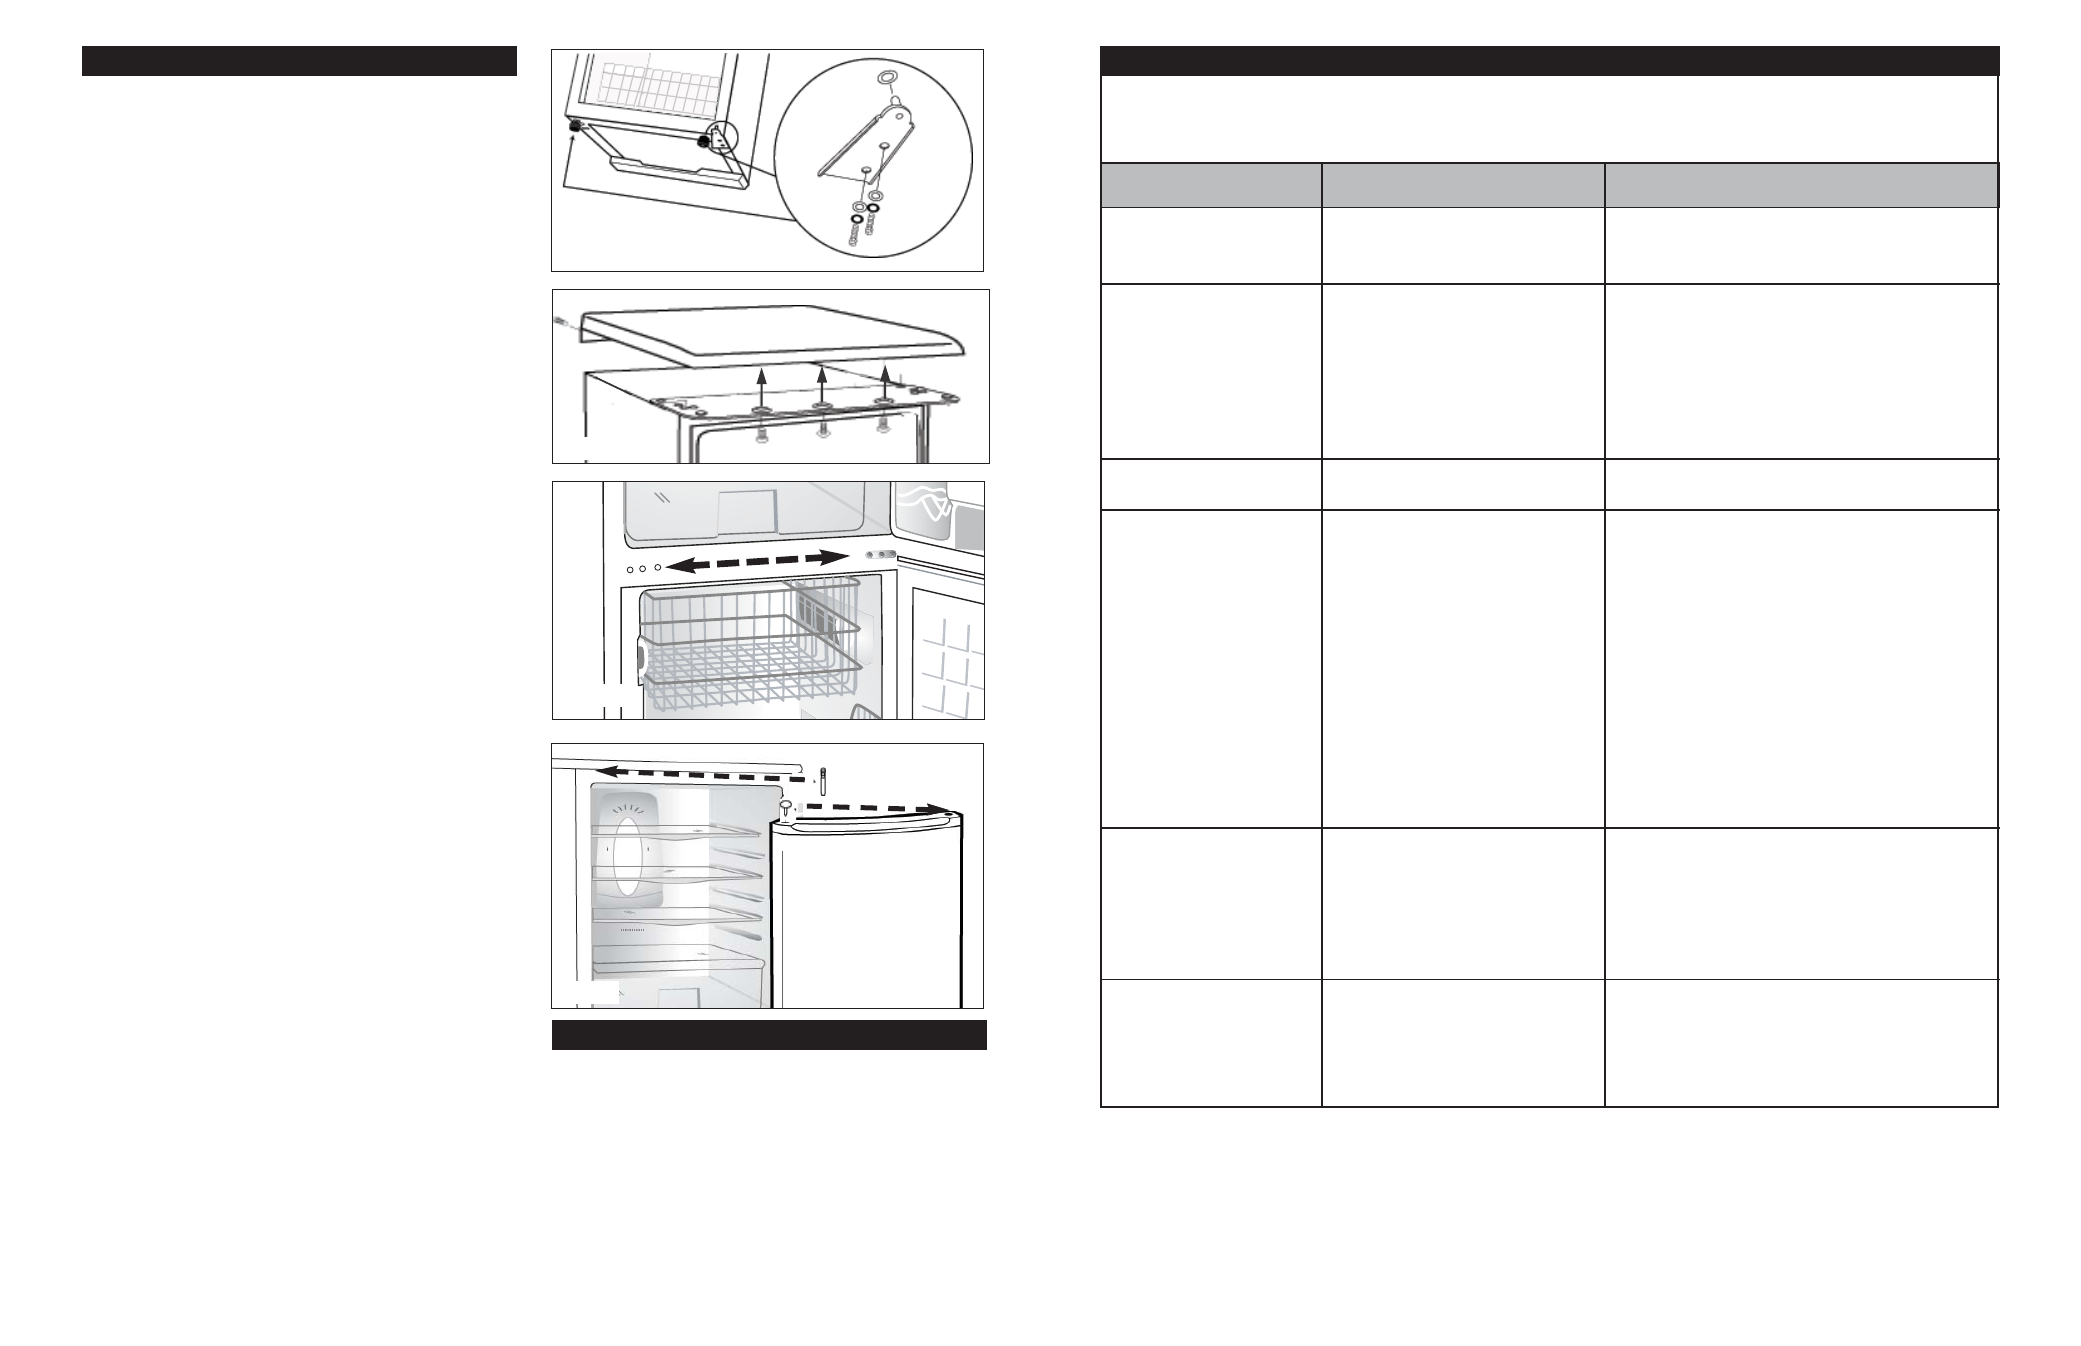
CAUTION: To avoid personal injury to yourself and/or
property, we recommend someone assist you during
the door reversal process.
1.
To access the lower hinge assembly, tilt back the
refrigerator cabinet or lay the refrigerator on its back.
(Fig. A)
2.
Remove both leveling legs located at the front of the
cabinet.
3.
Remove the screws holding the lower hinge assembly
to the cabinet.
(Fig. A)
4.
Remove the freezer door assembly from the
refrigerator cabinet.
(open door and pull down)
5.
Remove the worktop to access and disconnect the
wiring harness connectors (2) from the control panel
wiring.
(Fig. B)
6.
Remove the screws from the middle hinge assembly.
Then remove the hinge and main door.
7.
Remove
(unscrew)
the top hinge pin.
(Fig. D)
8.
Re-install the fresh food door top hinge pin on the
opposite side of the cabinet.
(Fig. D)
9.
Remove the door plugs and door bushings located on
the top and bottom of each door assembly.
10. Insert the detached control panel connectors into
the cavity (where the
bushing
was removed) on the
right side of the fresh food door.
11. Extract the left side control panel connectors from
the left side cavity (where the
plug
was removed) of
the fresh food door and reconnect to the main wiring
harness - white to white, black to black.
12. Re-install worktop.
13. Interchange positions of plugs and bushings on both
doors.
(ie. door plug right side, door bushing left side.)
14. Re-install main door assembly on cabinet.
15. Re-install the middle hinge assembly on the
opposite side.
(Fig. C)
16. Make sure the door assembly is properly aligned on
the cabinet, before tightening hinge screws.
17. Re-install freezer door assembly on cabinet.
18. Re-install the lower hinge assembly on the opposite
side. Making sure to change bushing and screw on
opposite sides on bottom of unit
19. Make sure the door assembly is properly aligned on
the cabinet, before tightening lower hinge screws.
20. Re-install both leveling legs.
The process is now complete.
Fig. A
Fig. D
Door Reversal Instructions
To replace the refrigerator light bulbs:
1. Remove the top two shelves from the cabinet.
2. Remove the screw from the upper portion of the
light bulb cover.
3. Pull the light bulb cover outward to remove it.
4. Unscrew the bulb(s).
5. Replace with a 120V/15 Watt bulb only.
Light Bulb Replacement
Fig. B
Fig. C