Cha pter 9 remote sur veillance & pla yback – Q-See QSDT16PCRC User Manual
Page 34
66
67
CHA
PTER
9 REMOTE SUR
VEILLANCE & PLA
YBACK
PICTURE 9-35
PICTURE 9-36
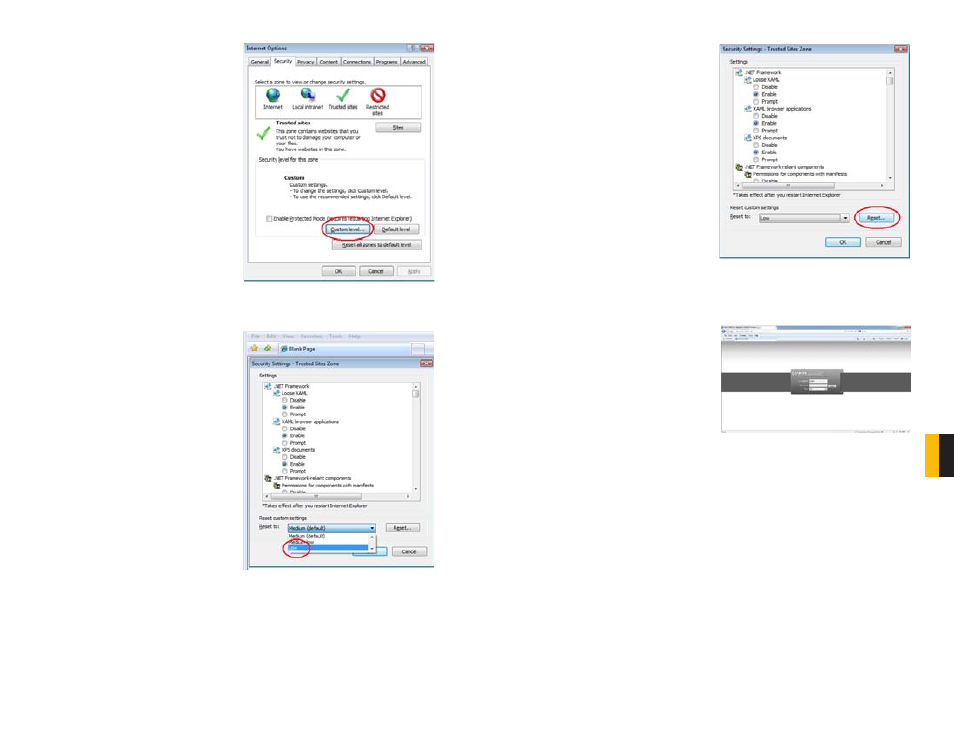
STEP 11. Click the Custom level…
button.
STEP 12. Pull down the “Reset to:”
menu button and select Low
PICTURE 9-37
STEP 13. Click the Reset button
STEP 14. Click “Yes” when asked, “Are
you sure you want to change the
setting for this zone?”
STEP 15. Click OK
STEP 16. Click Apply
STEP 17. Click OK
STEP 18. Close Internet Explorer
You are now ready to access the DVR using Internet Explorer.
PICTURE 9-38
Open a browser window in Internet Explorer
and enter the IP address or DDNS name
(obtained in Section 9.3 DDNS (Dynamic
Domain Name Service)) into the address
bar.
You will see a log in screen similar to that
shown in
Picture 9-38
or yellow alert bar at
the top of the window asking for permission
to open an ActiveX application. Allow it to
install
webrec.cab control to reach the
sign-in screen.
Instructions for controlling your system
remotely are in the next section.