Service and adjustments – DeVillbiss Air Power Company D23757 User Manual
Page 15
15- ENG
D23757
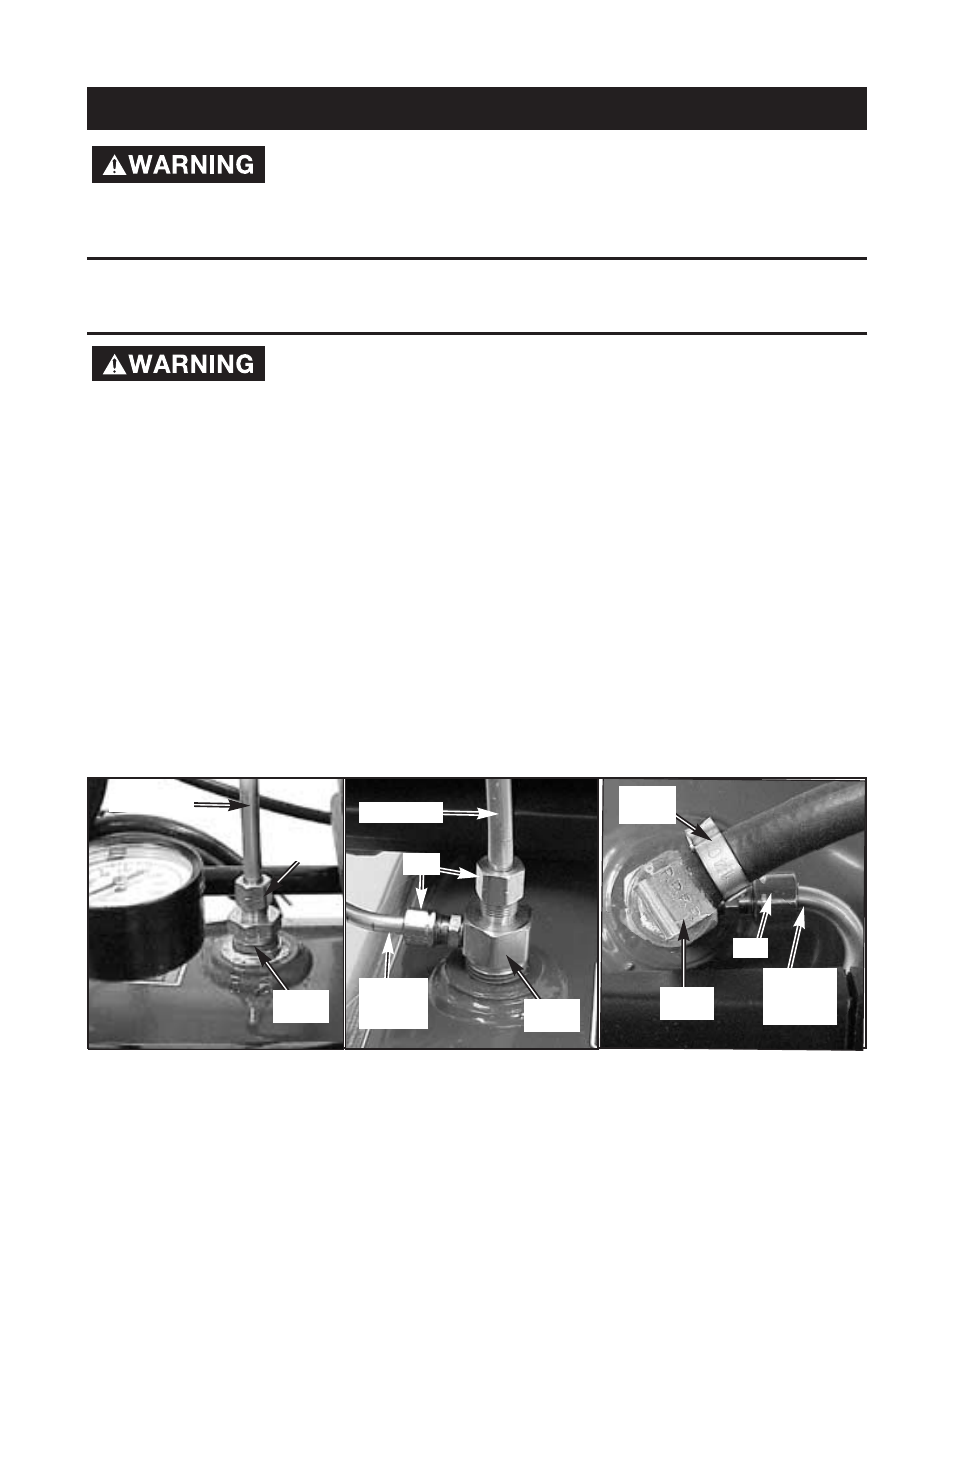
To Replace or Clean Check Valve
1.
Release all air pressure from air tank. See “To Drain Tank” in the
Maintenance section.
2.
Unplug outfit.
3.
a.
(if equipped) Remove the hose by removing the hose clamp.
NOTE: The hose clamp is not reusable. You must purchase a new
hose clamp, see the Parts List Manual or purchase a standard hose
clamp at a local hardware store.
b.
(if equipped) Loosen the nut on the pressure release tube and move
the tube to the side.
4.
Unscrew the check valve (turn counter-clockwise) using a socket wrench.
5.
Make sure the valve disc moves freely inside the check valve and the
spring holds the disc in the upper, closed position. The check valve may
be cleaned with a solvent, such as paint and varnish remover.
6.
Apply sealant to the check valve threads. Reinstall the check valve (turn
clockwise).
7
a.
(if equipped) Replace the pressure relief tube and tighten the nut.
b.
(if equipped) Replace hose and new hose clamp.
8.
Perform the Break-in Procedure. See “Break-in Procedure” in the
Operation section.
SERVICE AND ADJUSTMENTS
Unit cycles automatically when power is on. When doing
Maintenance, you may be exposed to voltage sources, com-
pressed air or moving parts. Personal injuries can occur. Before performing any
Maintenance or repair, unplug the compressor and bleed off all air pressure.
ALL MAINTENANCE AND REPAIR OPERATIONS NOT LISTED MUST BE PER-
FORMED BY TRAINED SERVICE TECHNICIAN.
Before servicing:
●
Unplug or disconnect electrical supply to the air compressor.
●
Bleed tank of pressure.
●
Allow the air compressor to cool.
Nut
Check
Valve
Outlet Tube
Outlet Tube
Check
Valve
Nut
Pressure
Relief
Tube
Pressure
Relief
Tube
Hose
Clamp
Nut
Check
Valve