Posa start connections, Spool gun connections, Section 6 operation – MK Products WC-1-110 User Manual
Page 12: General, J5 j6
Owner’s Manual - Page 11
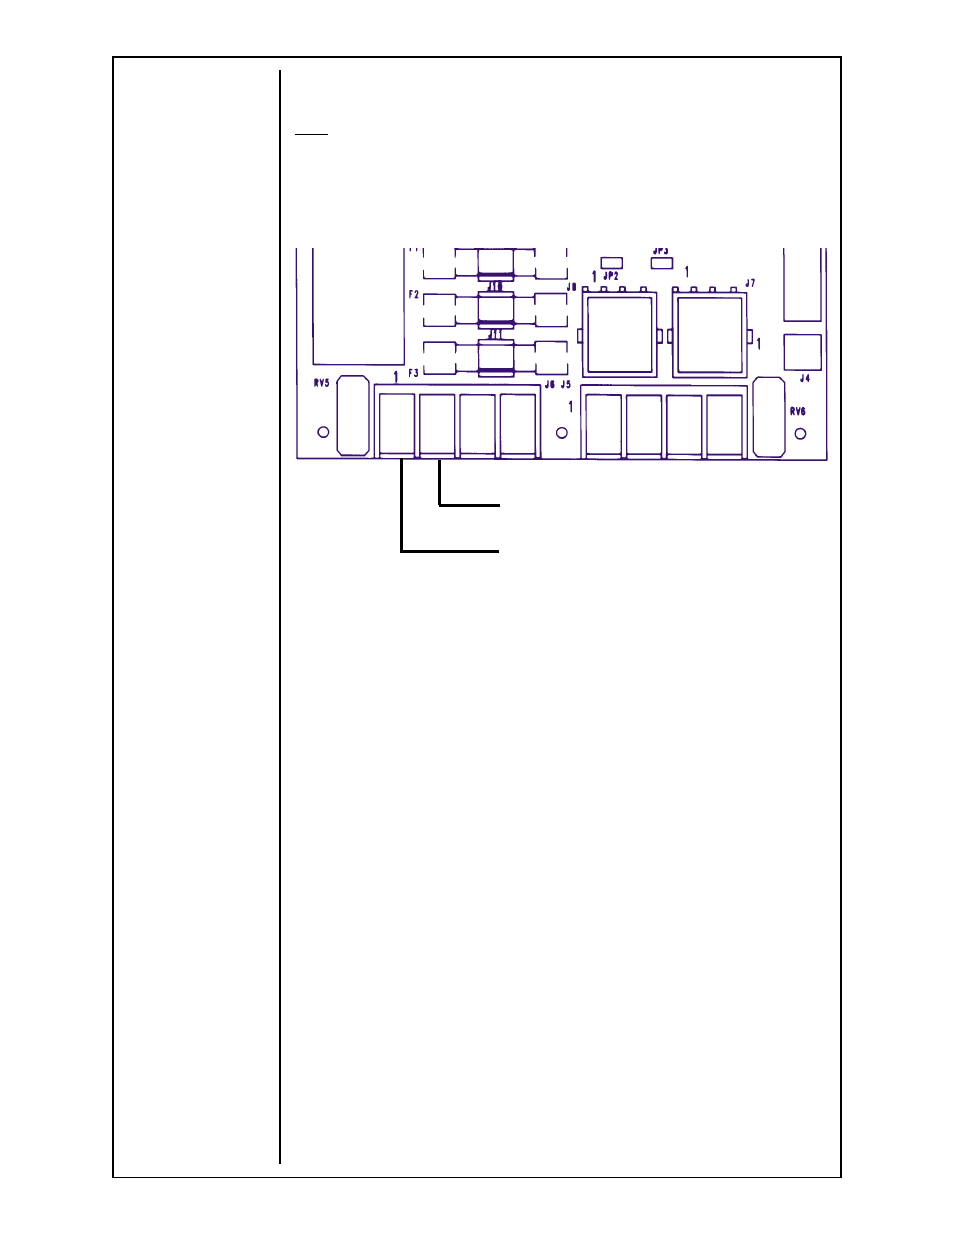
Posa Start Connections
When using a constant current power supply, the Posa Start sensing leads
must be connected to the power source. Place the red wire on the power
supply positive terminal and the green wire on the power supply negative
terminal. When using a constant voltage power supply, the sensing leads
need not be connected, and the Posa Start should be turned off. The Posa
Start Sense Leads are internally connected to the P.C. Board on terminal strip
J6 terminal 1 (red) and terminal 2 (green).
Spool Gun Connections
Connect the gun control cable amphenol plug to the WC-1, and secure.
Attach the power cable lug from the gun to the positive terminal of the power
supply, and the negative terminal of the power supply to work ground.
Connect gas hose to regulator/flowmeter on gas supply.
Section 6
OPERATION
General
The WC-1 is designed to interface the Prince
®
XL Spool Gun to most DC
Constant Current, Constant Voltage, and pulsed power supplies.
The Posa Start feature allows the WC-1 to be used in combination with
constant current DC welding power sources of open circuit voltage in excess of
55 volts.
NOTE:
Reverse polarity MUST be used)
CAUTION:
Do not operate a WC-1 on a power source having a high frequency
starting circuit before making sure that the high frequency
portion of the power source is turned off. Failure to take this
precaution will cause permanent damage to the posa start circuitry.
The Posa Start Run-in Speed Control, located on the front panel, provides
adjustment for slow wire run-in. Once the arc has been established, the wire
feed speed is automatically changed from the slow run-in speed to the welding
speed set on the torch potentiometer.
WORK
J5
J6
4
4
4
4
4
3
3
3
3
3
2
2
2
2
2
1
1
1
1
1
4
4
4
4
4
3
3
3
3
3
2
2
2
2
2
1
1
1
1
1
+ WELD
RED
GREEN