20 caution, A. insufficient or excessive compression, B. table/clincher bracket adjustment (figure 18) – MBM Corporation BINDERYMATE 2 User Manual
Page 22: C. clincher (figure 19)
20
CAUTION
Turn Power OFF Before making Any
Adjustments
A. Insufficient or Excessive
Compression
Proper compression of work between the clincher
and the bender bars is necessary so that the stitch
penetrates the work material and clinches correctly.
To test for compression, drive several stitches into
sample work material. With proper compression,
stitches hold the work together firmly and the clinched
legs do not overlap. In the following instances,
either one or all of the conditions may exist: with
insufficient compression, stitch legs overlap, crown
of the stitch is fractured, and the work mutilated.
To change compression adjust the table/clincher
bracket.
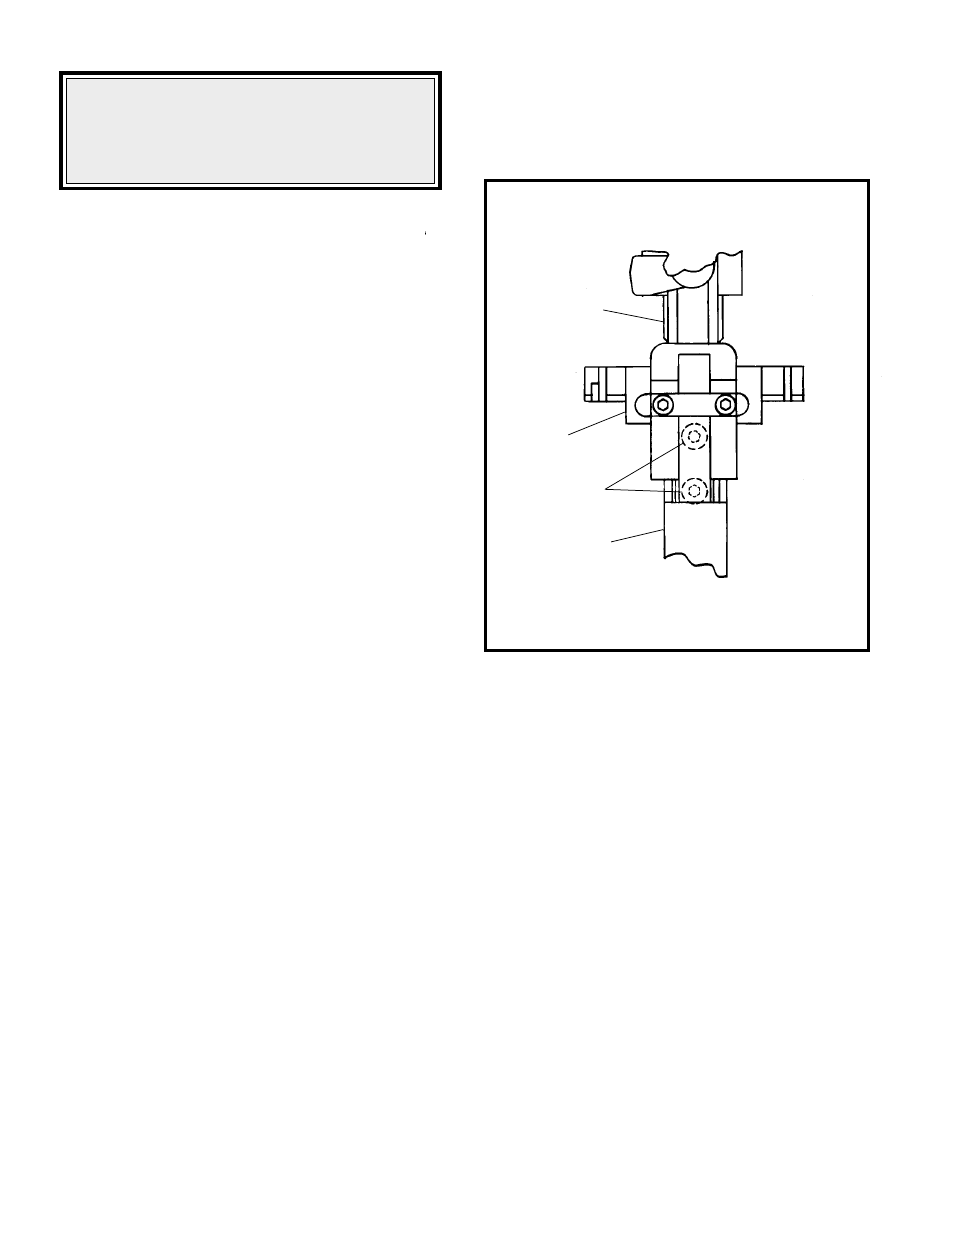
B. Table/Clincher Bracket
Adjustment (Figure 18)
1. Remove wire from rotator, and turn the jog knob
clockwise until the bender bar is fully down.
2. Loosen the two screws (Index A) securing the
table/clincher bracket (Index B) to the stand
(Index C).
3. Move the table/clincher bracket up until the top
of the clincher assembly squarely touches the
bottom of the fully lowered bender bar. (Index
D)
4. Retighten the two screws.
C. Clincher (Figure 19)
The purpose of the clincher is to turn the legs of the
stitch back after they have penetrated the work
material.
With the Activated (moving) Type clincher, the stitch
legs must enter the clincher at the same time and
with equal spacing from each side. When the stitch
legs have penetrated the work material, the moving
clinchers are raised to bend the legs towards each
other and up flat against the work. The clincher
points must bend both legs of the stitch against the
work with the same force. Clincher points must
always move freely and not bind. Dirt, wire chips,
etc. will cause the points to bind.
The clincher points are in a retracted position in the
clincher box until the stitch legs penetrate the work
material. After the legs penetrate, the clincher points
move upward to give a neat, flat clinch against the
bottom surface of the work material. If the clincher
points remain in the up position, the legs of the next
stitch cannot penetrate the work material, causing
the stitch legs to buckle and/or the corners of the
crown to fracture. Examine the clincher points,
clincher slide for possible binding. Clean and oil.
If clincher points rise to high, they fracture the stitch
legs and/or mar the work. If the points do not rise
high enough, the legs will not clinch flat. Adjust the
height of the clincher points.
Figure 18
(QF27F9)
B
D
A
C