Installation, Warning: never check for gas leaks with open flame – Desa SMS24 User Manual
Page 8
www.desatech.com
117536-01B
8
INSTALLATION
Continued
OPTIONAL GA9200 SERIES ON/OFF
SAFETY VALVE/PILOT KIT
For additional convenience and safety an optional
ON/OFF safety valve/pilot kit is available. See Ac-
cessories, page 13.
Parts are available in this kit for propane/LP conver-
sion. See kit instruction sheet for detailed installation
instructions.
WARNING: You must use an
ON/OFF safety valve/pilot kit for
propane/LP conversion.
TESTING BURNER FOR LEAKS
1. Generously apply noncorrosive leak detec-
tion fluid to all connections.
WARNING: Never check for
gas leaks with open flame.
2. Light the burner with the shutoff valve no
more than half open and holding a match
slightly in front of the pan (see Lighting
Instructions, page 9).
3. Inspect all connections for bubbles, raw gas
odor, or flame from any area other than the
burner (leaks). If leaks are detected, shut off
the gas valve immediately. Tighten, or reas-
semble the loose connection(s) using pipe joint
compound until burner system is leak free.
4. When the burner is tested and leak free, observe
the individual tongues of flame on the burner.
Make sure that all ports are clear and produc-
ing flame evenly across the burner. If any ports
appear blocked, clear them by removing the
burner manifold and reaming the ports with a
modified paper clip or other suitable tool.
5. When finished testing, turn the gas shutoff
valve OFF to extinguish all flames.
ADDING PAN MATERIAL
Open the bag of glowing embers and spread it
evenly over the burner ramp.
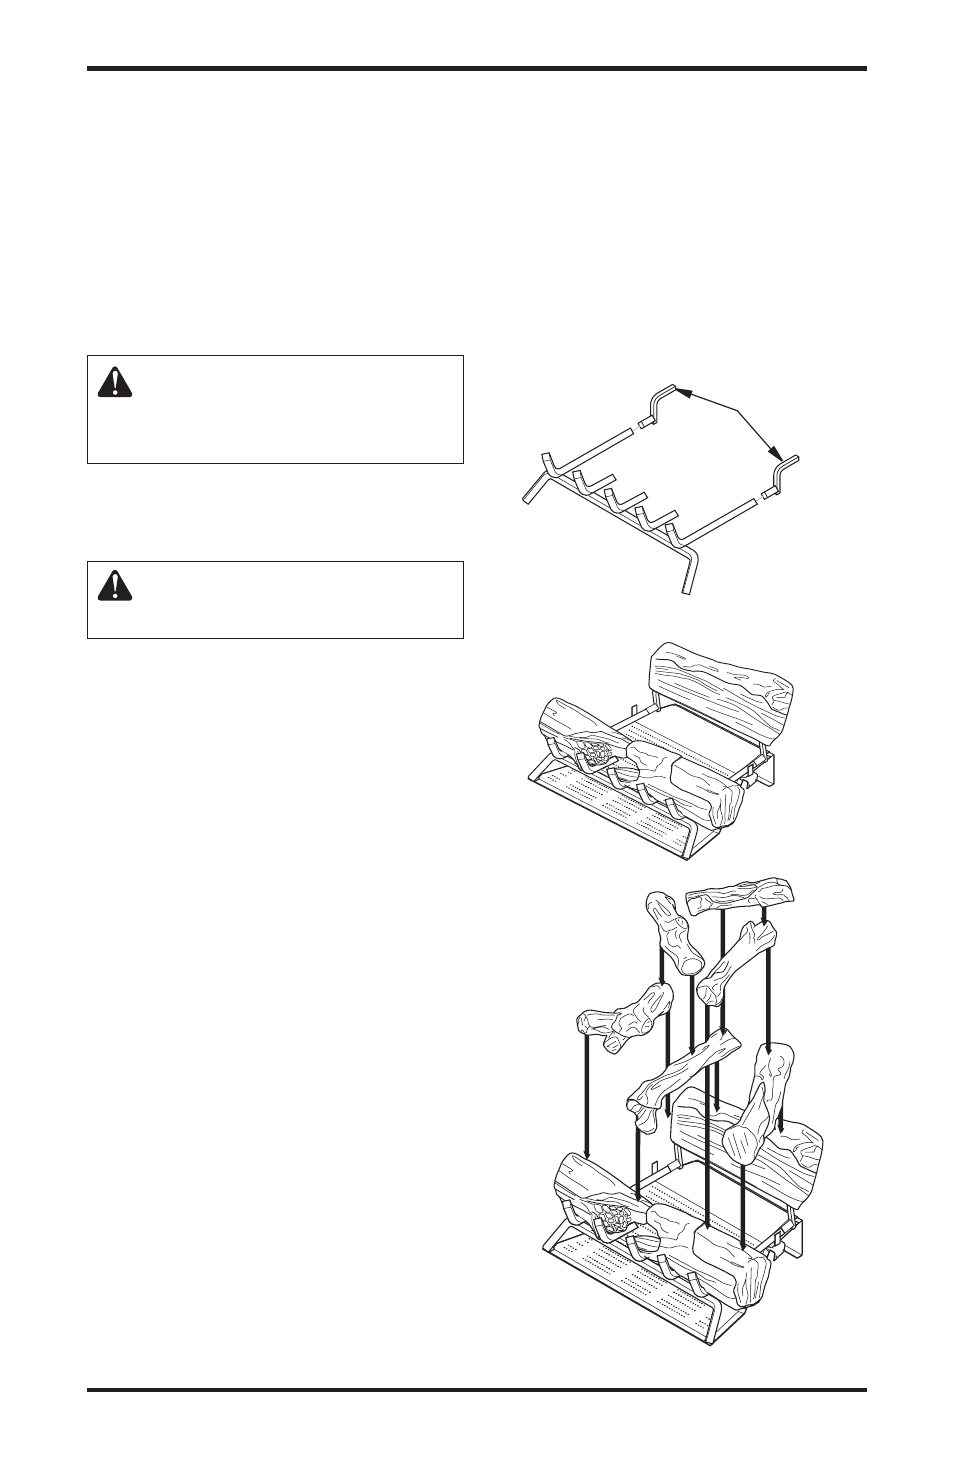
INSTALLING THE GRATE AND LOGS
1. Slide grate steps onto the ends of the grate as
shown in Figure 7.
2. Place the grate over the burner pan where the
two outer horizontal supports on the grate fit
into the two pan positioning tabs on the outer
edges of the pan.
3. Place two front logs onto grate (see Figure 8).
4. Place back log on grate steps (see Figure 8).
5. Figure 8 and Figure 9 on page 9 show a recom-
mended log arrangement, however you may
arrange the logs as you wish. Leave as much
open space as possible to minimize flame im-
pingement and sooting. Note: Logs may chip if
they are handled roughly or if hit together while
being placed.
5. Place ember chunks onto bottom portion of ramp
burner using Figure 9, page 9, as an example.
Figure 8 - Installing Logs
Figure 7 - Attaching Grate Steps
Grate Steps