Assembly – Desa Td125 User Manual
Page 7
www.desatech.com
121117-01B
7
aSSEMbLy
Continued
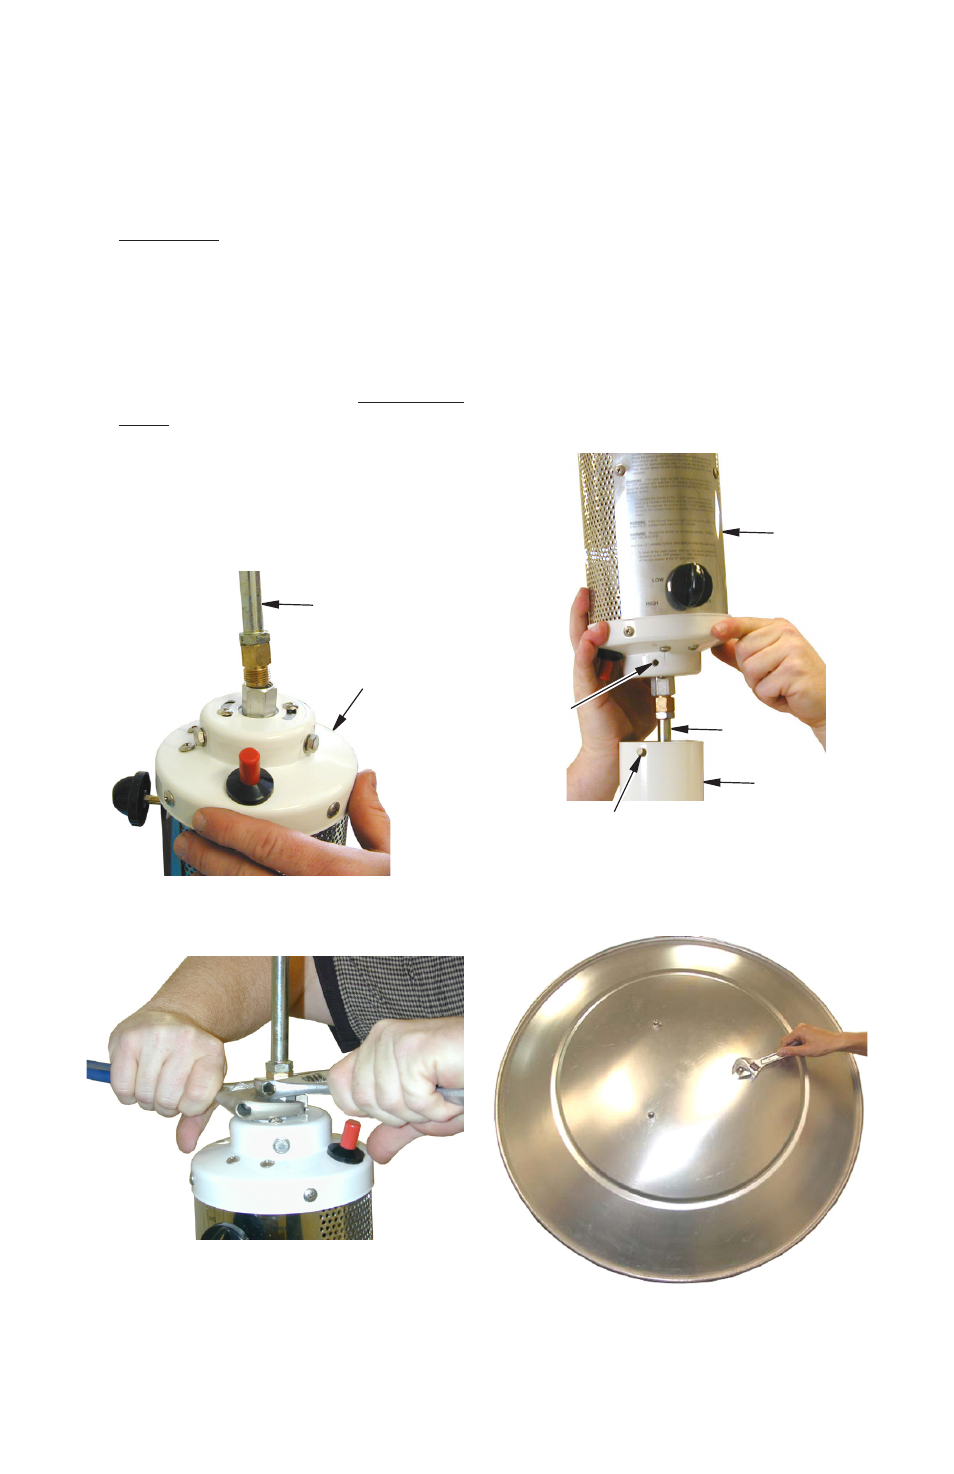
9. Thread manifold to bottom of burner
assembly (see Figure 9). Tighten with
wrenches (see Figure 10.)
10. Temporarily connect hose and regulator
to manifold. Connect hose and regulator
to a 20 lb. propane cylinder.
dO NOT LIGhT hEATER!
Open propane cylinder valve. Leak test
burner assembly and manifold connection
using a noncorrosive leak detection fluid.
DO NOT USE FLAME. See Checking for
Leaks, page 8. When there is no sign of a
leak, turn off propane/LP cylinder valve and
disconnect regulator from propane/LP gas
cylinder. Slowly loosen connection between
manifold and hose and regulator assembly.
Propane gas left in hose will escape.
11. Remove bolts from burner assembly.
Carefully lean base and pole assembly
over and insert manifold and burner
assembly through pole (see Figure 11).
Replace bolts.
12. Remove blue film from dome top. Dome
attaches to burner assembly with three
5/16" nuts and six 5/16" washers.
Place 1 washer on each threaded stud
of burner assembly. Place dome over
studs. Attach 3 washers and nuts to
studs. See Figure 12.
Figure 11 - Sliding Manifold and Burner
Assembly into Pole
Figure 9 - Attaching Manifold to Burner
Assembly
Manifold
Figure 10 - Tightening Manifold and
Burner Assembly
Burner
Assembly
Figure 12 - Attaching Dome to Burner
Assembly
Burner
Assembly
Bolts
Removed
From Here
Pole
Bolts Reinstalled
Through Here
Manifold