Lacava llc 5 – Lacava 0614 User Manual
Page 5
LACAVA LLC
5
7. Make sure the cartridge is in the off position and then turn
on the hot and cold water supplies and check for any
leaks.
8. Remove the plaster guards and set up a bucket below
the spout opening to collect water.
9. Slowly open the cartridge and allow the water to flow for
a minute.
10. Close the valve and check for any leaks. Repair if
necessary.
11. Reattach the plaster guards to the rough-in and finish the
surrounding wall. To ensure proper fit use the plaster guards
as a guide for correct hole diameter.
12. Remove plaster guards once the finished wall is complete.
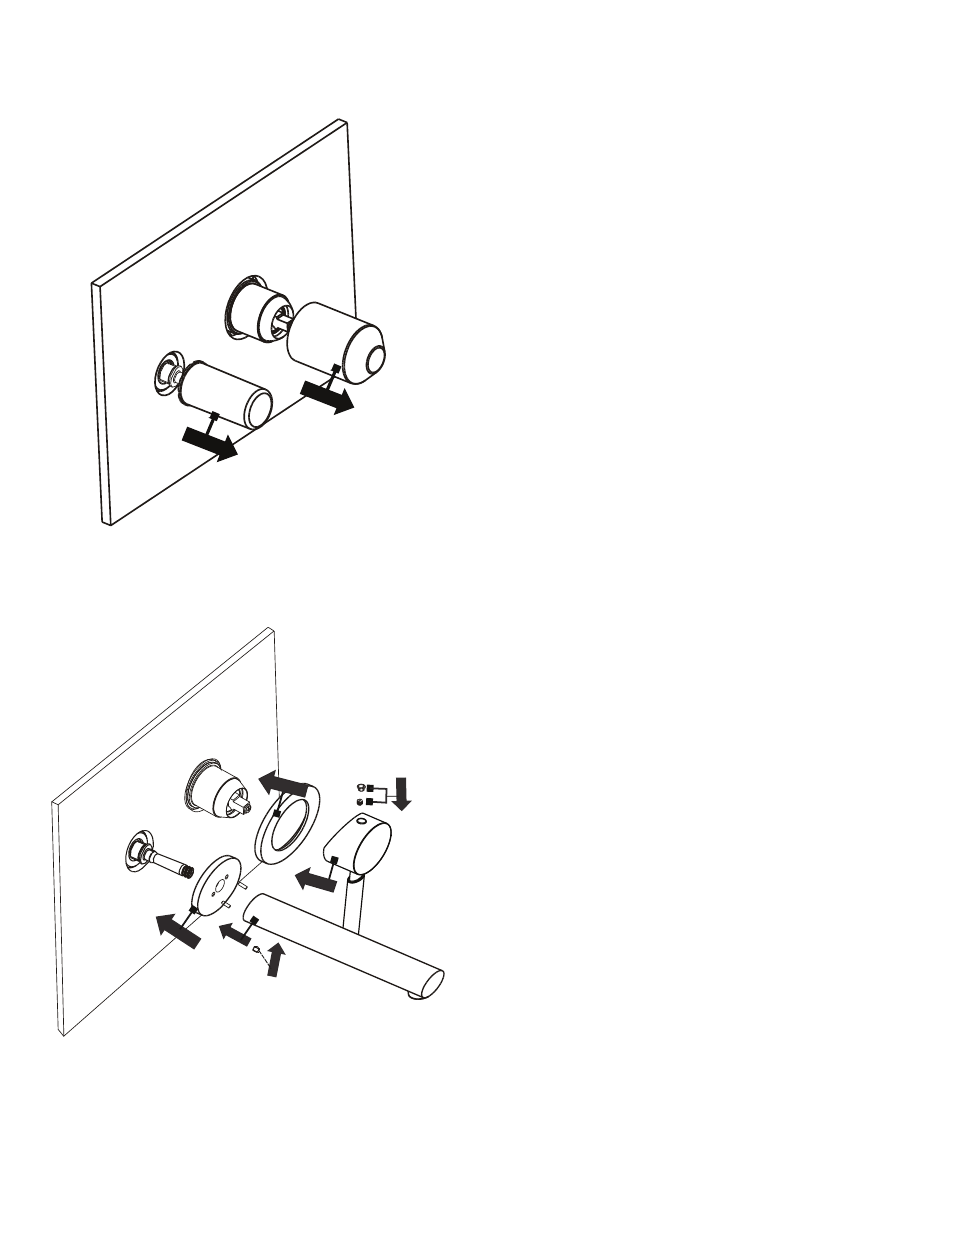
13. Slide the handle escutcheon into place over the
cartridge body.
14. Press the handle onto the cartridge stem and then using
the provided Allen wrench, tighten the set screw to keep
in place.
15. Press the set screw cap cover into the hole above the set
screw.
16. Slightly grease the o-rings on the brass spout connection,
and then push the spout over it until the escutcheon is
flat against the wall. Tighten the set screw to keep the
spout in place.
14. If desired, place a small bead of silicone around outside
edge of each escutcheon.
15. Turn on the water supply and check for any leaks.