1 installation, 2 control panel – Kleenmaid KED300 User Manual
Page 4
3
1 Installation
1.1 Make sure that the air inlets at the back are not blocked and do not allow fluff to
accumulate around your dryer.
1.2 If you wish to change the side on which your door opens see section 8 “To change
door opening”.
1.3 If your dryer is to be used with the control panel at the bottom see section 9 “To
change control panel”.
1.4 An optional wall-mounting kit is available from your dealer. If your dryer is to be
wall-mounted see section 10 “To wall mount”.
1.5 Remove any dust by wiping the drum and door with a damp cloth. Any initial smell
from the heater should disappear after the first period of heating.
1.6 WARNING: THIS APPLIANCE MUST BE EARTHED.
The dryer must be connected to its own socket. Do not use a “double” adaptor or
“power board”.
1.7 Ensure that the tumble dryer is installed in such a way that the full opening of the
dryer door is obtained.
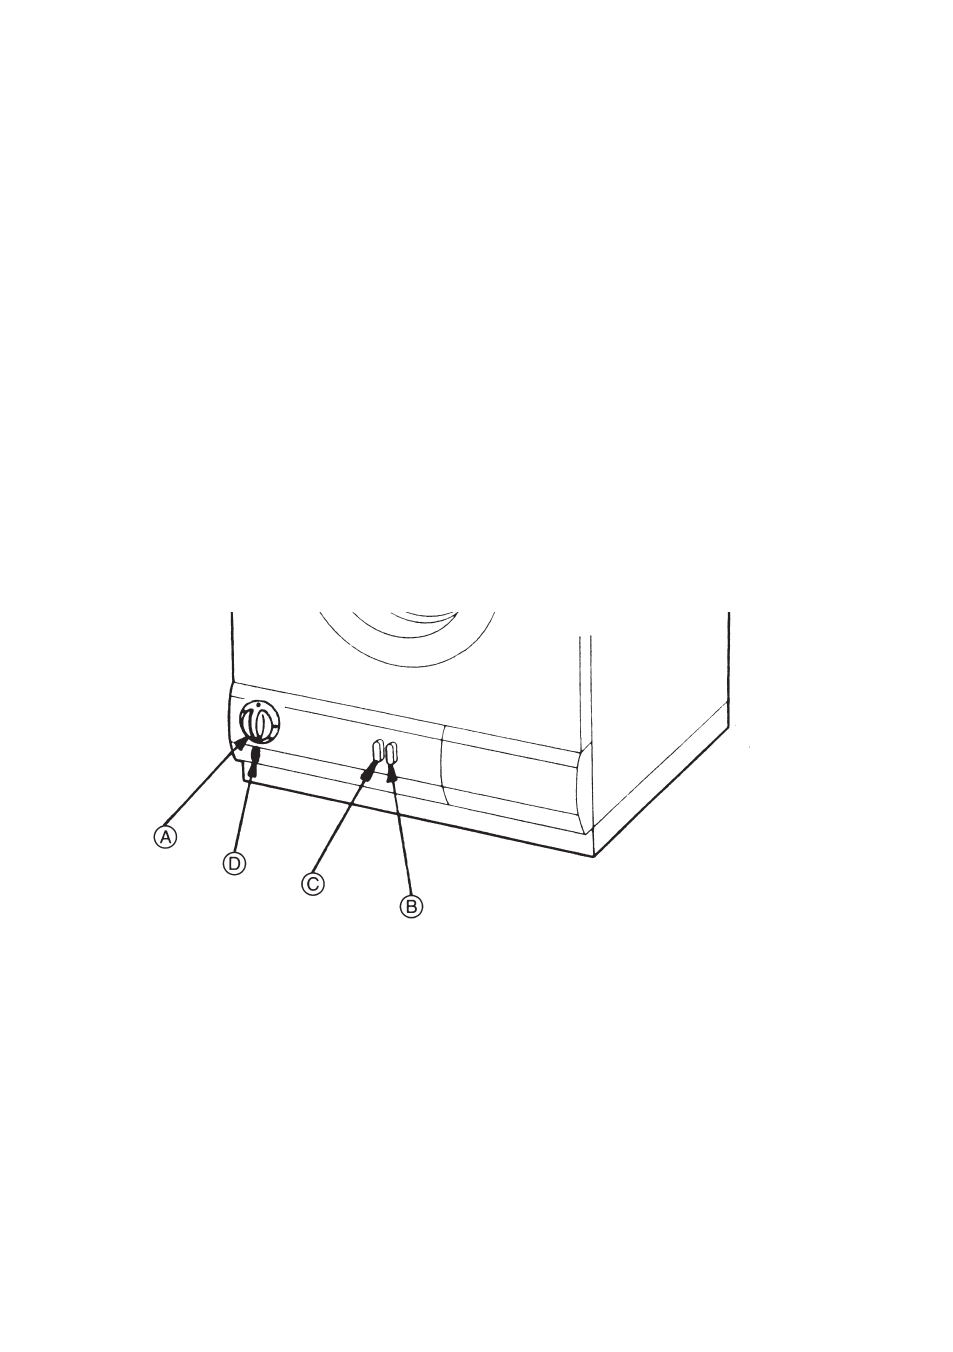
2 Control Panel
A.
The programme timer. Calibrated up to 120 minutes including 12 minutes cool
down at the end of each drying cycle. (Maximum drying time is the first increment
past 0 when turning the knob in a clockwise direction).
B.
The low/high heat selector switch.
Press button in for full heat.
Press again to release for half heat.
C.
The Anti-crease selector switch. Use this feature if you are not going to be present
to unload the dryer as soon as it has finished. It will then minimise garment
creasing caused by clothes lying for long periods in a stationary drum by
occasional drum rotation (10 seconds in every 6 minutes).
D.
The “Dryer on” neon. Lights when the dryer is running. Also remains lit after end
of cycle if Anti-crease has been selected.