Instruction on mounting and use – Kleenmaid ARTICA User Manual
Page 6
5
GB
1
2 3
4
5
6
7
2 1 . Slide the bottom section of the chimney down until it
completely covers the suction unit and slots into the
housing provided on top of the Rangehood.
2 2 . Turn the mains power on again at the central electrical
panel and check for correct Rangehood operation.
Carry out the SET-UP of the control panel, if necessary.
To do this consult the ‘Functioning – SET UP’ paragraph
in the following pages.
Electrical connection
The electrical tension must correspond to the tension noted
on the label placed inside the Rangehood. Connect the
electrical plug, where provided, to an easily accessible
outlet in conformity with Australian Standards.
Where an electrical plug is not provided (for direct connection
to electrical network) place a standards approved bipolar
switch with an aperture distance of not less than 3mm
(accessible) from the contacts.
Description of the Rangehood - Fig. 1
1 . Control panel
2 . Grease filter
3 . Grease filter release handle
4 . Halogen lamp
5 . Vapour screen
6 . Telescopic chimney
7 . Air outlet (used for filter version only)
8 . Sensor
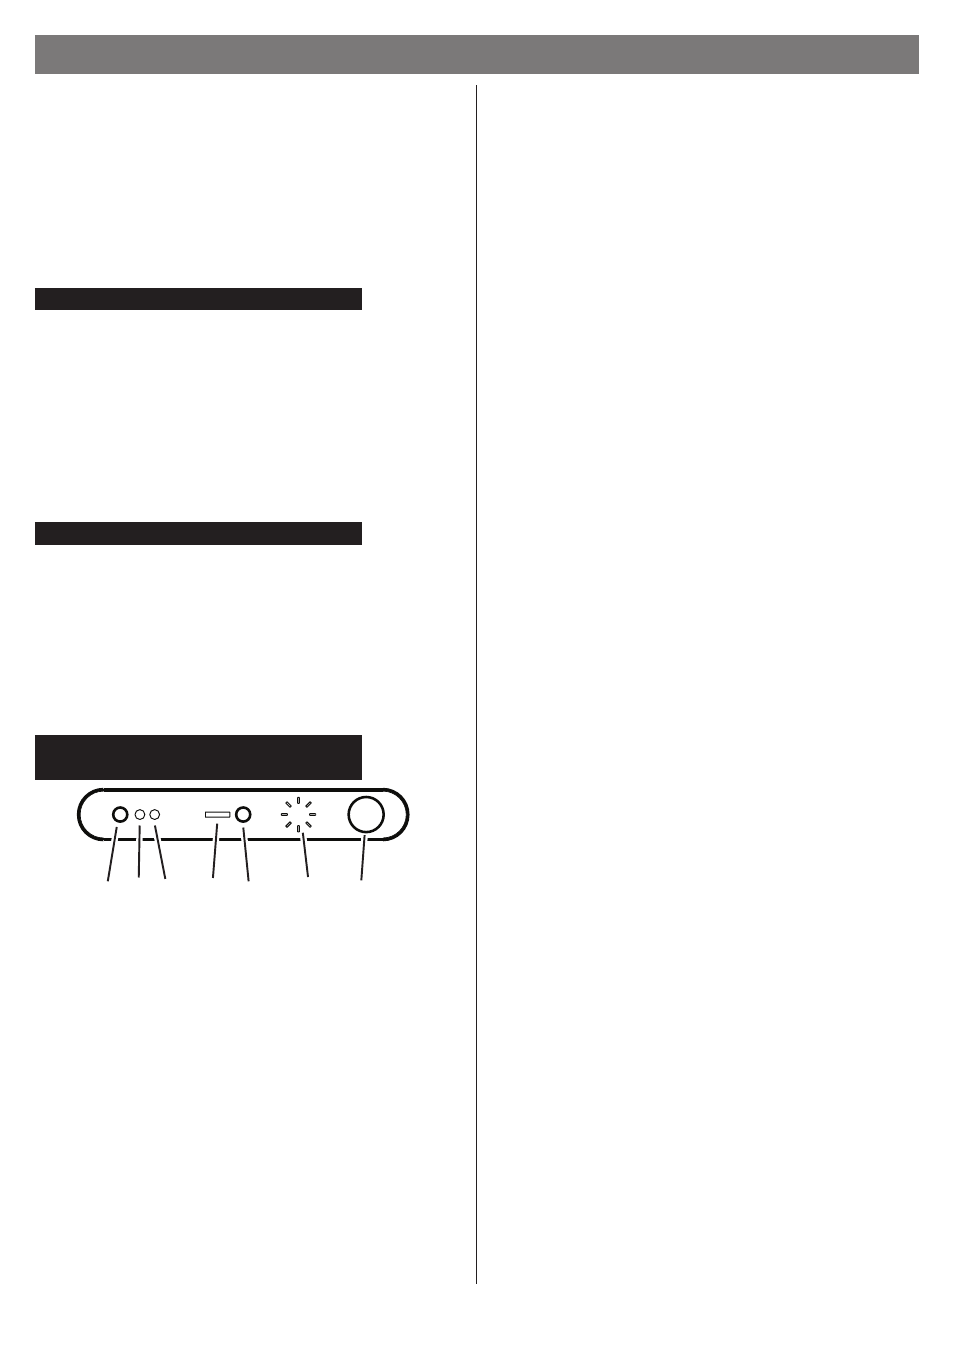
Operation –
Model with electronic controls
Main Functions
1 - ON-OFF lamp button
2 - LED signal for anti-grease filter saturation (See the
relative cleaning instructions for anti-grease filters).
3 - Led signal for active carbon filter saturation (See the
relative cleaning instructions for active carbon filters).
4 - LED signal for “automatic” operation
5 - ON-OFF button for “automatic” operation
6 – Functions signal (LED Display).
7 - ON/OFF Knob and suction power selection.
List of Functions
To switch the Rangehood to (ON) depress knob 7
The operation of button 5 is enabled and the wording
“Sensor” will appear, the Rangehood will set at “Manual
Stand-By”.
To switch the Rangehood to (OFF) press button 7 again;
if the Rangehood is set in the “automatic” operation
mode then pressing button 7 once will launch the
Rangehood to “manual Stand-By” pressing the button
again will switch the Rangehood to (OFF).
Attention! When the Rangehood is switched (OFF) all the
functions are disabled.
To switch on the lamps press button 1.
To switch off the lamps press button 1 again.
To increase the suction speed rotate button 7 clockwise
and set the desired speed (1, 2, 3 or intensive).
Attention
The intensive suction speed is timed for 5 minutes after
which the Rangehood returns to the 2
nd
speed.
The LED number (1, 2 or 3) will appear on the Display,
which is equivalent to the suction speed set plus a red
LED will also appear when the suction speed is set at
intensive.
The other display led’s will turn on alternatively in
proportion to the suction power setting.
To decrease the suction speed rotate the button
anticlockwise (Intensive, 3, 2, 1, Stand-by)
Filter Saturation Signal
The Rangehood is provided with an electronic device
which signals the necessity to clean and/or replace the
filters (Grease or Active Carbon).
Attention!
The saturation signal device for the active carbon
filter is disabled, the enabling (or disabling) function is
performed in the SET-UP operation (see instructions at
the bottom of the page).
Grease filter saturation signal
The LED signal 2 will turn on.
Active Carbon filter saturation signal
The LED signal 3 will turn on.
Attention! The signal will not appear when the Rangehood
is switched (OFF) or in stand-by mode.
Reset the Filter saturation signal (to be carried out ONLY
after having cleaned and/or replaced the filters):
Set the Rangehood to stand-by press button 7 until the
sound of the beep and upon the turning off of the wording
s e n s o r.
Automatic Operation
The Rangehood always sets at “manual operation”,
by pressing button 5 the Rangehood sets to “automatic
operation”: the wording Sensor turns on (from white
to orange); the Rangehood starts up and regulates the
speed only if the sensors detect any variations in the
environment conditions. The LED signals for function 6
will turn on in sequence at a speed that varies the suction
speed that it sets automatically on the basis of the
sensors readings.
INSTRUCTION ON MOUNTING AND USE