Functions – Kleenmaid RHSGALA User Manual
Page 7
5
four screws (Ø 2,9 x 9,5 mm) fixing the air pipe
to the support (these screws must be kept).
Fig. 5.
14.
Fit the telescopic chimney support to the wall,
at a point close to the ceiling. The telescopic
chimney support has a reference mark P,
which must coincide with the line that you
have already drawn on the wall. Fig. 5.
15.
Using a pencil, mark the two holes required to
fix the support and drill the holes (Ø 8 mm).
Fig. 5.
16.
Insert two plugs and fix the telescopic chimney
support M using 2 screws size (5x45 mm).
Fig. 5.
17.
During installation the plug must not be
connected to the power supply.
18.
Select the
range
hood operating mode
.
19.
Exhaust mode:
If the connector ring has not yet been installed,
it must be fitted at this point (Q in Fig. 6, bayonet
connector). Turn it in a clockwise direction
and fix it to the air pipe L using a screw. Insert
the air pipe into the telescopic chimney support
and fix it with four screws (Ø 2
.
9 x 9
.
5 mm).
Fig. 6.
Fix the 150 mm diameter ABS pipe to the
rangehood
outlet, and connect it to the air pipe
connector
ring.
Ensure that the other end
Filter version:
20
.The
range
hood can now be connected to the
power
supply.
21
.
If
a
non-return
flap
has been installed or
is required, ensure that it opens and closes
properly.
22
.
Fix the top part the telescopic outlet pipe to the
relative support, using the two 3 mm dia x 9 mm
screws R. Fig. 5/6.
2
3
.
Slide the bottom part of the telescopic outlet
pipe downward until it rests in its housing on
the top of the
range
hood.
2
4
.
Replace the grease filters.
Functions
— The
range
hood is provided with a motor with
several
speeds. For the best performance
we
recommend using the low speeds in normal
conditions and the high speeds in particular
cases of strong odour and vapour
concentration.
— We recommend starting up the
range
hood
a few
minutes
before
c
ooking and keeping it
running
until all the odours have been eliminated.
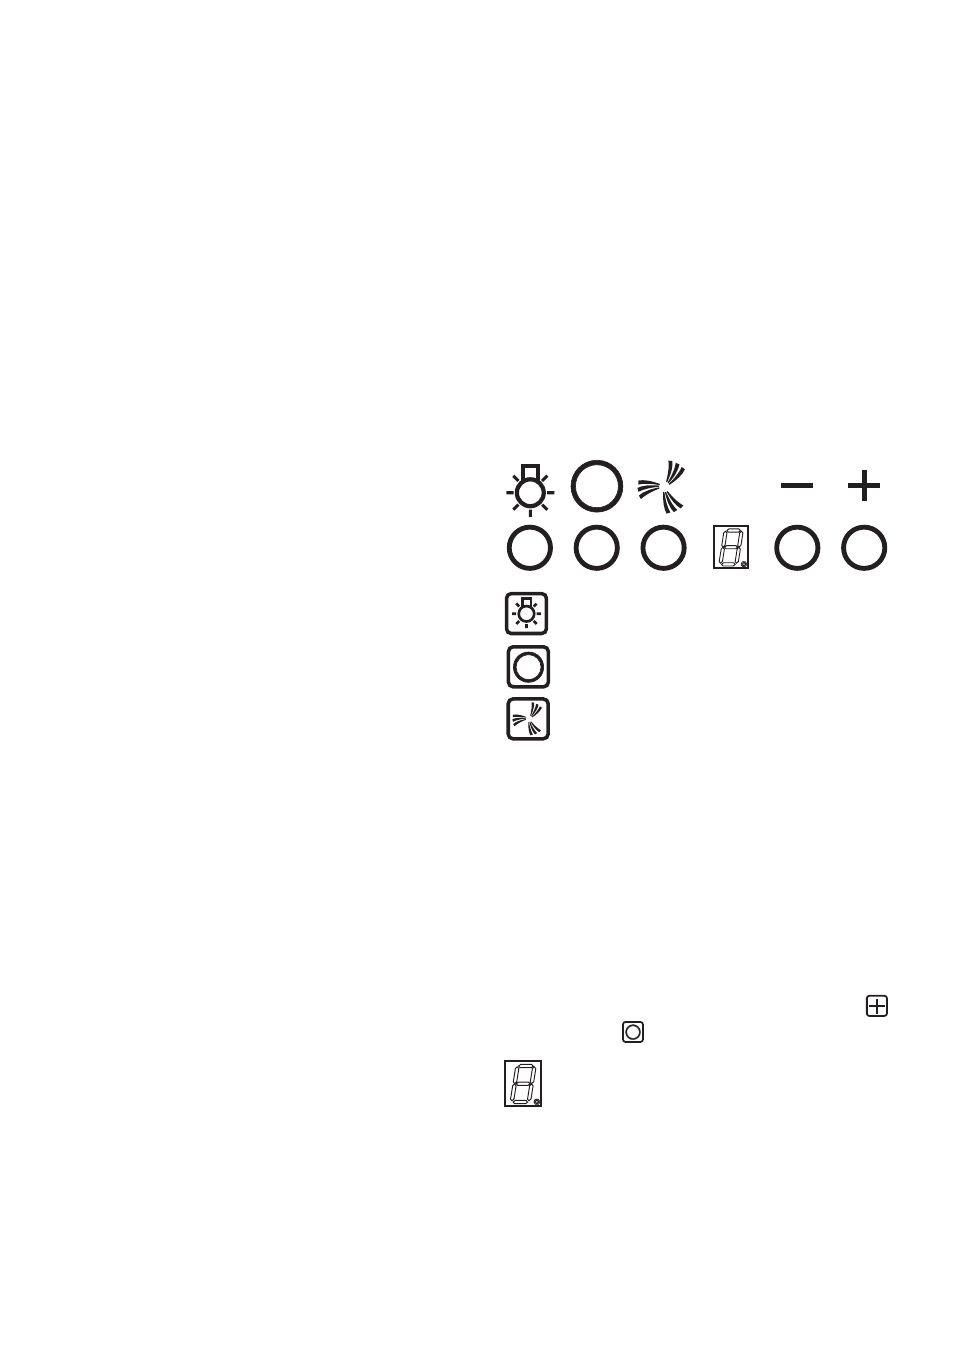
Descriptions and functions of the
control panel
-
The control panel is located on the front of the
range
hood.
= Lighting, on/off.
= Fan off
= Fast speed switch (P+ the led on the
bottom right side of the display flashes)
.
This speed should be used when the
concentration of cooking fumes or
odours is particularly strong (for
example when frying, cooking fish etc.).
The fast speed will run for about 5
minutes and then return to the speed
previously set automatically (1, 2 or 3),
or switch off if no speed was selected.
To turn off the fast speed, before the
end of the 5 minutes, press button
and
.
= Display showing fan speed (1-3-P),
change grease filters (grease filter
saturation indicator - F) and change
activated carbon filters (carbon filter
saturation indicator - C).
A lighted Led on the right bottom side
indicates the
range
hood is in stand-by
mode.
discharges into the open air.