Removing the oven door, Free in-home demostration – Kleenmaid TO39A User Manual
Page 4
INSTALLING SCALA OVENS
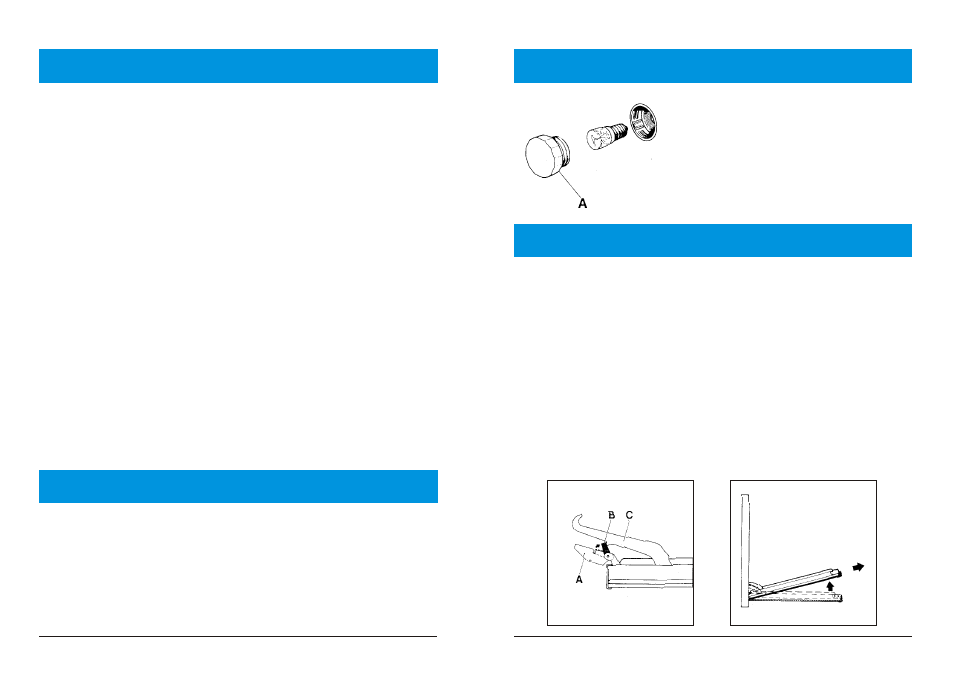
CHANGING THE OVEN LIGHT BULB
6
7
IMPORTANT: Connection to electrical mains must only be performed by a
licensed electrical contractor. All care must be taken to ensure the installation
is properly earthed and conforms to all local codes.
Refer to GENERAL DATA (page 1 or page 4) for details of the particular cut-out
and depth dimensions required for the model oven istalling. Prepare the cut-out
in the cabinet and ensure that side sliderelais are available to allow the underside
of the oven to be supported whilst allowing the unit to slide in.
Use the 4 screws provided to secure the front trim side rails to the cabinet front.
Scala ovens may be installed in any type of heat resistant cabinet (eg, timber
finisched in plastic laminate, timber, metal, brickwork, etc), aither as a wall unit or
under a work bench.
If installed as a wall unit, ensure that the upper-rear section of the cabinet has an
80-90 mm depth vent. When installed under a bench, the oven must be a
minimum 25mm above the floor, and there must be a minimum 50mm from the
top of the unit to the underside of the bench top. In addition, a 80-90 mm wide
vent must must be provided in the kitchen cabinet floor so thet hot air which
accumulates around the top of the oven is drawn away and replaced by cool air
coming in from underneath the oven.
NOTE: any vertical, cupboard panels immediately beside the wall oven must be
sealed completely to obtain the best result from your oven.
IMPORTANT: So that your Scala oven maintains its efficient sealing
capacity for the life of the appliance, NEVER USE THE DOOR AS A LEVER
(especially when the oven is being installed into its recess). Similarly,
undue pressure must never be placed on the oven door when it is open.
Please contact our Customer Call Centre on 1 800 072 144 to arrange for your
Free In-Home Demostration.
Our trained Demostrator will make an appointement to visit you in your home and
explain how to confidently use and care for your cooktop.
Please note that we may not have a Kleenmaid Demostrator in some regional
areas. In this case we will organise a step-by-step telephone demostration to
ensure you are able to achieve the best result from your cooktop.
1. (See diagrab above). Remove cover (A) buy
Unscrewuing in an anticlockwise direction.
2. Replace bulb (15W ES)
3. Remount cover (A)
REMOVING THE OVEN DOOR
(See diagrams, below)
Removing the door allows easy access to the interior of the oven for cleaning. To
do so:-
1. At either side of the door, the Hinges (A) have two clips (B) which can be
moved. Normally these remain flat against Hinges (A). Open the door fully and
hook the clips (B) to Part © of the Hinges. The door assembly can now be
removed.
2. Lift the door towards the outside (see the illustration at right, below; two
movements, ie, up-and-towards-yourself, gripping the door near each hinge).
3. To replace the door, fistly insert the hinges completely into the grooves.
4. Unclip the two clips (B) which hold the two hinges - THIS IS IMPORTANT! The
door is now in place.
FREE IN-HOME DEMOSTRATION