Kleenmaid CH600X User Manual
Page 6
-6-
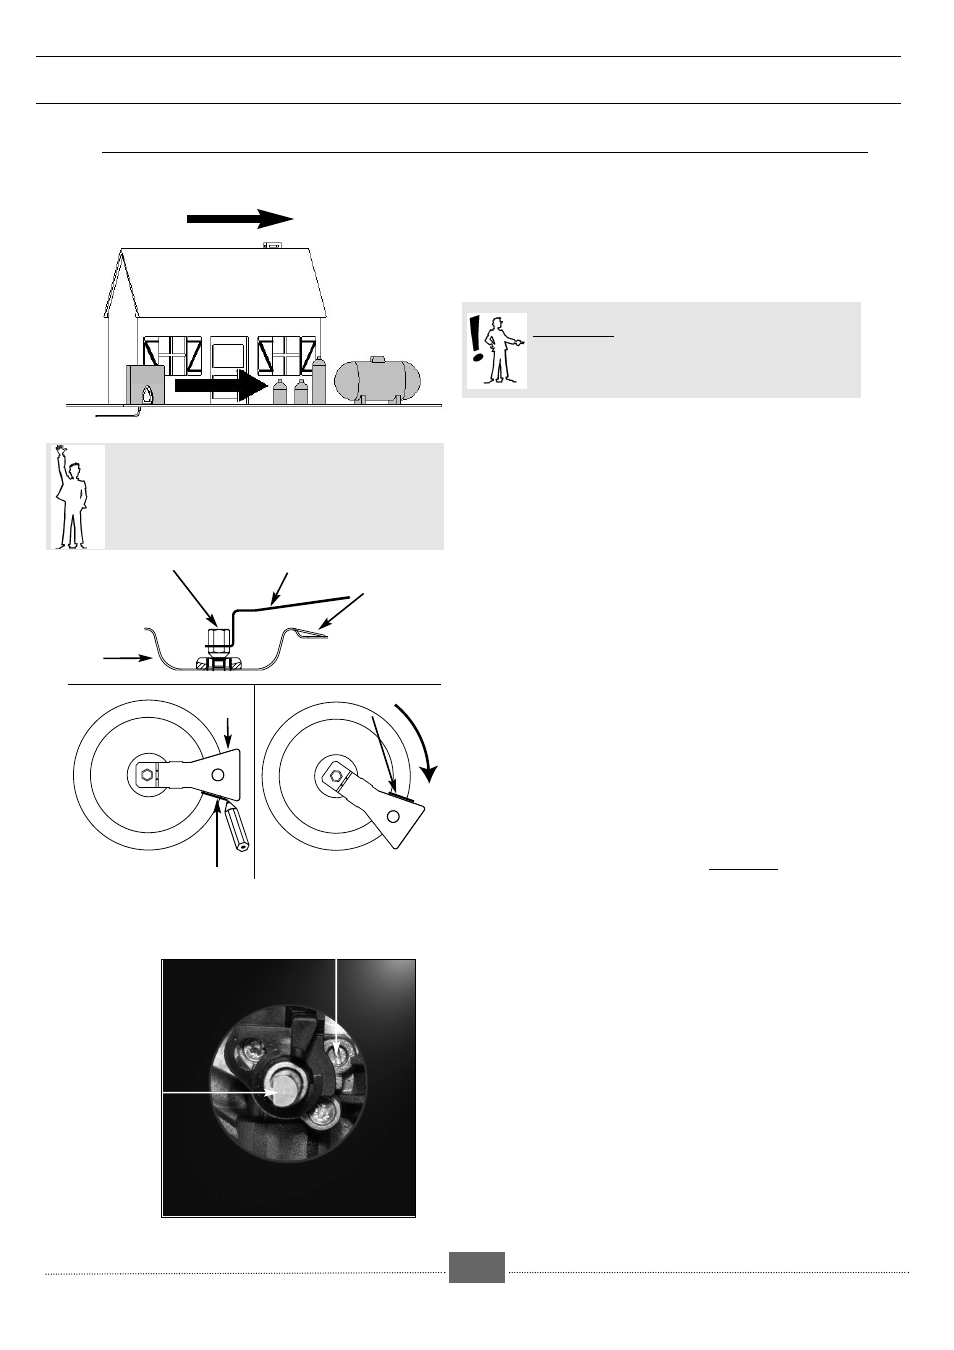
Tap axis
Adjustment
screw
fig.5
PRELIMINARY REMARKS
•
Your cooking hob is delivered regulated for
network gas (natural gas).
The injectors necessary for adaptation to LPG can be
found in the bag containing the
manual.
When carrying out this operation, you should
successively:
➊ A
DAPT THE GAS CONNECTION
❷ C
HANGE THE INJECTORS
❸ A
DJUST THE RETARDER ON THE TAPS
➊
Refer to the paragraph “Gas connection”.
❷
C
HANGE THE INJECTORS
in the following way:
• Remove the supports, and all the burner caps and
heads.
• Using the spanner supplied, unscrew the injectors
at the bottom of each dish and remove them (fig. 2).
• Replace these with the injectors supplied in the
bag, in accordance with the gas characteristics
table; To do this:
➪ First, screw them by hand.
➪ Put the spanner well onto the injector.
➪ Screw them right in without forcing.
➪ With a pencil draw a line on the hearth plate as
ndicated (fig. 3).
➪ Turn the spanner clockwise until the line appears on
the other side (fig. 4).
• Remount the heads, caps and grids of all the
burners.
❸
A
DJUST THE RETARDER ON THE TAPS
located under the
knobs. Proceed as follows:
• Pull up the knobs and remove them.
• Using a small screwdriver, screw fully the brass,
adjustment screw (yellow) (fig.5) clockwise.
• Work on one tap at a time.
• Put the knobs back in place making sure they are
turned in the right direction.
P
P
a
a
r
r
t
t
1
1
:
:
F
F
o
o
r
r
t
t
h
h
e
e
I
I
n
n
s
s
t
t
a
a
l
l
l
l
e
e
r
r
Angle spanner
Hearthplate
Injector
Dish
NETWORK GAS
(NATURAL GAS)
Meter
butane propane
propane
BUTANE/PROPANE
Pressure regulator
compulsory
Disconnect the apparatus before intervention
CHANGING FROM NETWORK GAS (NATURAL
GAS - AN AIR PROPANE / BUTANE MIXTURE
TO THE BUTANE/PROPANE GAS (FIG. 1)
fig.1
fig.2
HOW TO MAKE THE CHANGE OF GAS TYPE FOR THE COOKING HOB
●
Spanner
Line
ADAPT THE HOB CONNECTION to the new gas adjustment