Assembly – IBEA HY-704 User Manual
Page 19
ENGLISH
GB
19
6. ASSEMBLY
HANDLE ASSEMBLY (L) Fig 1
Remove screws (1) and widen handle (2) to insert it into the
tube (3) and fasten it with screws (1) and nuts (4). Position
the safety bar (5) in its housing and fasten with the screw
(6), the washer (8) and the nut (7). The handle position is
adjustable for operator needs.
CONNECTING THE BATTERY TO THE HARNESS Fig. 2
Connect the battery to the harness by means of the 3 hook
ends (B). Insert the hook (B) in its housing (A) and lock in,
turning it 90° clockwise.
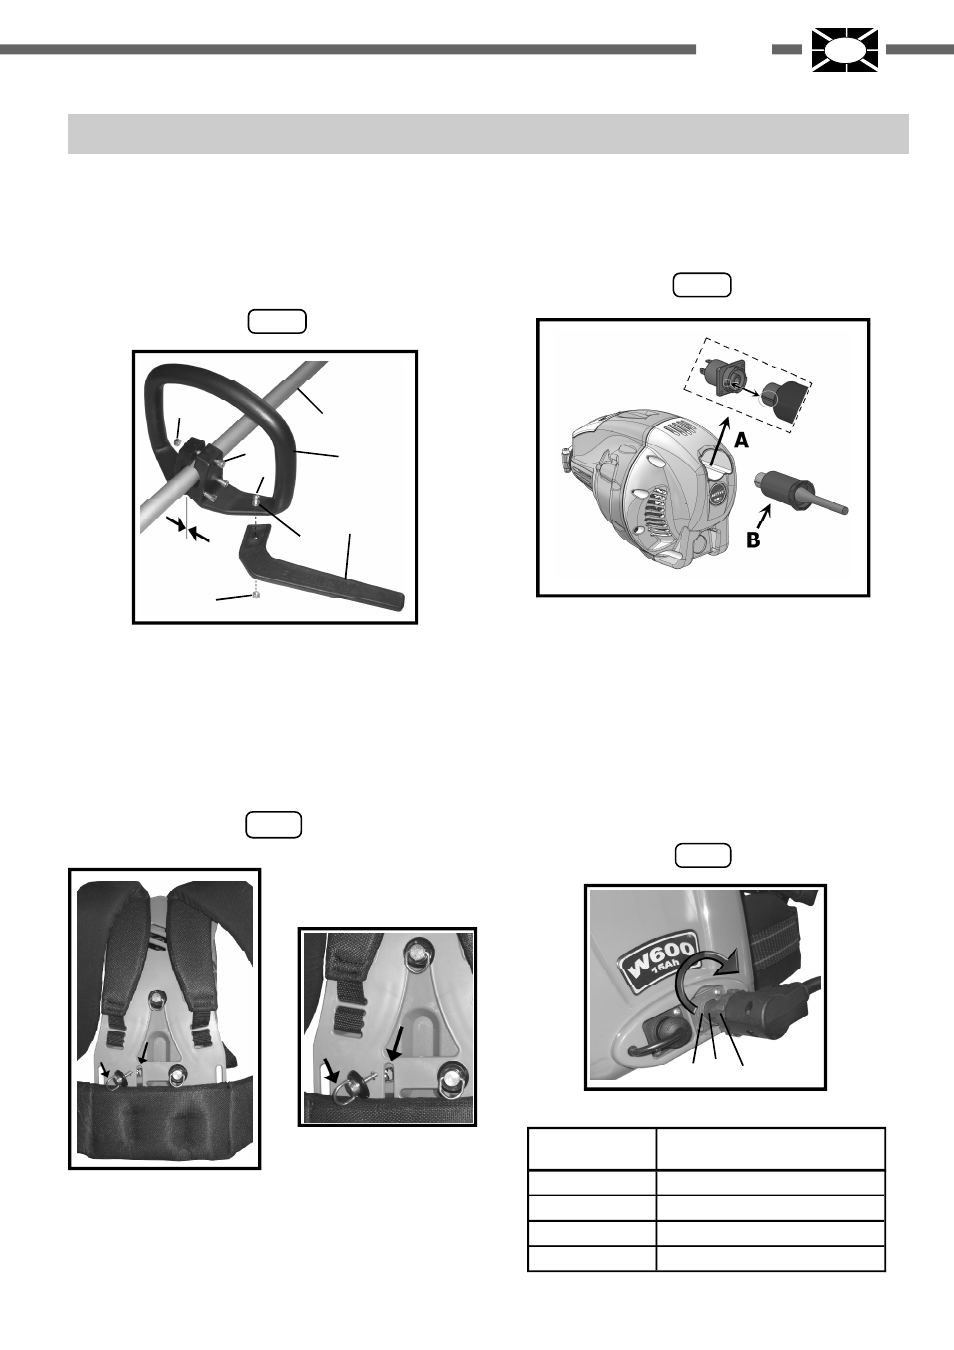
CONNECTION CABLE TO MOTOR Fig. 3
1) Turn the sleeve counterclockwise (B);
2) Insert the sleeve (B) into (A);
3) Turn clockwise the sleeve (B) to lock it;
CONNECTING THE MACHINE TO THE BATTERY AND
START-UP Fig. 4-5
Only use original IBEA batteries. Connect the motor cable
(A) to the battery connector (B) and lock in, turning the ring
(C) 90° clockwise. Turn the switch to position (1) Fig. 5 Make
sure that the LED on the motor is on and first press the
safety lever (4) and then the accelerator lever (2).
FIG . 4
FIG . 3
FIG . 1
FIG . 2
A
B
A
B
2
3
7
1
6
4
5
8
A
B
C
LED COLOUR ON
THE MOTOR
BATTERY STATUS
Green
Battery charge from 100% to 80%
Green / Yellow
Battery charge from 80% to 50%
Yellow / Red
Battery charge from 50% to 20%
Red
Battery charge from 20% to 0%