Grandstream GVR3550 Quick Installation Guide User Manual
Page 4
3
4
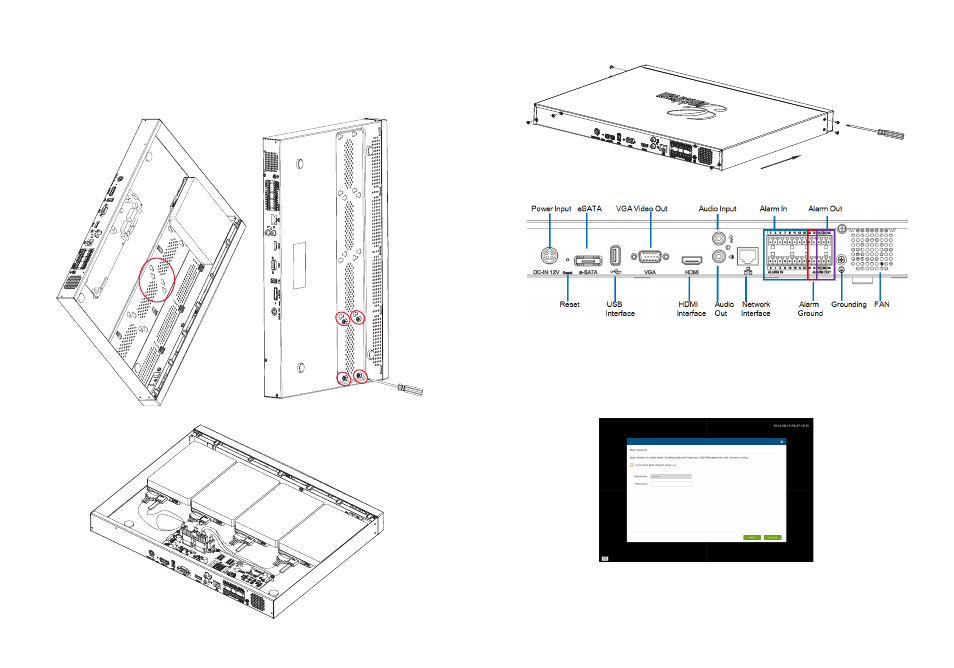
3. Side standing the opened device so the screws holes at the floor shell can be
easily spotted.
4. Put the HDD (with 4 screws on) into the holes on floor shell, sliding it to narrow
opening, tighten the 4 screws.
5. Repeat the above steps if having multiple HDDs.
6. Connect the SATA power and data cables from HDDs to the PCB board.
7. Close the cover panel and tighten the 8 screws.
CONNECTING THE GVR3550:
1. Connect a display device to the HDMI or VGA interface.
2. Connect the network cable from RJ45 interface of GVR3550 to a network
switch (Gigabit switch recommended).
3. Connect power adapter from device to power source.
4. When the GVR3550 is powered on successfully, it will display the local view
main screen as shown below. Follow the “Boot Wizard” to install the system.
Note:
- GVR3550 can automatically adapt to 1080p or 720p HDMI monitor.
- VGA doesn’t support automatic resolution matching. When VGA and HDMI port are both
connected, only the HDMI display will be active.
- User can manually configure output display and resolution from the configuration menu.