Accessories, Install shelves, Install doors – Gladiator GAGB28FDYG Full-Door GearBox User Manual
Page 5: Complete the assembly
5
2.
Screw a leveling leg (P7) into each of the four rivet nuts located at
the corners of the cabinet as shown.
3.
Stand the cabinet upright.
4.
If you have not already, fasten the two bolts at each front corner,
of the cabinet frame. Completely tighten all the cabinet bolts and
nuts.
Install Shelves
IMPORTANT:
■
Install shelf (P8m) in the cabinet so that the long edge with
magnets is facing the cabinet front.
■
Use the pair of holes indicated to install shelf (P8m), so the doors
will lock.
■
Shelf (P8) may be installed using any of the other pairs of holes in
the cabinet sides.
1.
Align the holes in the shelf with the pair of holes shown.
2.
Using Phillips-head screws (F3b) and small flange nuts (F4) per
side, fasten shelf (P8m) to the cabinet sides (P1 and P3).
3.
Place shelf (P8) so that the holes in the ends are aligned with the
desired set of holes in the cabinet sides (P1 and P3).
4.
Using Phillips-head screws (F3b) and small flange nuts (F4) per
side, fasten the shelf to the cabinet sides (P1 and P3).
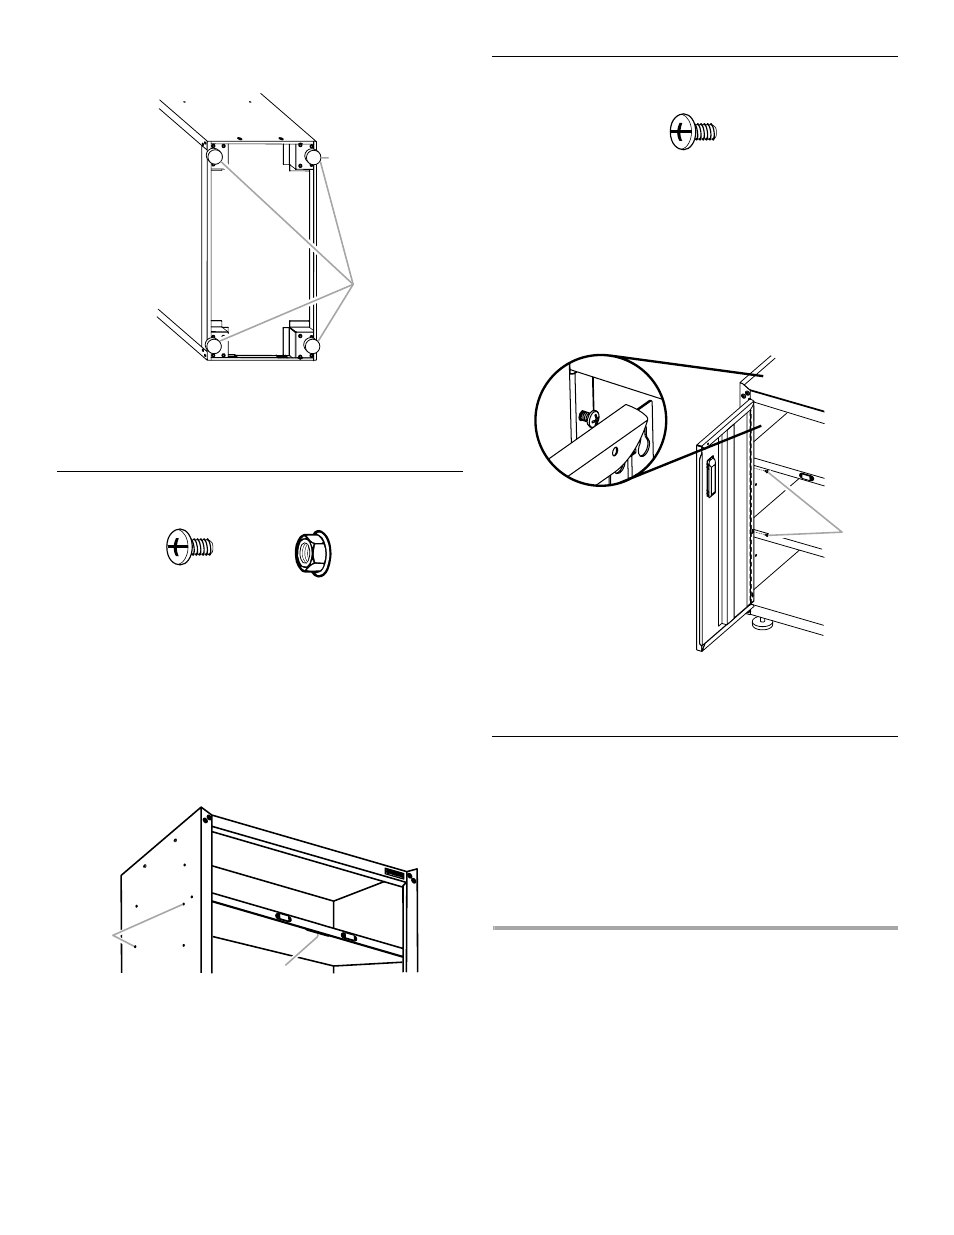
Install Doors
The door hinges are designed with keyhole slots at the top and
bottom so the door will hang on the cabinet while you are fastening
the screws.
1.
Start Phillips-head screws (F3b) in both the top and bottom holes
on each side of the cabinet.
2.
Hang the right-hand side door (P7) from the top and bottom
screws, and hand tighten.
3.
Insert the middle two screws through the door hinge into the
cabinet and hand tighten.
4.
Repeat steps 2 and 3 to attach the left-hand door (P8).
5.
Align the doors and completely tighten the screws.
Complete the Assembly
1.
Make sure there is a bolt or screw in each hole of the cabinet
frame.
2.
Move the cabinet to its final location.
3.
Place a level on the inside shelf, and if necessary, level the
cabinet by adjusting the height of the leveling legs (P7). Turn to
the left to raise or to the right to lower the leveling leg.
4.
If the doors are not aligned, loosen all the screws attaching the
door hinge to the cabinet.
5.
Adjust door to the desired height, and fully tighten the screws.
ACCESSORIES
To order the accessories listed below or to inquire about other
available accessories call 1-866-342-4089 or contact your
authorized Gladiator brand dealer.
In Canada, call 1-800-807-6777.
VersaTop™ Work Surface
Order Part # GAVT18SPSX
A. Leveling legs
F3b
F4
F3b Phillips-head screw (8 - black)
F4 Small flange nut (8)
A. Holes for installing shelf
B. Slot in shelf for lock
P4
P1
P6
A
P7
B
A
P1
P8m
P2
P3
F3
F3b Phillips-head screw (8 - black)
A. Phillips-head screws (F3b)
A
P2
P4
P8
P9
P8m