Geist SA1-01002XLNB User Manual
Page 2
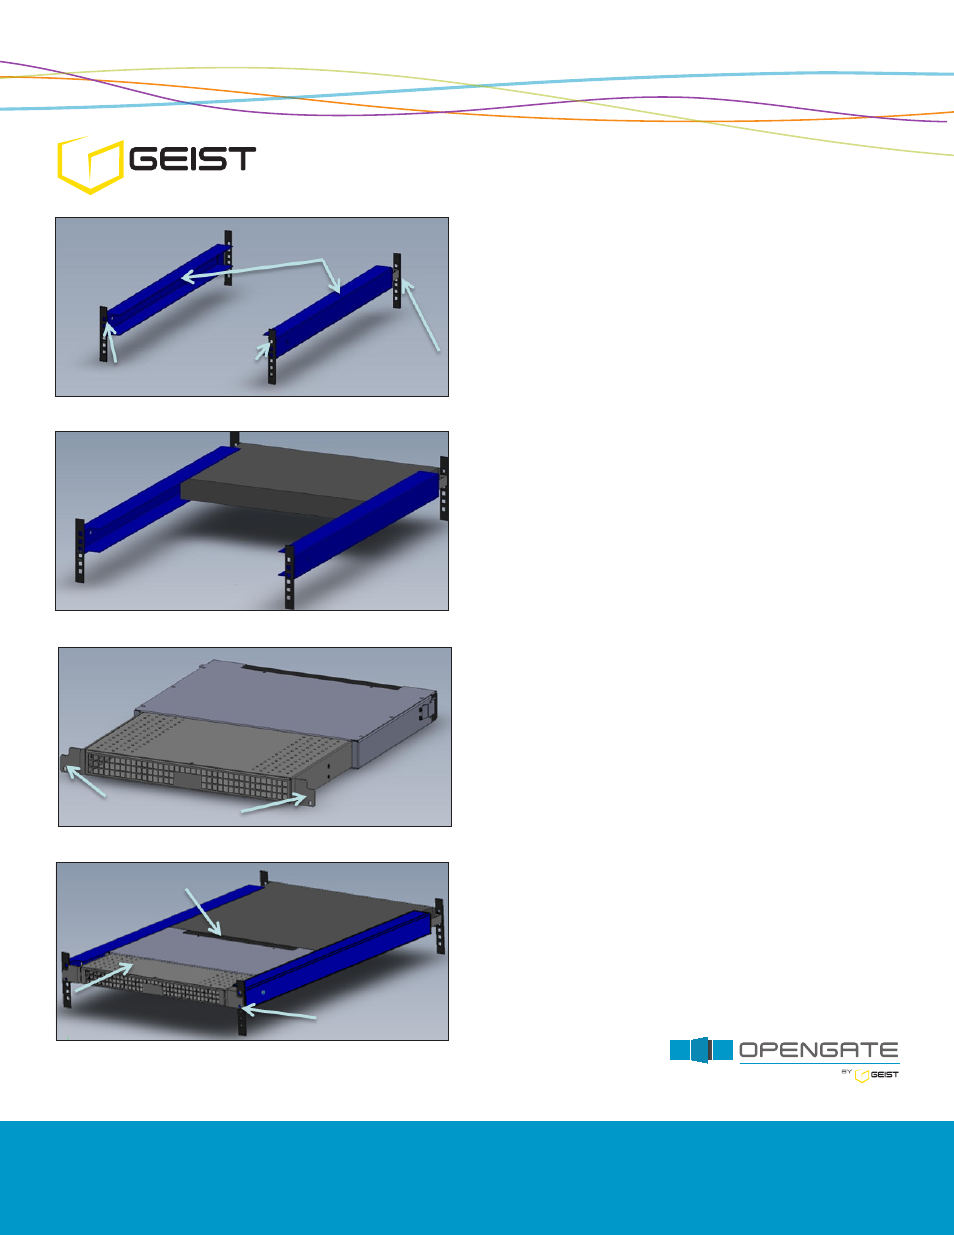
STEP 1 Mount the adjustable rails using customer
provided cage nuts and screws. The new build rails
will be used to support the network switch, SwitchAir
chassis and insert. Attach the new rails using only the
top front screw holes on both rack front rails. The rail
extension tab attaches to the rack rear using a single
cage nut and screw. Use the center hold of the 1U
space for this attachment.
STEP 3
SwitchAir is not in the fully extended position
when shipped from the factory. Pull evenly on the
chassis mounting tabs for the desired depth.
STEP 2 Slide the network switch into the rails and
mount to the rack using customer provided cage nuts
and screws.
STEP 4 Insert SA1 into the rails and push unit until the
insert comes into contact with the network switch and
the chassis tabs are in contact with the rack. During this
process route the cables through the brush openings.
Install the bottom SA1 chassis screws on both sides.
Install is complete.
1
2
3
4
Rack Rear
Install Adjustable Rails For SA1
and Data Switch Mounting
Install Top Cage Nuts
and Screws to Both
Sides of Rack Front
Mount to
Center Hole
of 1U Space
Route Cables
Network Switch
Insert
Slide SA1 into Rails
Pull Evenly on Tabs to Extend
Attach to Rack
Geist Americas
Geist Europe
Geist Asia
Geist DCiM
China
Hong Kong
800.432.3219
1.877.449.4150
+44 (0) 1823 275100
+86.755.86639505
+852 90361927
geistglobal.com
geistglobal.com
geistglobal.com
geistglobal.com
geistglobal.com
10001501