Power requirements and mounting – FiberPlex TIS-8632 User Manual
Page 8
Page 6
Power Requirements and Mounting
Flexible mounting allows the TIS‐8632 to be rack shelf mounted or used in a standalone configuration. Up to 3
TIS‐8632 units can be mounted on a TDR‐01 shelf and powered by a single, integral cable. Alternately, the TIS‐
8632 can be used in a standalone application when paired with the included DC wall adaptor.
Standalone
For standalone applications, the TIS‐8632 comes with (4) peel and stick rubber feet. Simply peel the paper
backing from the rubber foot and affix to four corners of the TIS‐8632.
Surface Mount
Surface mounting on a wall, desk, or other
vertical surface can be accomplished by
using either the supplied peel‐and‐stick
Velcro pads, or by using the integrated
keyhole mounts with the supplied wood
screws.
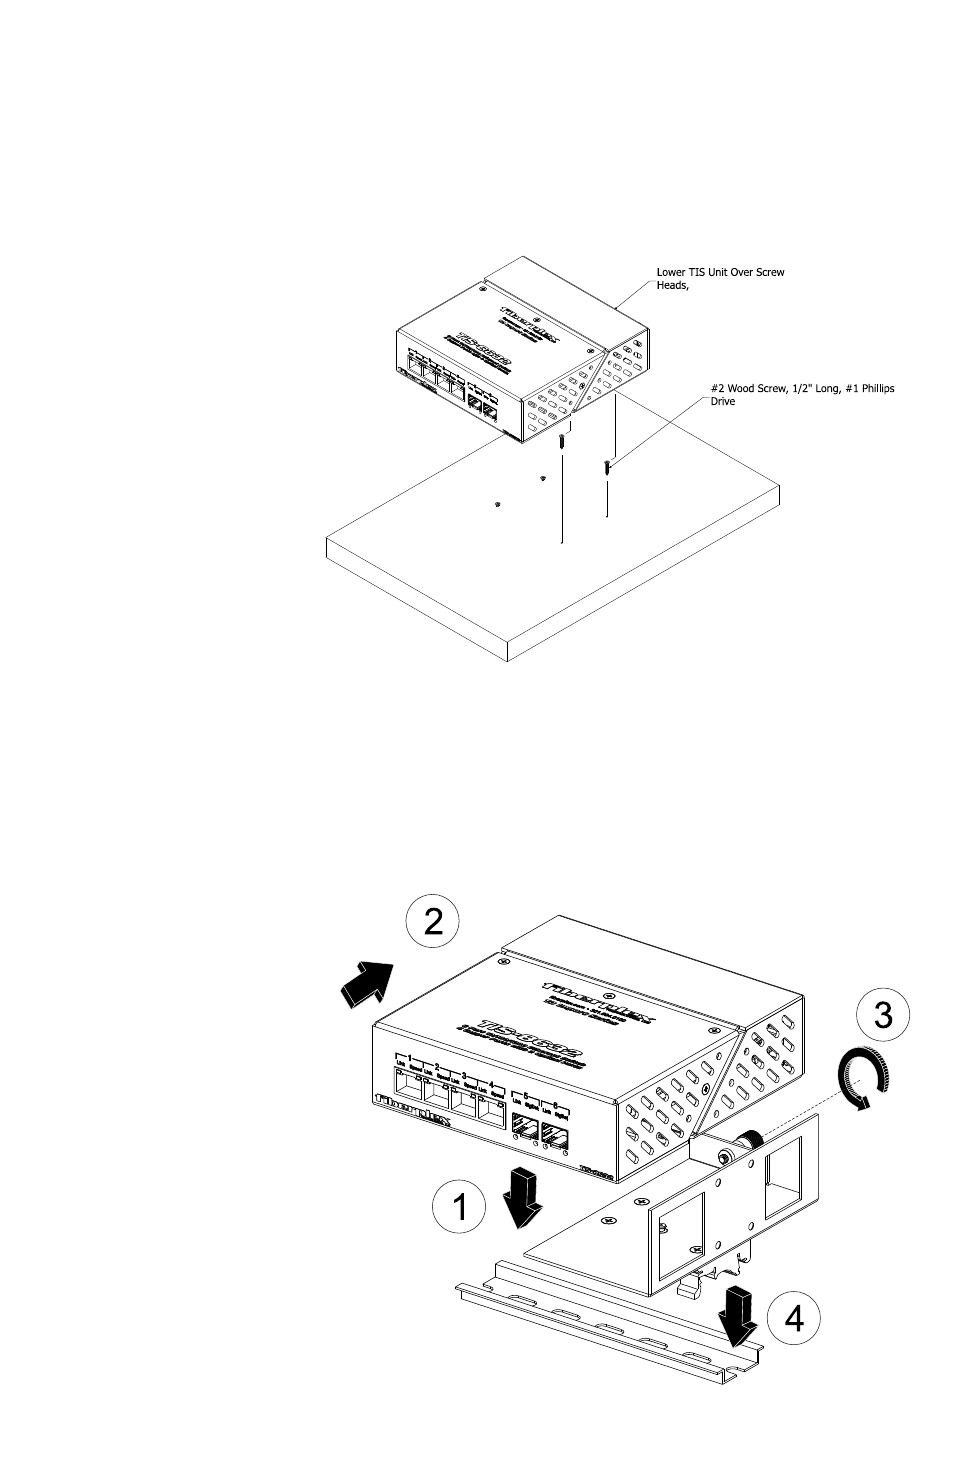
To use the wood screws:
1.
Mark the surface using the
supplied template
2.
Screw the #2 ½”
wood screws into the
surface at each mark
3.
Leave a small amount of
thread to accommodate the
thickness of the TIS‐8632 case
4.
Put the large part of the keyhole over the
screw head and pull to
engage
DIN Rail
Using the TD‐DINR, the TIS‐8632 can be mounted to a DIN rail. See the TD‐DINR user manual for more details
on configuration options. Mount the TIS‐8632 the TD‐DINR in the same manner regardless of the initial
configuration of the mount itself or the height of top hat DIN rail utilized (35 x 7.5 or 35 x 15mm). The edge
mounting solution happens to be shown below. All fasteners necessary for configuration and mounting are
included with the TD‐DINR.
1.
Line up key hole on the
bottom of the TIS‐8632
with the studs on the
Mounting Bracket and
push flat against the
plate.
2.
Slide the TIS‐8632
forward until it stops.
3.
Tighten the Retaining
Screw until snug.
4.
Snap the Rail Clips on to the DIN
Rail.
Figure 4 TIS‐8632 installation on a TD‐DINR
Figure 3 TIS‐8632 Surface Mount