Installation instructions, Installation on the ceiling, Installation on the wall – Fenix ECOSUN G User Manual
Page 8: Clearance distances
8
Installation instructions
Installation, electrical connection and the first commissioning is permitted to
be performed by a worker with relevant qualifications. The panels are intended
for mounting on a wall or ceiling. The producer must be consulted before any
other form of installation is attempted.
Installation on the ceiling
•
Position the mounting frame in the location where the panel is to be placed,
using a pen, mark holes according to the holes on the frame.
•
Drill the holes, insert the wall anchors and attach the mounting frame with
the screws.
•
Always hang the panel by all four mounting slots
•
Slide the panel into the mounting frame.
Installation on the wall
•
Mark the holes according to the table, drill out the holes, insert the dowels
and drive the screw in to protrude approx. 5 mm. (Fig. 4)
•
Always hang the panel by all four mounting slots.
•
Put the panel on the screws.
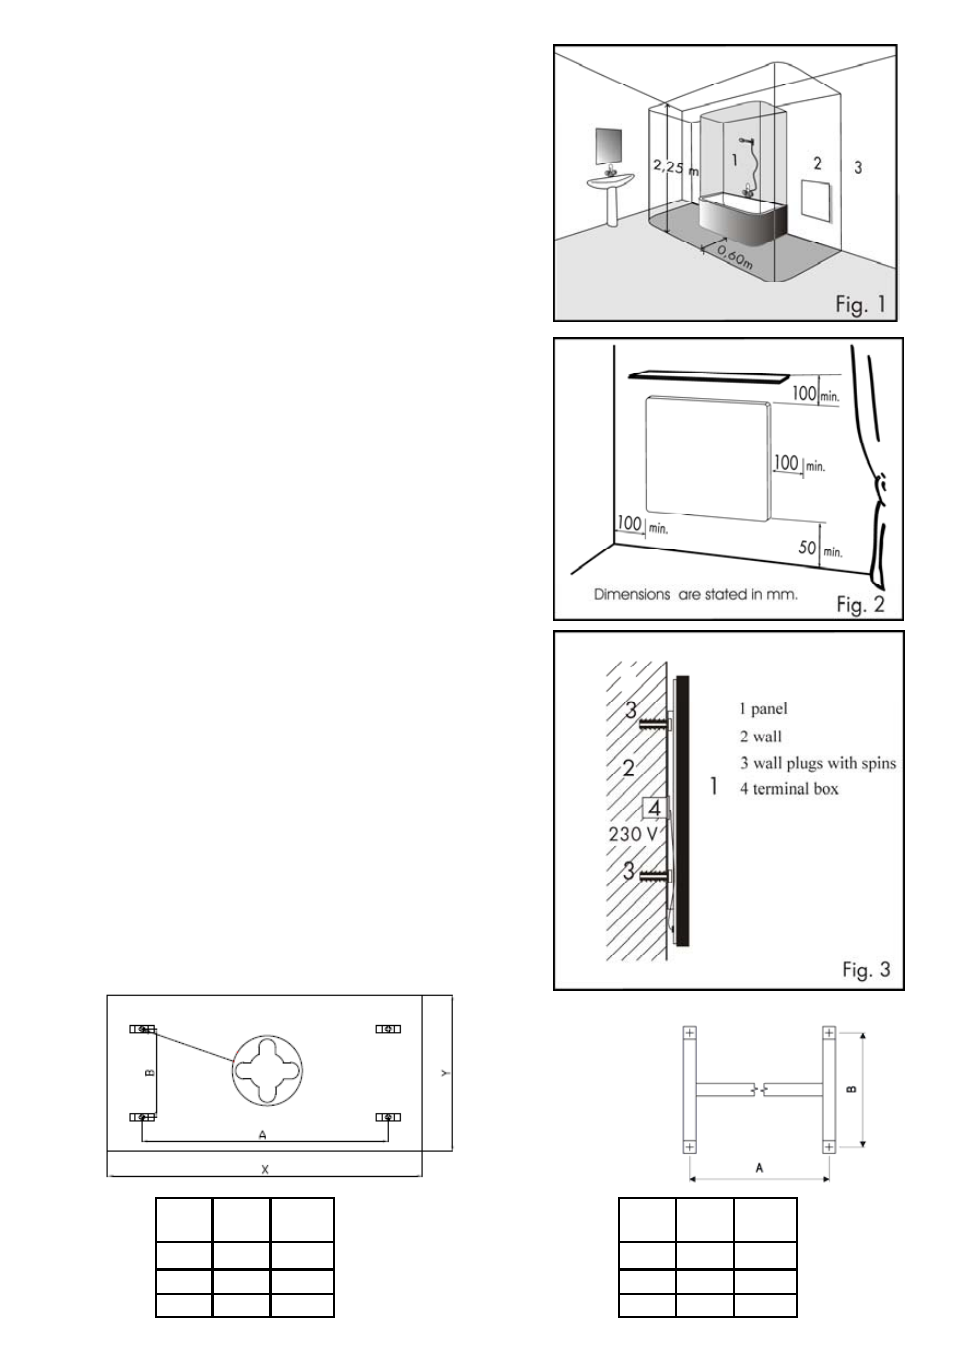
Clearance distances
The distance between the bottom edge of the appliance and the floor mustn’t
be less than 50 mm; 150 mm is recommended. The clearance distance on the
side (e.g. from furniture) must be at least 100 mm, and 100 mm is the mini-
mum in the upward direction (see Fig. 2).
In bathrooms, the panel must be installed in accordance with the HD 60364-7-
701:2007 standard and is permitted to be located in accordance with Fig. 1.
The panel is a class II appliance, with IP 44 coverage. The panel must not be
placed directly under an electric socket.
Fig.4
Mounting frame
W A
(mm)
B
(mm)
300 335 360
600 935 360
850 935 360
W A
(mm)
B
(mm)
300 340 280
600 935 280
850 935 280